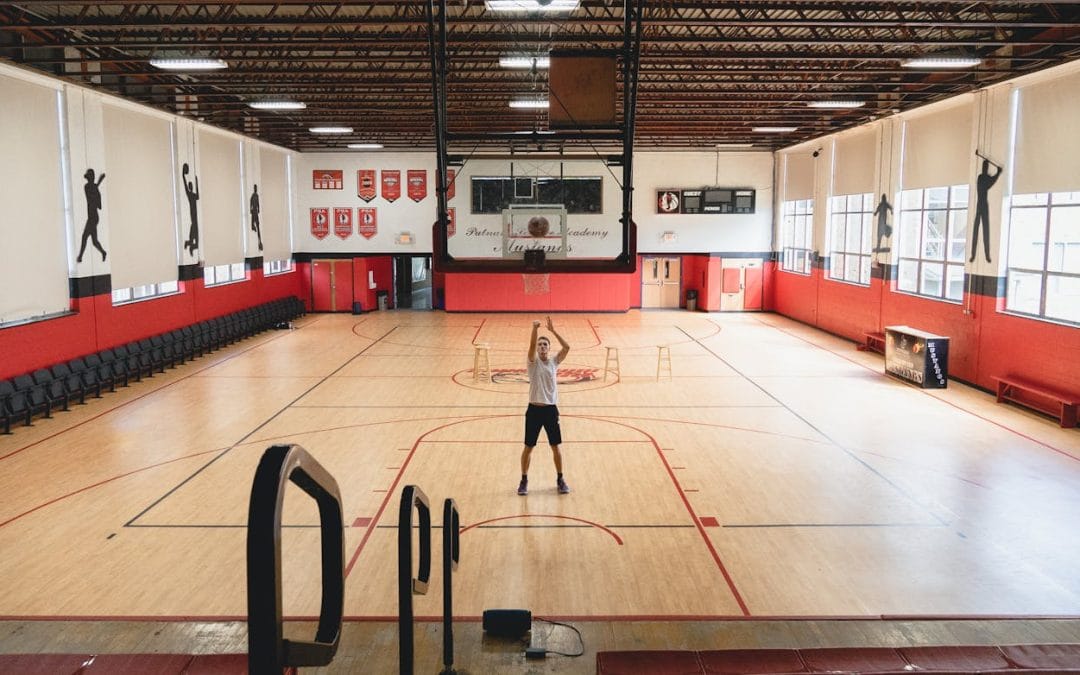
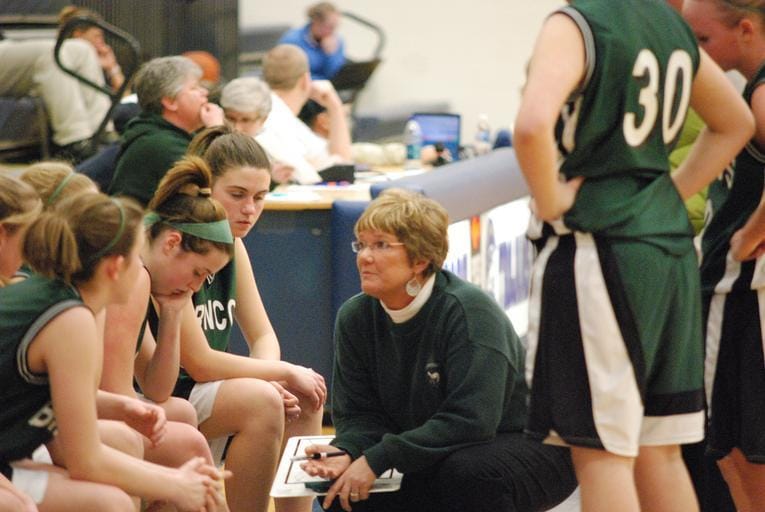
If you want to crank up the tempo, create easy points, and use your whole bench, you have to learn how to teach basketball pressing the right way.
In this clinic conversation, Coach Collins and his guest coach walk through why they press, how they build their system, and the drills they use almost every day. What follows is a cleaned-up, blog-friendly version of that discussion you can plug right into your own practices.
Why You Should Teach Basketball Pressing
Even if you never want to be a full-time pressing team, your players must learn it. Why?
If you can’t break a press, you can’t play. Understanding how a press works makes your press offense better. The teams that press well almost always break presses easily because they see the game from both sides.
94 feet for 32 minutes. Coach talked about their program motto: “94 feet for 32 minutes.” They do not want to give opponents a “free trip” up the court. The floor is 84 or 94 feet long, so they want to make you earn all of it.
Shot clock or not, pressure wins. In non-shot-clock states, pressing can keep teams from stalling late. In shot-clock states, even a soft press that steals 8–10 seconds can knock an offense out of rhythm. Either way, pressure tests ball handling and decision making.
Create easy points. Every good coach is hunting “gimme” points. Some steal them on baseline out of bounds. Some get them with a dominant post. Pressing is another way to grab 8–10 extra points in transition without having to grind against a set defense all night.
Play more players, build energy. Pressing lets you rotate deeper into your bench. One coach talked about his “grandma unit” of smart but slower seniors who ran a 2-2-1 back to zone while his younger group played at a frantic pace. Pressing also brings energy to the gym, which matters a lot in the girls game where you are trying to build crowds and excitement.
When Will You Press?
Before you teach basketball pressing to your team, you need clear rules on when you will use it.
Common rules these coaches shared:
Dead balls and made free throws. That is their standard: always press on dead balls and made free throws. They practice it that way, too.
Made field goals (by philosophy). Some years they press on every make. Other years they are more selective. One simple rule they use: if they score, get right back into the press until there is a clean miss and defensive rebound.
End-of-game live ball pressure. If they are behind late, they will press off misses as well. This is a different gear. You have to practice it so your kids know spacing, matchups, and how to avoid panicked fouls.
“One trips” after timeouts. A favorite trick: out of a timeout, play one trip in a different defense or press, then go back to your base. That single possession is enough to throw off the other team’s ATO play or rhythm.
You also need rules for when to get out of the press:
If the other team scores three times in a row, they are out of it.
If they reach the bonus too early, they shut the press down. Fouling kills hustle.
If players are “fake pressing” and not really getting into the ball, the staff will either demand they turn it up or they will get out and play solid halfcourt.
Having some math and clear rules helps you avoid coaching strictly on emotion in the fourth quarter.
These coaches use three main looks. You can mix and match, but you need to understand the strengths and weaknesses of each before you teach basketball pressing in your gym.
1. Fullcourt Man-to-Man
Strengths:
Everyone is matched up.
The basket is protected if you keep a solid “protector” back.
You can hide your traps behind different alignments and junk it up for ball handlers.
It flows naturally into your halfcourt man if you teach it correctly.
Weaknesses:
It is the hardest of the three to teach.
Rotations are complex once you start trapping. Everybody is responsible for the basket at some point.
If communication is bad, you give up layups or open threes while you try to “scramble” back.
They also use a “marriage rule” when they trap in man. Once you commit to a trap, you are married to it until the ball comes out. No half-hearted, one-step-and-bail effort. If you go, you go.
2. 2-2-1 Press (“20”)
Why they like it:
Great for controlling tempo, especially in the girls game.
More conservative than full scramble, but still creates turnovers for weaker ball-handling teams.
You can keep your 5 at the top of the key to protect the rim and never let her get into deep rotation.
They will:
Keep the five back and tell her to keep a foot inside the top of the key.
Trap in “purgatory” (just before half court) and “hell” (just after half court).
Emphasize turning the ball handler back into the second guard, then run and jump from there.
They admit you do not get as many steals with this version, but you also do not give up as many layups.
3. 1-2-1-1 Press (“40”)
This is their more aggressive, diamond-style press.
They will put the four on the ball, try to force the inbound to the “short side” and trap hard there.
On the “long side” they may stay more 2-2-1 and delay the first trap.
It can morph from a 1-2-1-1 into a 2-2-1 and then into their halfcourt man or amoeba zone.
The key here is teaching where and when to trap and how to protect the basket behind the action. If you pull your protector into the rotation too much, you are asking three or four different kids to handle the rim in one possession.
Teaching Method: Whole–Part–Whole
Both coaches are big believers in whole–part–whole teaching when they teach basketball pressing:
Show the whole thing first.
Walk through the full press alignment.
Show film clips of the press live in games.
Break it into parts with drills.
No-middle stance work.
Cut-off and trap angles.
Rotations behind the ball.
Go back to the whole.
5-on-5 with clear rules (press on dead balls, then fall back to halfcourt).
They also stressed one big mistake: do not build your press before your man-to-man foundation. They tried that once with a young team and regretted it. Now they always spend the first week or so installing core man-to-man principles before they layer the press on top.
Start With Breaking the Press, Then Build Your Own
Coach closed with a simple point: before you teach basketball pressing to attack, make sure your kids can break it.
He told a story about a middle school program that wanted to put in a press even though they did not have a press break installed. That is backwards. Start by giving your players solutions against pressure. Then layer in your own pressure packages.
Once your team can handle that, choose one or two presses that fit your personnel, teach them with a whole–part–whole approach, and use daily drills like zigzag, cut, rugby, and rotation work to build toughness and trust.
If you want more drills, practice ideas, or one-on-one support, or if you need help installing a shooting workout with your team, explore everything on TeachHoops.com. With a 14-day free trial, one-on-one mentoring, and a library of proven practice tools, it’s one of the best places for coaches who want to take the next step.
If you want your players to grow into confident, versatile scorers, your practice time has to be intentional. The best basketball practice skill work keeps energy high, touches frequent, and corrections simple. This session highlights how to layer shooting, footwork, ball handling, and finishing into a fast-paced practice that builds real game habits.
This workout models how to develop every player on your roster, whether they’re a guard learning to attack off the bounce or a six-foot post who still needs to shoot from the perimeter to compete at the next level.
Quick-Hop Shooting Series
Practice opens with a jump-turn series built around clean footwork and quick decisions. Everything is off the hop, and players must keep “sticky fingers” as they get into their shot.
Key points include:
Hold the follow-through until the ball returns.
Keep the pace high; players shoot for a number (seven makes), and they run if they miss the target.
This sequence produces a lot of reps in a short window, which is the heart of efficient basketball practice skill work.
One-Step Power Finishes
The practice moves next into a classic drill. Players take one step, power up, keep the ball high off the shoulder, and rebound their own miss. Details matter here:
Eyes stay on the rim or backboard.
Every rep is explosive.
No wasted movement or talking. The pace drives the development.
This segment reinforces strong finishing habits for players of every position.
Inside-Foot Layup Series
Every player must be able to score with both hands, so this drill pushes left-hand and right-hand finishing from the inside foot. Coaches cue pace and physicality. Players lean the shoulder, stay tight to their line, and finish with strength.
This is where you build the layup consistency your team needs when games get tight.
A quick timeout in practice teaches players how to sweep the ball, load the hips, and attack without hesitation. The rip-and-go drill is essential because most players are never explicitly taught the footwork required to beat the first defender.
Points of emphasis:
Low hips and shoulders
Big first step
Cover ground in one bounce
Power hop when finishing
Ball Handling: Inside-Out and Push Dribble
To prepare for pressure, players learn two key moves: the inside-out dribble and the push dribble.
What the drill reinforces:
Get low and shift the defender.
Push the ball out with purpose.
Make your move at the chair (defender) with speed.
Even bigs handle the ball; everyone must be press-ready.
Three-Point Work: Olympic Shooting
“Olympic shooting” is the team’s core perimeter drill. Players communicate, locate perimeter shooters, and chase rebounds with urgency. The group shoots for a target (eight makes in a minute).
Why it works:
Game-like spacing
Game-like tempo
Constant communication
Players learn to relocate and catch ready
Tall players shoot here too. The goal is to develop basketball players, not just positional specialists.
Post Development: Seal-In Series
To balance perimeter skill work, players shift to the block for a one-minute seal-in circuit. The drill includes four post moves:
Jump hook
Up-and-under
High-low option
Strong seal to the target hand
Guards and posts rotate through because toughness, footwork, and leverage matter across the roster.
Competitive One-on-One: Yale Hand Box
Every practice needs live competition. The Yale Hand Box drill forces players to attack, rebound, and block out while the clock runs. The defender can keep scoring until the rebounder secures the ball, so players must fight on every rep.
This is where effort, accountability, and competitive spirit surface. The drill shows coaches exactly what their players are made of.
Fast-Break System: Three-Trips and 21-Second Work
The practice closes with the team’s fast-break system, built on the rule of getting a shot within seven seconds. Players flow into three-trips action:
First option: rack attack
Second option: inside-out
Third option: wing three
If players fail to crash the boards or slow the pace, coaches correct instantly. The standard stays high.
Final Thoughts
This practice is designed for pace, accountability, and repetition. The session offers dozens of touches, lots of “read it and do it” coaching, and clear expectations for how each skill translates to real competition. When your basketball practice skill work is intentional, players learn to play faster, stronger, and smarter.
If you want more drills, practice ideas, or one-on-one support, or if you need help installing a shooting workout with your team, explore everything on TeachHoops.com. With a 14-day free trial, one-on-one mentoring, and a library of proven practice tools, it’s one of the best places for coaches who want to take the next step.
Every coach wants players who can score in multiple ways. Training a true 3-level scorer in youth basketball takes a focused plan, clear teaching points, and consistent reps. This simple progression gives players a chance to build confidence from the three-point line, the mid-range, and the paint while working at a pace that mirrors real game action.
The 3-Level Scoring Progression
This drill guides players through five key shooting spots: corner, wing, top of the key, opposite wing, and opposite corner. At each spot, the player completes three scoring actions that help shape a complete offensive skill set.
At every station, the sequence is the same:
Catch-and-shoot three: The passer delivers the ball to the corner. The player catches cleanly and shoots in rhythm to stretch the defense.
One-dribble pull-up: The second pass triggers a rip-through and a controlled one-dribble mid-range jumper.
Two-dribble floater: The third pass sends the player downhill into the lane for a soft two-dribble floater over an imaginary defender.
Once the player finishes all three shots, they rotate to the next spot and continue around the arc. The pattern builds repetition, rhythm, and shot versatility in a way young players understand.
Becoming a 3-level scorer in youth basketball is about more than making shots. This drill teaches players how to create space, stay balanced, and score in different situations. The catch-and-shoot builds range. The pull-up teaches pace. The floater gives players a way to finish over length without forcing contact.
Coaches appreciate how efficient the drill is and how easy it is to repeat throughout the season. It fits neatly into a short practice segment while still delivering high-value skill work.
Final Thoughts for Coaches
There is nothing better than watching a young player grow into a confident, versatile scorer. If you want more drills, practice ideas, or one-on-one support, or if you need help installing a shooting workout with your team, explore everything on TeachHoops.com. With a 14-day free trial, one-on-one mentoring, and a library of proven practice tools, it’s one of the best places for coaches who want to take the next step.
If you’re looking for a quick, structured way to help your players build confidence from multiple spots on the floor, this five-spot shooting workout is a great place to start. It gives athletes a repeatable routine that works catch-and-shoot threes, off-the-dribble footwork, pull-ups, and free throws in one sequence. You can run it in individual workouts, small-group sessions, or even as a warm-up during practice.
This drill uses five locations: both corners, both wings, and the top of the key. At each spot, the player takes the same five-shot progression before moving on.
The Five-Spot Shooting Workout Sequence
Players attempt five shots in this order:
Catch-and-shoot three The passer feeds the corner and the player steps into a clean catch-and-shoot three.
Escape dribble left into a three On the next pass, the player takes a quick escape dribble left to create space and fires again from deep.
Shot fake, escape dribble right into a three The player sells the shot fake, dribbles right, and hits a three off the bounce.
Pull-up jumper going left Now the player attacks with a one-dribble pull-up moving left for a mid-range shot.
Pull-up jumper going right Finish the sequence with the same pull-up going to the right.
After finishing the fifth shot, the player rotates to the next spot on the floor and repeats the progression.
Once all five locations are complete, the player heads to the line for five free throws. This adds a pressure element and reinforces good habits after fatigue sets in.
Scoring System
If you want to add competition or track improvement over time, score it this way:
Three-point makes: 3 points each
Pull-up jumpers: 2 points each
Free throws: 1 point each
A perfect workout totals 70 points.
Why This Drill Works
This routine mixes game-realistic shot types with movement in both directions, forcing players to develop balanced footwork and consistent mechanics. It also teaches them to shoot out of common actions they’ll see in games: catch-and-shoot, escape dribbles, shot fakes, and quick mid-range counters.
It’s efficient, it scales for all levels, and it gives coaches an easy way to track progress.
If you want more breakdowns like this, or if you need help installing a shooting workout with your team, explore everything on TeachHoops.com. With a 14-day free trial, one-on-one mentoring, and a library of proven practice tools, it’s one of the best places for coaches who want to take the next step.
Hey coach, if you are like most of us, your practice plan is already packed before you even roll the balls out. You want to install presses, zones, man-to-man coverages, special game-plan defenses for that one rival, and somehow still have time for shooting and skill work. That is where a smart approach to youth basketball defensive systems can save your sanity.
What I want to walk you through here is the idea behind our Funnel Down Defense and why it has become the backbone of what we do. It shrinks the floor, simplifies decisions for your players, and gives you a real chance against teams that might be more athletic or talented.
The Origin Story: From Too Many Defenses To One Clear System
Like a lot of coaches, I used to have “defensive clutter.” Box-and-one here, a special zone there, a game-specific tweak for one opponent. After a close loss where I had tried to put in multiple specific defenses for one team, I was driving home, Chick-fil-A in the passenger seat, thinking:
“I just have too many things. Too many defenses. I need variation, but I also need to narrow it down.”
On that drive, with a Chick-fil-A napkin and a pen, the early version of Funnel Down Defense was born. The goal was simple:
Keep the system versatile enough to work against good teams
But simple enough that high school kids could remember it in November, not just in March
Over the last five or six years, we have tweaked and refined it, but the core idea has stayed the same.
Using The Lines Already On Your Court
Most of you already have part of the defense drawn on your floor and do not realize it.
If you look at a typical high school gym, you will see a volleyball court on top of your basketball floor. A volleyball court is about 30 feet wide, while a basketball court is about 50. That is an instant visual tool.
We use that:
The volleyball court becomes our “funnel”
We are trying to force the ball into roughly 40% of the floor
We do not need painter’s tape to mark lanes or pack line borders, because the lines are already there
If you have ever put down tape to mark help lines or gaps, this is the same concept, but baked into the court permanently.
Because I coach in Wisconsin, a state full of bowling alleys and churches, our language is built around that.
We talk about:
Gutter: The outer lanes near the sideline, outside the volleyball court lines
Alley: The main middle area where most offenses want to operate
Strike Zone: The short corner / deep baseline area near the basket
We want the offense out of the alley and into the gutters. And to funnel the ball into that strike zone along the baseline, where we can trap and where the court itself becomes a defender.
Here is why that matters:
Behind the backboard is a terrible place to live on offense
The baseline and the basket act like two extra defenders
Passing angles shrink, and pull-up jumpers from 14–18 feet are low-percentage shots for most high school and youth players
Most kids today want threes or layups. Short corner, off-the-dribble midrange jumpers with a weak hand are exactly the shots we are happy to give up.
Forcing Baseline And Shrinking The Floor
In Funnel Down, we are always trying to get the ball to the gutter and then into the strike zone.
Key concepts:
We force baseline, not middle
We do it on both sides of the court, but prefer the left gutter when possible because shooting percentages are usually a little lower going left
Our goal is to keep the ball in that 40% slice of floor for 80–90% of the game
We use a simple mental landmark: the equator, which is the middle line of the court.
If the ball is on the right side of the equator, we funnel right
If it is on the left, we funnel left
Once the ball crosses half court, we do not let it reverse back across that line
Again, this is why simple lines on the floor make this one of the most coachable youth basketball defensive systems you can run.
Why Funnel Down Works For Youth Basketball
This system is built for real teams with real limitations, not All-Star squads.
1. It Works In Man And Zone
You can run Funnel Down out of:
Man-to-man
2–3 zone
2–1–2
Even 1–3–1, depending on your personnel
We have run it roughly 50/50 man and zone in different seasons, based on who we had in the program.
2. It Fits Any Athlete Type
Would I rather have long, athletic kids? Sure. But Funnel Down gives you a fighting chance even when:
You are not the most athletic team
You are playing a team with a stud guard who lives in ball screens
You need to protect slow-footed players by keeping help and traps predictable
The system is built on angles, help positioning, and communication, not just raw talent.
3. It Saves Practice Time
Once we went all-in on Funnel Down as our main defensive system:
We cut about 20% of our defensive teaching time in practice
We stopped chasing 4–5 different defenses for different opponents
Our players learned one clear, layered system instead of a menu of complicated schemes
That gave us more time for:
Skill work
Offensive sets and spacing
Special situations
Simple Rules Players Can Remember
One of my guiding principles is that my players can consistently remember about three key concepts at a time. So almost everything in our program is built in threes.
For Funnel Down, those three are:
Pin
Funnel
Trap
We teach them to:
Funnel the ball into the gutter
Pin the ball handler toward the baseline and sideline
Trap in the strike zone when the timing is right
Whether we are in man or zone, those actions stay consistent. That simplicity is why players pick it up quickly and why it works so well at the youth and high school levels.
Running Off The Three-Point Line
The hardest adjustment for most players is understanding we are not always “closing out” like a traditional defensive system. Instead, we are often running shooters off the line.
We emphasize:
Do not give up rhythm, catch-and-shoot threes
Force them into the dribble, preferably towards the gutter
Trust that you have help and a defined funnel behind you
The modern game revolves around the three-point line. A system that ignores that reality will not hold up, especially as your players get older.
Bonus Benefit: Your Offense Gets Better Too
One thing I did not plan on when I scribbled this on a napkin:
Our offense got better.
Because Funnel Down:
Forces tough passes
Speeds teams up
Takes away reversals
We needed to practice against it. That meant:
Our ball movement improved
Our players learned how to attack a shrunk floor
Our decision-making under pressure got sharper
Sometimes the best youth basketball defensive systems are the ones that accidentally make your offense tougher and more skilled too.
A Smarter Way to Coach
If you’re coaching club ball or running weekend tournaments, organization is half the battle. Between travel logistics, gate fees, and scheduling headaches, it can be overwhelming.
That’s why platforms like SidelineSavings.com are emerging, helping tournament operators, coaches, and parents streamline entry, scheduling, and payment systems so everyone can focus on basketball, not spreadsheets.
If you want more breakdowns like this, or if you need help installing a full court press with your team, explore everything on TeachHoops.com. With a 14-day free trial, one-on-one mentoring, and a library of proven practice tools, it’s one of the best places for coaches who want to take the next step.
Youth coaches carry a heavy load. I know what it feels like to rush from work to the gym, manage tryouts, handle nervous players, and still try to run a meaningful practice. When you add film, stats, and game breakdowns on top of that, it can feel like you’re chasing time you never get back.
That’s one of the big reasons I get excited about tools that help coaches save time and stay organized. SidelineSavings.com is designed for coaches who want real support and simple answers that make the job easier.
Below is how I look at film, analytics, and the reality of youth coaching, and how Sideline Savings fits into that world.
Why Youth Coaches Feel Overloaded
If you coach youth basketball, you already understand the weekend grind. Two or three games on Saturday, another one or two on Sunday, and a practice waiting for you on Monday. You might want to use film or stats to help your players grow, but breaking down four or five games before your next practice is nearly impossible.
Even at the high school level, where I have staff support, I still spend hours on each game. We often have multiple coaches watching the same film from different angles because we want to get it right. Youth coaches do not have that luxury, and I always wonder how you all manage it with everything else on your plate.
Kids also learn visually more than ever. They watch clips and short videos constantly, so film has become a powerful teaching tool. They respond to what they can see. That makes film valuable, but it also increases the pressure on coaches to carve out time they simply do not have.
3 Things Every Coach Should Focus On
With more than three decades on the sidelines, I can tell you this with confidence. Whether you coach high school or youth basketball, these three things decide games more than anything else:
Turnovers
Rebounding
Shot selection
If you address those three areas consistently, your team will improve. But finding patterns across several games takes time, and most youth coaches go straight from games into work and family life. That leaves very little time to review film, let alone break it down.
How Sideline Savings Helps Coaches Solve Real Problems
Sideline Savings steps into that gap and gives you clarity without the time drain.
Here is what it looks like:
Upload your game film
Provide your roster
Let the system analyze everything for you
What you get back is a clear, practical summary. No complicated charts. No guessing. Just a straightforward breakdown that tells you what matters most.
You receive:
Your top strengths
Your top weaknesses
Shot selection reports
Turnover and rebounding info
Player specific workout suggestions
A weekly practice plan based on your recent games
I always say the same thing when talking to coaches. Just tell me what to do. Sideline Savings does exactly that and saves you hours in the process.
Built for Youth Coaches on Tight Budgets
Most youth programs cannot afford expensive software or large staff support. Sideline Savings keeps the price accessible for the coaches who need help the most.
You can upload film directly from your phone, get the breakdowns you need, and walk into practice with a clear plan. It helps you focus on teaching and removes the feeling of scrambling from moment to moment.
If I had something like this when I was coaching youth teams, I would have grabbed it instantly. The amount of time it saves is worth it on its own.
Why This Helps Your Players
Players improve faster when they understand what you are teaching. When your feedback is tied to clean film clips and clear explanations, they see exactly what you are talking about.
This leads to better practices, better communication, and more confidence. It also helps parents understand the process and keeps everyone on the same page.
A Smarter Way to Coach
If you’re coaching club ball or running weekend tournaments, organization is half the battle. Between travel logistics, gate fees, and scheduling headaches, it can be overwhelming.
That’s why platforms like SidelineSavings.com are emerging, helping tournament operators, coaches, and parents streamline entry, scheduling, and payment systems so everyone can focus on basketball, not spreadsheets.
If you want more breakdowns like this, or if you need help installing a full court press with your team, explore everything on TeachHoops.com. With a 14-day free trial, one-on-one mentoring, and a library of proven practice tools, it’s one of the best places for coaches who want to take the next step.
If your players struggle to get meaningful reps on their own, a 20-minute basketball workout can be a game-changer. This routine comes straight from Coach Collins’ gym and shows how much skill work you can pack into a focused, high-energy session. It works for players of all ages and is perfect for anyone training without a rebounder.
Below is the full breakdown, along with teaching points you can use in practice or send home with your athletes.
1. Form Warm-Up: Perfect Shots (1 minute)
The workout starts with feel and rhythm.
Shoot close-range form shots.
Aim for “no rim” makes.
Gradually move back as consistency improves.
This works like a putting green in golf—just settling into touch before things ramp up.
2. Mid-Range Baseline Series (1 minute)
Players shoot from 8–10 feet on both sides.
Never stay on one side for more than two shots.
Encourage purposeful footwork and soft finishes.
This is especially helpful when working solo because the ball naturally rebounds to the opposite side.
3. Bank Shot Work (1.5 minutes)
Start at 3–4 feet and hit consistent bank shots on both sides.
Why it matters:
It’s a shot players rarely practice.
Angles stay consistent regardless of gym.
It reinforces touch, balance, and vision.
4. Elbow Jumpers (30 seconds)
Quick catch-and-shoot footwork at both elbows.
5. Runners and Floaters (1.5 minutes)
Start at the college arc and attack the lane.
Players should:
Use both hands.
Work off both feet.
Experiment with different angles.
If players make every shot, they aren’t going fast enough. This part should push them outside their comfort zone.
This builds game-speed decision making while limiting unnecessary dribbling.
7. Block Work: Right and Left (1 minute each)
Even guards need this skill set.
Players practice:
Cross-step finishes
Up-and-unders
Fadeaways
Basic post moves using either hand
It also gives players a breather in the middle of the workout when fatigue starts to set in.
8. Baby Hooks (1 minute)
Soft hooks across both blocks.
Not every guard will use this in games, but adding it increases versatility and finishing confidence.
9. One-Dribble Pull-Ups Around the Key (2 minutes)
No fancy moves here—just pure scoring footwork.
This section turns into a conditioning drill as players chase their own rebounds and keep moving.
10. Creative One-Dribble Attacks (1.5 minutes)
Players choose their moves:
Spin jumpers
Hesitations
Crossovers
Fake crossovers
This is the “sandbox” portion of the workout where players experiment without overthinking.
11. Three-Point Shooting (2 minutes)
Shoot at the appropriate line for your level (HS, college, NBA).
The key teaching point: Shoot threes when tired. This simulates real late-game conditions.
12. One-Dribble Stepbacks (1.5 minutes)
Mid-range or deep—player’s choice.
Stepbacks help open the rest of a player’s scoring package because defenders must respect the space created.
13. Pick-and-Roll Simulation (1.5 minutes)
Use a chair, cone, or imaginary screen.
Players should vary:
Angle of attack
Number of dribbles
Finishes
This is where two-dribble attacks show up organically.
14. Deep Three-Pointers (1.5 minutes)
Shoot within your actual range.
If deep threes aren’t realistic, move in.
If they are, challenge yourself when fatigued.
This segment builds both confidence and shot tolerance.
15. Free-Throw Cooldown (goal-based)
Finish with made free throws, not minutes.
Examples:
Make 10 in a row
Make 8 of 10 twice
Make 20 total
Players should shoot them tired. That’s the whole point.
Why This 20-Minute Basketball Workout Works
This routine fits everything a player needs into one tight session: shooting touch, finishing, footwork, ball handling, and conditioning. It’s doable at the park, in an empty gym, or even during off-hours at practice. Players improve fastest when they can work consistently, and this workout makes that easy. Oo rebounder required.
Encourage your athletes to hit this daily, track their makes, and take pride in pushing through fatigue. Over time, you’ll see sharper decision-making, better balance, and more confidence in pressure moments.
If you want more breakdowns like this, or if you need help installing a full court press with your team, explore everything on TeachHoops.com. With a 14-day free trial, one-on-one mentoring, and a library of proven practice tools, it’s one of the best places for coaches who want to take the next step.
If your team struggles to apply ball pressure, rotate with purpose, or protect the paint against quick guards, working in full court press defense drills can transform your defensive identity. Pressing isn’t just about speed. It’s about angles, teamwork, and early help. That’s why the drill in this video breakdown is such a valuable teaching tool for youth and high school coaches.
Before we get to the drill, remember to subscribe to the TeachHoops YouTube channel and explore everything on TeachHoops.com. You’ll get one-on-one mentoring, office hours, and a 14-day free trial that helps coaches level up for less than a dollar a day.
Building the Foundation: Why the Gap Matters in a Full Court Press
Press defenses succeed when players understand help positioning, not just the first on-ball defender. Coach’s demonstration starts with a simple 2-on-2 alignment on the baseline, which reinforces the same rotations you need when teaching how to run a full court press in youth basketball.
Players learn two off-ball concepts:
Denial – jumping into passing lanes to disrupt quick guards
Gap defense – sagging into a support position to stop penetration
Most youth teams don’t have the quickness to deny everything. That’s where gap defense becomes essential. The goal is to force the offense to beat multiple defenders, not just the first one. In a press, this mentality keeps the ball on a string and buys time for the next line of help.
The 2-on-2 Gap Drill
This drill gives players a clear picture of how help defense works under pressure. It’s simple, repeatable, and fits perfectly into a full court press progression.
Setup:
Two offensive players start on the baseline.
Two defenders match up directly.
One defender pressures the ball.
The off-ball defender slides into the “gap,” staying between their man and the ball.
Execution:
The ball handler dribbles from the baseline toward midcourt.
The ball defender applies steady pressure without reaching.
The gap defender sees both man and ball, sliding into support whenever penetration occurs.
If the ball is passed, the gap defender closes out under control, then jumps back into the gap as the action continues.
The emphasis is simple: Be early with help. Stay connected to both players. Make ball pressure feel like a two-on-one.
This mirrors the support responsibility in every full court press. When the first defender is beaten, the next help must already be there.
This drill is the simplest way to train those habits. It teaches players to close out, slide into the gap, and support their teammate before the ball crosses half court. Once they master this, you can add a third defender to simulate trapping, stunts, and run-and-jump rotations.
Bringing It All Together
The gap drill is a great way to teach the early stages of how to run a full court press in youth basketball. It builds confidence, develops communication, and shows players that great team defense starts with great support.
If you want more breakdowns like this, or if you need help installing a full court press with your team, explore everything on TeachHoops.com. With a 14-day free trial, one-on-one mentoring, and a library of proven practice tools, it’s one of the best places for coaches who want to take the next step.
If you’re looking for a clean, game-ready way to build shooting confidence and teach players how to flow into modern offensive actions, this dribble handoff drill from Coach Tony Miller is a great place to start. It works for youth teams, high school programs, and small-group workouts, and it helps players develop skills they’ll use in nearly every offense.
Before we get into the breakdown, remember to subscribe to the TeachHoops YouTube channel and explore everything on TeachHoops.com. You’ll find one-on-one mentoring, office hours, a 14-day free trial, and affordable tools coaches use to win more games.
Two-In-A-Row Shooting: A Competitive Warm-Up
Coach Miller starts with a simple but effective shooting progression called “Two in a Row.” It’s a great warm-up drill that keeps players locked in and moving with purpose.
How it works:
A coach stands at the free-throw line and receives passes from the shooting machine.
The player begins in the corner and shoots from five spots: corner, wing, top, wing, corner.
The player must make two shots in a row before moving to the next spot.
Once they’ve finished all five spots, their score or time is recorded.
This turns a standard shooting routine into a competitive challenge. Players can chase personal bests or compete against teammates, which boosts focus and tempo right away.
Dribble Handoff Drill: Teaching Movement Into Shots
After the warm-up, Coach Miller walks through a dribble handoff drill that builds footwork, timing, and shot preparationbehind a handoff. Since handoffs are a staple in today’s offenses, this action translates directly to games.
How the drill is set up:
The player starts at the top of the key and receives a pass.
They take two hard dribbles toward a teammate standing near the wing.
As they approach, they deliver a clean handoff.
The receiving player catches behind the handoff and shoots a three.
Players swap roles and repeat.
This drill teaches players to flow smoothly into handoffs, read angles, and shoot on the move. It’s ideal for guards, but wings and forwards benefit from practicing both sides of the action.
Final Thoughts
Coach Miller’s combination of competitive shooting and a focused dribble handoff drill gives players real offensive reps that improve game performance. These drills fit easily into practice plans, pre-game warmups, or individual workouts. If you want to build better shooters and smarter movers, add both to your weekly routine.
Designing an effective youth basketball offense isn’t just about drawing up plays. It’s about helping young players understand the game, make reads, and react naturally in game situations. Too often, youth coaches overload teams with set plays before kids grasp the fundamentals of movement and spacing.
This post breaks down how to build a true offense that teaches players how to play, not just what to run, while sharing a few proven youth basketball coaching tips from Coach Steve Collins and the team at Coaching Youth Hoops.
Plays vs. Offense: What’s the Difference?
Coaches often face a common question: should I focus on teaching plays or running an offense? The answer depends on your level, but for most youth teams, an offense built around reads, reactions, and fundamentals will always be more effective than memorizing plays.
When young players learn how to read the defense and respond instinctively, they become smarter and more confident on the floor.
Teaching Reads Over Running Plays
At the youth level, time is limited. Most coaches only have two or three practices a week, so it’s important to focus on developing habits that last. Instead of adding more plays, spend that time teaching simple reads such as:
When you’re overplayed, back cut.
When a defender switches, slip to the basket.
When help defense collapses, kick out to the open shooter.
These reads help players see the floor and react instinctively. As Coach Collins explains, it’s similar to driving a familiar route. You don’t think about every turn; you just react to traffic and conditions.
Teaching players to recognize basketball “traffic” in real time is what makes an offense effective.
Coaches should focus on a core offensive system that fits their players’ age and skill level. Systems like motion offense, read and react, or Rule of Three give young players structure while still encouraging creativity.
Keep it simple:
Limit yourself to one or two core offenses.
Add specific plays only for special situations, like out-of-bounds or last-second shots.
Don’t introduce new actions that repeat what an existing play already does.
This keeps players from getting overwhelmed and allows them to master spacing, timing, and decision-making before layering on complexity.
The Value of Analytics and Film Study
Coach Collins also highlights how technology is changing the way coaches teach. The Sports Stories analytics tool helps youth coaches break down film and turn numbers into actionable insights.
Instead of just identifying what went wrong, it tells coaches and players what to work on next in practice. This makes film sessions more productive and gives players individualized feedback on how to improve.
Keep Practice Simple and Game-Focused
Many youth coaches lose valuable time trying to design the perfect playbook. The truth is, your players benefit more from learning the flow of a game than memorizing patterns. Focus practice time on:
And if you’re short on time, full-season practice plans are available at CoachingYouthHoops.com, offering ready-to-use drills, practice outlines, and game prep tools designed for every age group.
Conclusion
Building a great youth basketball offense starts with teaching players how to think and react, not just how to execute a play. Simplify your system, focus on reads, and give players opportunities to learn through repetition. Combine that with the right practice planning tools and video analysis, and you’ll set your team up for long-term success.
Looking for a youth basketball shooting drill that challenges players to improve accuracy, pace, and endurance? The M Drill and 5-Spot Shooting Progression are two simple, high-intensity workouts that turn any empty gym into a game-ready training session. Featured on the TeachHoops YouTube channel, these drills combine conditioning and repetition, helping players compete against the clock while sharpening their form and confidence.
Drill 1: The M Drill Shooting Challenge
The M Drill teaches players to move with purpose, hit from all five key shooting spots, and track their own progress. It’s ideal for solo workouts or warm-ups at team practice.
Setup:
One basketball
Stopwatch or timer
Five shooting spots: both corners, both wings, top of the key
How it works:
Start the timer for one minute.
The player must make one shot from each of the five spots.
Record the total time to complete all five makes.
On the next round, try to beat that time.
Progressions:
Round 2: Two makes per spot (1:00)
Round 3: Three makes per spot (1:45)
Round 4: Four makes per spot (2:00)
If there’s no rebounder, allow a little extra time to chase down rebounds.
Coaching points:
Keep feet active between shots.
Focus on balance and form even under fatigue.
Encourage players to compete against themselves or teammates.
This drill builds rhythm, stamina, and confidence in game-speed situations.
Once players have mastered the M Drill, the 5-Spot Shooting Progression takes things to the next level. It uses the same five spots but increases total makes, footwork variety, and movement patterns.
Setup:
Same five shooting spots
Partner or rebounder (optional)
Stopwatch or scoreboard timer
How it works:
Players aim to make a set number of shots (for example, 10 or 15) cycling through all five spots.
Emphasize continuous motion—no pauses between makes.
Mix in pivots, jab steps, or pump fakes to simulate live play.
Record total makes and time to track improvement week-to-week.
Why it works:
Builds conditioning through constant movement.
Reinforces consistent mechanics from multiple angles.
Helps players transfer shooting fundamentals to game flow.
Why Coaches Love These Drills
Together, the M Drill and 5-Spot Progression form a complete shooting workout, efficient, competitive, and scalable for all levels. They train muscle memory, self-accountability, and stamina without needing fancy equipment or full-court setups.
Whether you’re coaching youth players or high school athletes, these drills teach players to stay focused, move with intent, and build confidence with every rep.
Bonus: Smarter Tournament Planning
If you’re coaching club ball or running weekend tournaments, organization is half the battle. Between travel logistics, gate fees, and scheduling headaches, it can be overwhelming.
That’s why platforms like SidelineSavings.com are emerging, helping tournament operators, coaches, and parents streamline entry, scheduling, and payment systems so everyone can focus on basketball, not spreadsheets.
Every great ball-handler starts with a clear plan. A well-structured youth basketball dribbling progression gives players the foundation they need to handle pressure, build confidence, and move with purpose. Whether you’re coaching beginners or helping older players polish their form, this four-part dribbling progression develops rhythm, control, and game-ready movement from the ground up.
1. Pound Dribble (Progression One)
Purpose: Build strength, rhythm, and ball control as the foundation of your dribbling progression.
Setup:
Players spread out facing the coach or mirror.
Each holds a basketball in their right hand to start.
How to Run It:
Pound the ball hard below the knee.
Keep the back straight and eyes up.
Switch to the left hand after 5–10 seconds.
Coaching Points:
Emphasize control, not just speed.
Stay balanced with knees bent and feet shoulder-width apart.
Dribble with fingertips, not palms.
Variation: Add verbal or visual cues (colors, numbers, or commands) to train reaction and focus while maintaining ball control.
2. Crossover Dribble (Progression Two)
Purpose: Teach tight, controlled crossovers as the next step in the youth basketball dribbling progression.
Setup:
Players stay low in a wide stance.
How to Run It:
Cross from right to left hand in short, tight movements.
Keep the dribble below the knees.
Maintain a steady rhythm for 10–15 seconds.
Coaching Points:
Keep the chest up and eyes forward.
Push the ball quickly through the crossover pocket.
Avoid wide, looping movements.
Variation: Call out numbers (1 = pound, 2 = crossover) to mix progressions and test quick reactions.
Advanced Players: Combine all four while reacting to your verbal calls (1–4).
This keeps players engaged, reinforces muscle memory, and builds the court awareness they’ll need during games.
Wrap-Up
Mastering a structured youth basketball dribbling progression helps players develop consistent ball-handling habits and confidence under pressure. As Coach Collins reminds us, “By the end of the season, your players should know the progression by heart.” Once they do, you’ll see tighter handles, smarter spacing, and more control across every level of your program.
Bonus: Smarter Tournament Planning
If you’re coaching club ball or running weekend tournaments, organization is half the battle. Between travel logistics, gate fees, and scheduling headaches, it can be overwhelming.
That’s why platforms like SidelineSavings.com are emerging, helping tournament operators, coaches, and parents streamline entry, scheduling, and payment systems so everyone can focus on basketball, not spreadsheets.
Ready to Build Your Coaching Machine?
The truth is simple: every coach wants to spend less time grinding and more time coaching. With AI, that’s not a fantasy, it’s the future. If you’ve ever wished for an extra assistant, this is your chance to create one.
Join The Coaching AI Masterclass and learn how to build your own AI basketball coaching system, the one that organizes, plans, and communicates so you can just coach.
If you’d like to explore further, also check out theAIsportscoach.com, a free community for coaches to share prompts, strategies, and ways AI is helping them win both on and off the court.
Every youth basketball coach has been there: tracking every rebound, turnover, and deflection only to realize the numbers didn’t actually help you win. The truth is, most of what youth coaches track doesn’t matter. What does matter are three simple stats that tell you whether your team is improving and how you can help them play smarter.
This isn’t about analytics for analytics’ sake. It’s about coaching clarity.
1. Shot Quality
Forget total points or field-goal percentage. What you really need to measure is shot quality. Are your players taking the right shots?
A good shot for one player isn’t a good shot for another. Youth coaches should focus on where the shot came from, how it was created, and whether it was the best available look. Tracking shot quality means grading each attempt:
A-shots are rhythm, open-look, in-range shots.
B-shots are rushed or contested but within a player’s comfort zone.
C-shots are poor-decision attempts.
You don’t need a fancy system, just note after each game the ratio of A-shots to C-shots. If that number improves week by week, your offense is improving too.
2. Turnover Rate
Turnovers tell the story of composure. You can chart points, but if your team can’t protect the ball, none of it matters.
Instead of raw totals, track turnovers per possession (or roughly per trip down the floor). If you’re under 20 percent, you’re giving your team a chance to win.
Most youth teams lose not because they can’t score but because they give away too many possessions. Make ball security part of your culture, reward teams that get a shot on goal every time down, even if it misses. That habit alone wins more games than any play you draw up on a whiteboard.
The third stat doesn’t live on a scoresheet, it lives in your culture. Track effort plays.
Effort plays include:
Taking a charge
Diving for a loose ball
Sprinting back on defense
Setting a great screen
Boxing out
Keep a running tally of these moments. Post them in your team chat or shout them out at practice. When you measure effort, players understand that hustle counts as much as highlights. Over time, this becomes the identity of your program.
Why Less Data Means Better Coaching
When coaches obsess over stats, they often lose sight of what matters most: teaching the game. The right three stats: shot quality, turnover rate, and effort plays, give you everything you need to evaluate performance without drowning in numbers.
It’s the same principle that drives tools like TeachHoops: keep the game simple, teach what matters, and help players grow.
Bonus Tip: Smarter Tournament Planning
If you’re coaching club ball or running weekend tournaments, organization is half the battle. Between travel logistics, gate fees, and scheduling headaches, it can be overwhelming.
That’s why platforms like SidelineSavings.com are emerging, helping tournament operators, coaches, and parents streamline entry, scheduling, and payment systems so everyone can focus on basketball, not spreadsheets.
Ready to Build Your Coaching Machine?
The truth is simple: every coach wants to spend less time grinding and more time coaching. With AI, that’s not a fantasy, it’s the future. If you’ve ever wished for an extra assistant, this is your chance to create one.
Join The Coaching AI Masterclass and learn how to build your own AI basketball coaching system, the one that organizes, plans, and communicates so you can just coach.
If you’d like to explore further, also check out theAIsportscoach.com, a free community for coaches to share prompts, strategies, and ways AI is helping them win both on and off the court.
If you’re wondering how to coach first-time players, start with one simple goal: help them fall in love with basketball. New players need structure, patience, and encouragement. They don’t need complicated plays or endless lectures. Your job as a youth coach is to teach fundamentals, make practice enjoyable, and give every player a reason to return next season.
Build a Foundation Through Fundamentals
When players are just starting out, focus on the basics. Fundamentals form the building blocks of every skill they’ll need later. Keep drills short, energetic, and positive.
One coach shared how his fifth-grade developmental team improved dramatically over six months by working only on a simple “pass, cut, fill” offense and defensive movement. By season’s end, the players understood spacing, teamwork, and court awareness.
Make Practice Fun and Leave Players Wanting More
At the youth level, enjoyment matters more than results. Kids who have fun at practice will want to keep playing and improving.
When players leave smiling and energized, they build confidence and motivation. The next time practice rolls around, they’ll be excited to get back on the court.
Young athletes are still learning how to move, think, and react in new ways. Progress takes time, and every player develops at a different pace.
What to focus on as a coach:
Reinforce simple concepts before adding new ones
Keep expectations realistic
Repeat drills consistently
Encourage every small step forward
If you stay patient and model a positive attitude, your players will do the same. The goal isn’t perfection; it’s growth and enjoyment.
Final Thoughts
When you focus on fundamentals, fun, and patience, you’re doing more than coaching basketball. You’re creating a positive first experience that keeps players in the game for years to come.
Bonus: Smarter Tournament Planning
If you’re coaching club ball or running weekend tournaments, organization is half the battle. Between travel logistics, gate fees, and scheduling headaches, it can be overwhelming.
That’s why platforms like SidelineSavings.com are emerging, helping tournament operators, coaches, and parents streamline entry, scheduling, and payment systems so everyone can focus on basketball, not spreadsheets.
Ready to Build Your Coaching Machine?
The truth is simple: every coach wants to spend less time grinding and more time coaching. With AI, that’s not a fantasy, it’s the future. If you’ve ever wished for an extra assistant, this is your chance to create one.
Join The Coaching AI Masterclass and learn how to build your own AI basketball coaching system, the one that organizes, plans, and communicates so you can just coach.
If you’d like to explore further, also check out theAIsportscoach.com, a free community for coaches to share prompts, strategies, and ways AI is helping them win both on and off the court.
Building team culture in youth basketball is one of the most important things a coach can do. It’s not just about drills, plays, or wins. It’s about creating an environment where every player feels connected, valued, and eager to show up. A strong culture leads to stronger effort, accountability, and long-term love for the game.
Here are seven ways to build real buy-in on your youth basketball team.
1. Focus on Connection Before Commitment
Kids play harder for coaches they feel connected to. Make time to build relationships before expecting full effort.
Start each practice with a short team huddle or check-in
Pair players who don’t know each other well
Host a simple team event like a cookout or movie night
When players feel like they belong, commitment comes naturally.
2. Give Every Player a Role
A clear role helps every athlete feel part of the team’s mission.
Define each player’s strengths early
Celebrate “effort” roles such as energy players or defensive stoppers
Strong programs grow from consistent, daily effort in how the team connects and behaves.
Final Thoughts
Building team culture in youth basketball comes down to consistency, care, and connection. When players feel valued and understand their role, they give more effort. When coaches model the right standards and show genuine care, buy-in follows.
Ready to Build Your Coaching Machine?
The truth is simple: every coach wants to spend less time grinding and more time coaching. With AI, that’s not a fantasy, it’s the future. If you’ve ever wished for an extra assistant, this is your chance to create one.
Join The Coaching AI Masterclass and learn how to build your own AI basketball coaching system, the one that organizes, plans, and communicates so you can just coach.
If you’d like to explore further, also check out theAIsportscoach.com, a free community for coaches to share prompts, strategies, and ways AI is helping them win both on and off the court.
When it comes to developing strong ball-handlers, few exercises are as effective as two-ball dribbling drills. This classic workout builds rhythm, control, and hand-eye coordination, three fundamentals that separate good guards from great ones. Whether you’re coaching elementary players or fine-tuning varsity athletes, this two-part drill series can elevate your players’ confidence with the basketball.
Drill 1: The Two-Ball Stationary Drill
This is a high-difficulty ball-handling drill, especially for younger players. Start simple and progress gradually.
How to Run It:
Each player starts with a basketball in each hand.
Have them dribble both balls simultaneously, pounding them hard into the floor.
Emphasize power. The key to control is hitting the ball hard enough that it bounces back quickly.
After players get comfortable, add variations: dribble inside the knees, outside the knees, or alternate heights.
To increase the challenge, have them slam one ball down to the floor until it stops, while maintaining control of the other ball.
Once the stationary ball settles, restart both and repeat.
Coaching Tip: Encourage players to use their dominant hand to stop and start the stationary ball while their weak hand keeps pounding. This forces their off-hand to stay active and controlled under pressure, a must for breaking presses or driving through traffic.
Common Mistake: Players who dribble softly lose control more often. Remind them: “Pound the ball hard. Control comes from confidence.”
This version adds decision-making and reaction training to the mix, helping players keep their heads up and process the game around them.
How to Run It:
Player A (the dribbler) starts by dribbling two balls low and hard below the knees.
Player B (the partner) stands a few feet away and throws a bounce pass toward Player A.
Player A catches with one hand, either left or right, and quickly returns a bounce or chest pass.
Repeat several times, alternating which hand catches and passes.
Coaching Tip: The goal isn’t perfect passing, it’s awareness and multitasking. The dribbler should keep their eyes up, never looking down at the basketballs. This helps build comfort handling the ball while scanning the court.
Progression: As players improve, shorten the distance between partners or increase the speed of the passes to simulate game pressure.
Why These Two-Ball Dribbling Drills Work
These two-ball dribbling drills develop much more than coordination. They teach rhythm, focus, and confidence, all while building the muscle memory players need to handle full-court pressure. Even the pros do it!
For youth players, it’s a fun way to stay engaged while improving balance and reaction time.
Start slow, keep the standards high, and emphasize power and focus in every rep. The best ball-handlers aren’t born, they’re built one pound dribble at a time.
Ready to Build Your Coaching Machine?
The truth is simple: every coach wants to spend less time grinding and more time coaching. With AI, that’s not a fantasy, it’s the future. If you’ve ever wished for an extra assistant, this is your chance to create one.
Join The Coaching AI Masterclass and learn how to build your own AI basketball coaching system, the one that organizes, plans, and communicates so you can just coach.
If you’d like to explore further, also check out theAIsportscoach.com, a free community for coaches to share prompts, strategies, and ways AI is helping them win both on and off the court.
Every coach wants to get better results on the court, but the real challenge is knowing where to start and how to measure it. The PROOF Process™ gives you a simple, repeatable way to integrate AI tools into your basketball program without getting overwhelmed. It helps you focus on what matters most: measurable improvement, fast feedback, and lasting results. Here’s how you can adapt the PROOF Process™ to use AI effectively in your basketball coaching.
P – Prime for On-Court Results
What it means: Before diving into AI, pinpoint one specific stat you want to improve. Don’t just say, “We need to get better.” Define exactly what success looks like.
Coach’s Action: Instead of chasing “productivity,” focus on outcomes, like cutting down turnovers or improving shot selection.
Example:
Old Way: “We need to cut down on turnovers.”
AI Way: “We’ll use an AI video tool to auto-tag all 75 of our turnovers from the last five games. We’ll identify our top two causes (like skip passes vs. zone or dribbling into traps) and reduce those by 20% in the next two weeks.”
AI turns vague goals into actionable, trackable objectives.
R – Rapid Results
What it means: You don’t need to wait months to see improvement. Use AI to create small, measurable wins, ideally by your next game or week of practice.
Coach’s Action: Take your AI-generated insights and immediately design two new drills that target the main issues (like passing vs. zone or handling traps). Run them early in the week.
The Test: During your next scrimmage, track only those two types of turnovers. If they drop, you’ve got proof the AI-driven adjustment works. That’s a rapid win and one your players will notice.
O – Optimize the Strategy
What it means: Once you’ve seen improvement, the next step is consistency. Use AI to monitor whether the gains hold up over the next few games.
Coach’s Action: Keep feeding new film into your AI system. Track that stat across multiple games to see if the improvement sustains.
When you see that your turnover rate stays down, that’s not luck, it’s a new standard. AI isn’t a gimmick anymore; it’s part of your team’s DNA.
This is how your entire program learns to “speak the same language” when it comes to using data and technology effectively.
F – Futureproof Your Program
What it means: The goal isn’t to use AI for one season. It’s to build a culture that uses it forever.
Coach’s Action: Make AI part of how you do film, scouting, and player development. When players graduate or staff changes, your system stays strong.
AI isn’t the new thing. It’s the normal thing. It helps every player, every season, improve faster and smarter.
Final Thoughts
The PROOF Process™ is a roadmap for how basketball coaches can use AI effectively, starting small, proving results, and building a system that lasts. You don’t need to be a tech expert. You just need a plan, a focus, and the discipline to measure what matters.
AI can’t replace your coaching instincts, but it can amplify them.
Ready to Build Your Coaching Machine?
The truth is simple: every coach wants to spend less time grinding and more time coaching. With AI, that’s not a fantasy, it’s the future. If you’ve ever wished for an extra assistant, this is your chance to create one.
Join The Coaching AI Masterclass and learn how to build your own AI basketball coaching system, the one that organizes, plans, and communicates so you can just coach.
If you’d like to explore further, also check out theAIsportscoach.com, a free community for coaches to share prompts, strategies, and ways AI is helping them win both on and off the court.
AI is quickly becoming a powerful tool in coaching, but most of us still aren’t using it to its full potential. When it comes to AI practice planning for youth basketball, many coaches make the mistake of treating it like a quick Google search instead of the game-changing mentor it can be.
In this post, we’ll explore how basketball coaches can use AI effectively, not just for drills and practice plans, but for real, strategic growth.
The Bad Habit That’s Holding Coaches Back
Hey Coach, listen up. There’s a habit most of us have, and it’s holding us back from unlocking AI’s full potential in our basketball programs.
For decades, we’ve been trained by Google. Need an answer? Type in a few short keywords.
Google spits out a page of links, and it’s on us to dig through each one, decide which random “coach” to trust, and then piece together what might work in our next practice plan.
We’ve been doing this for so long that we bring the same “quick-hitter” mindset to AI.
But that’s like using your best player as a decoy.
From “Google Searcher” to “Coach in Conversation”
Think about it: You wouldn’t walk up to a mentor coach you respect and just say, “zone offense.”
No! You’d give them the full picture:
“Hey Coach, I’m prepping for our rival. They run an aggressive 2-3 zone that extends high. My guards are quick but small, and my best shooter is my 4-man, who struggles to get open on the wing. We run a basic 4-out motion. What specific actions or quick-hitters can we install this week to get my 4-man open looks from the high post or short corner?”
See the difference? You’re giving context, your opponent, your personnel, and your goal.
Your mentor gives you a strategy. Google gives you a list.
AI is your new mentor coach. Start treating it like one.
“I’m an AI coach. My team is struggling with on-ball defense and late help-side rotations. We keep getting beat off the dribble, and our closeouts are sloppy. I have 90 minutes for practice tomorrow. Can you build me a 25-minute practice block with a 3-drill progression that focuses on 1) containing the ball-handler, 2) proper closeout technique, and 3) the first help rotation? Give me the key teaching points and coaching cues for each drill.”
That’s the foundation of AI practice planning for youth basketball, giving the system enough detail to act like an experienced assistant, not just a search engine.
The same idea applies to culture building. Don’t just type, “How to build team culture.” Try this instead:
“I’m an AI coach. I’m taking over a high school program that won 5 games last year. The players seem unmotivated, and the parents are negative. I need to establish a new culture of accountability and ‘next play’ mentality. Give me a 30-day plan for the off-season that includes 3 specific activities I can do with the team, a theme for the month, and a sample letter I can send to parents outlining my philosophy and expectations.”
Why This Works
When you give AI context, you’ll get a response that’s:
Immediately Actionable: You’re not just getting a list of random ideas. You’re getting a real game plan you can take straight to the court.
Strategic: You can think critically about the plan, confirm your instincts, or spot a new angle you hadn’t considered.
Efficient: You’ll walk away with a full script: a practice plan, a culture blueprint, a parent letter, ready to share with your assistants or AD.
That’s how basketball coaches can use AI effectively: by treating it like a coaching partner who knows your system, your players, and your goals.
The Takeaway: Give AI the Scouting Report
The next time you sit down to plan a practice or prep for a big game, break the “Google habit.” Don’t toss in a few keywords and hope for the best.
Treat AI like your mentor coach. Give it the full scouting report: your team, your opponent, your time constraints, and your objective. You’ll be amazed at how much faster, and better, it works for you.
Any questions about this or anything else you’re working on AI-wise? I’m an email away.
Ready to Build Your Coaching Machine?
The truth is simple: every coach wants to spend less time grinding and more time coaching. With AI, that’s not a fantasy, it’s the future. If you’ve ever wished for an extra assistant, this is your chance to create one.
Join The Coaching AI Masterclass and learn how to build your own AI basketball coaching system, the one that organizes, plans, and communicates so you can just coach.
If you’d like to explore further, also check out theAIsportscoach.com, a free community for coaches to share prompts, strategies, and ways AI is helping them win both on and off the court.
Every coach dreams of being more organized, more efficient, and more focused on the court. That’s exactly what an AI basketball coaching system can help you do. Instead of spending hours on film, practice plans, and parent emails, you can let AI handle the heavy lifting, just like Coach Steve Collins teaches in The Coaching AI Masterclass.
It’s not about replacing coaches; it’s about giving them the tools to coach freely again.
Every Coach Is Running Two Programs
Let’s be honest, every coach runs two programs. There’s the basketball program: practices, games, and player development. And then there’s the everything else: film breakdowns, scouting reports, parent emails, travel logistics, communication, and scheduling.
Coach Steve Collins calls that grind “The Human Machine.” It’s the system he ran for 27 years, one that demanded endless hours of manual prep just to keep things afloat.
Now, he’s built something better.
Masterclass Spotlight: The Coaching AI Masterclass
In The Coaching AI Masterclass, Coach Collins reveals how to turn that “Human Machine” into an AI-driven coaching system that almost runs your program for you.
Across four weeks, you’ll see live demonstrations of the exact tools he uses to automate film work, generate practice plans, and write professional parent emails in seconds. You’ll also get ready-to-use templates for scouting reports, communication, and organization, all designed for high school and youth coaches who want to work smarter, not longer.
The AI System That Almost Runs Your Program for You
Coach Collins’ message is simple: AI won’t replace coaches, but coaches who use AI will replace those who don’t.
In the masterclass, he shows how AI can become your Director of Operations, Head of Scouting, Analytics Assistant, and Communications Coordinator, all rolled into one. Here’s what that looks like:
Film in minutes: Upload notes and let AI create organized insights.
Practice plans in seconds: Generate 90-minute plans with breakdowns, games, and teaching cues.
One-page scouting reports: Summarize opponents with personnel tables, tendencies, and short player versions.
Stress-free communication: Draft supportive but firm parent emails that save time and eliminate back-and-forth.
These are real examples from Coach Collins’ workflow, not theory.
Every coach has felt the weight of running a program alone. The AI basketball coaching system that Coach Collins teaches is designed to lift that burden.
As he says:
“Here’s what we’ll do: teach you how to do film in minutes, practice plans in seconds, college-looking scouts, and emails done for you.”
This is the difference between surviving the season and actually enjoying it. AI handles the repetitive tasks so you can focus on player development, game strategy, and leadership, the parts of coaching that truly matter.
The Human System vs. The AI System
For decades, Coach Collins ran everything manually, that was his “Human Machine.” Today, his AI-powered system does the same work faster, cleaner, and more consistently.
The masterclass teaches you how to build your own version of that system, one that fits your team, your level, and your style. You’ll walk away with the structure and templates needed to streamline your entire program.
Ready to Build Your Coaching Machine?
The truth is simple: every coach wants to spend less time grinding and more time coaching. With AI, that’s not a fantasy, it’s the future.
If you’ve ever wished for an extra assistant, this is your chance to create one.
Join The Coaching AI Masterclass and learn how to build your own AI basketball coaching system, the one that organizes, plans, and communicates so you can just coach.
If you’d like to explore further, also check out theAIsportscoach.com, a free community for coaches to share prompts, strategies, and ways AI is helping them win both on and off the court.
Coaching today isn’t just about the court. It’s about juggling emails, organizing practices, managing parents, and keeping everything running smoothly. That’s where AI for youth basketball coaches comes in. You don’t need to be a tech expert or data wizard to use it; you just need to know how to ask the right questions.
With the right approach, AI can help you save time, simplify your program, and get back to what you love most: coaching.
“I’m Not Tech-Savvy…” Is No Longer an Excuse
Every coach knows the feeling: you hear about some new piece of technology and immediately think, That’s not for me.You’re not alone.
This isn’t about learning complicated software or coding. It’s about using tools you already know, your phone, your laptop, your curiosity, to make coaching easier and more efficient.
Workshop Spotlight: The Coaching AI Masterclass
The Coaching AI Masterclass is a four-week live workshop built specifically for youth and high school basketball coaches who want to use technology without feeling overwhelmed.
Coach Collins walks you through the entire process of making AI your assistant coach, showing you how to ask the right questions, build better prompts, and turn everyday tasks into automated systems.
Coach Collins breaks it down into three simple steps:
Ask the right questions.
Ask them the right way.
Ask for feedback.
That’s it. You don’t need to be a tech expert, you just need to know how to coach your AI the same way you coach your players. The better your communication, the better the results.
In The Coaching AI Masterclass, you’ll see how small wording changes can turn AI from a confusing chatbot into a confident assistant that helps you plan, organize, and prepare like never before.
Here’s one of Coach Collins’ real examples straight from the masterclass PDF:
“Explain basketball.” (Bad)
“Explain basketball to a 10-year-old who plays soccer.” (Better)
“Explain basketball to a 10-year-old who plays soccer and hates running, under 120 words and explain why.” (Best)
That’s the power of specificity. When you tailor your questions, AI tailors its answers, just like a good assistant coach who knows your players, your system, and your goals.
Practical Prompts Any Coach Can Try
You don’t need to reinvent the wheel. Here are a few simple prompts Coach Collins shares in the masterclass that any youth coach can use:
“Explain zone defense like I’m a brand new youth coach.”
“Give me 3 pregame speeches for a nervous middle school team.”
“Make a parent email about practice times sound supportive but firm.”
Each one saves you time, reduces stress, and sharpens your communication without replacing the personal touch that makes you a great coach.
The Secret Isn’t the Tool, It’s the Question
Coach Collins compares AI to a veteran assistant: it never sleeps, it never forgets, and it gets better the more you use it. AI won’t replace your judgment, it amplifies it. Once you learn how to talk to it, you’ll wonder how you ever managed without it.
Join The Coaching AI Masterclass and see how AI for youth basketball coaches can turn busywork into breakthroughs, freeing you to focus on player development and the game you love.
If you’d like to explore further, also check out theAIsportscoach.com, a free community for coaches to share prompts, strategies, and ways AI is helping them win both on and off the court.
Let’s get one thing straight: AI isn’t replacing basketball coaches. But coaches who use AI will replace those who don’t. That’s the bold claim at the heart of The Coaching AI Masterclass from Coach Steve Collins, a Hall of Fame coach with 3 state titles, 10 state appearances, and nearly three decades of building winning programs. His message to coaches everywhere is simple: the game is changing, and early adopters win.
This isn’t about losing the human side of coaching. It’s about using new tools to handle the heavy lifting, so you can spend more time doing what you do best coaching the game.
AI Is the Assistant Coach That Never Sleeps
Imagine having an assistant who never gets tired. One who can serve as your Director of Operations, Head of Scouting, Analytics Wizard, and Communications Director, all at once.
That’s what AI can be when you learn how to use it correctly. It’s not a gimmick. It’s a tireless helper that organizes, writes, analyzes, and plans faster than any coach could on their own.
Every time, the coaches who embraced change gained an edge and this is no different. AI is simply the next step in that evolution. The coaches who adopt it early will be the ones out-organizing, out-preparing, and out-performing their opponents for years to come.
As Coach Collins says: “Building a machine is easier today than it’s ever been.” The only question is whether you’ll start building yours now or later.
If you’ve ever felt like you spend more time managing logistics than coaching your team, AI can change that.
In The Coaching AI Masterclass, you’ll see how to systemize the “program side” of your job, everything from communication to organization, so you can finally focus on the court again. It’s about reclaiming your time and reducing the mental clutter that comes with running a program.
Coach Collins has already tested the system himself. He calls it: “The Human Machine vs. The AI System,” 27 years of running everything manually compared to the new model that almost runs itself.
Masterclass Spotlight: The Coaching AI Masterclass
The Coaching AI Masterclass is a live, four-week training designed by Coach Steve Collins, a Hall of Fame high school coach with three state titles and 10 state appearances. In it, he reveals how to use AI tools to run your program faster, cleaner, and smarter, so you can focus on what really matters: coaching.
You’ll see live demonstrations of the exact systems he uses for scouting, practice planning, and communication. By the end, you’ll know how to turn AI into your most reliable assistant, the one that never sleeps.
This masterclass isn’t theory. It’s a practical, hands-on demonstration of what AI can do for your program today. You’ll see the exact tools Coach Collins uses, how he uses them, and what it looks like when AI handles the busywork while you focus on coaching.
Because the truth is, every coach wants more time. And now, you can finally have it.
If you’d like to explore further, check out theAIsportscoach.com, a free community for coaches to share prompts, strategies, and ways AI is helping them win both on and off the court.
Coaching youth basketball today comes with more responsibilities than ever: practice planning, film breakdown, scouting opponents, and constant communication with players and parents. For new or inexperienced coaches, it can feel overwhelming. That’s where AI Coaching Prompts come in.
By learning how to ask AI the right questions, you can save hours of busy work and focus on what really matters: developing players and building your program.
What Are AI Coaching Prompts?
AI Coaching Prompts are carefully worded instructions that tell AI exactly what you need, whether that’s designing a practice, analyzing film, or even writing a weekly parent email. Instead of spending hours piecing together drills, clips, and notes, you can let AI do the heavy lifting while you keep the final say.
The difference between a vague prompt and a sharp one is the difference between a messy assistant and a skilled one. These prompts give you the second kind.
Examples of AI Coaching Prompts You Can Use
Here are some real prompts and how you can put them to work:
Practice Planning Prompt: “Design a 90-minute practice for transition defense tomorrow. Include 2 breakdown drills, 2 competitive games with scoring, a 5-minute film segment, and time blocks.” Instead of juggling drills at the last minute, you’ll get a structured, balanced plan with teaching moments built in.
Film Breakdown Prompt: “Analyze our last game with 5 key clips. Create a 30-minute film session plan and suggest 3 practice drills to fix the issues.” You can turn raw game footage into actionable teaching points your players understand, without having to spend your whole night cutting clips.
Player Development Prompt: “Write a 4-week shooting plan for two guards under 30% from three. Include daily drills, weekly goals, and checkpoints.” This gives struggling shooters a personalized plan you can track week by week, instead of recycling the same generic shooting drills.
Team Communication Prompt: “Draft a short weekly parent email about updated practice times. Keep it clear, positive, and under 200 words.” No more scrambling to write updates. AI does the drafting, you add the personal touch.
Join the TeachHoops Community
TeachHoops.com offers a unique platform for coaches to share experiences and gain new insights. Learn from others who have navigated similar challenges. It’s an invaluable resource for those looking to:
Discover powerful AI prompts that professional coaches use to analyze game footage and identify winning strategies.
Unlock advanced training techniques that will elevate your players’ skills and basketball IQ to the next level.
Learn how to create personalized development plans for each player using AI assistance in minutes, not hours.
Learn how to ask AI the right questions the first time, so you stop wasting time on bad prompts and start injecting AI into your program. Do less busy work, and spend more time coaching where it matters most!
AI Coaching Prompts are just the start. They’re part of a larger movement to bring AI into youth sports in practical, coach-friendly ways. By using prompts as your foundation, you’ll start to see how AI can fit into every corner of your program, from practice plans and scouting to player development and culture-building.
The future of coaching isn’t about replacing coaches with technology. It’s about giving coaches the tools to spend less time on busy work and more time teaching the game.
What Other Coaches Are Saying
I’m not the only one who’s seen the impact. One high school coach shared that using these prompts boosted his team’s scoring average by 15 points a game. Here’s another:
“These AI prompts have completely transformed my coaching approach. I’m now able to break down opponent strategies more effectively and create targeted practice drills that address our specific weaknesses. My team’s defense has improved by 23% in just one month!” -Coach Johnson
That’s not magic. It’s better organization and smarter planning.
Final Word
If you’re a new or developing coach, AI Coaching Prompts can be the bridge between feeling overwhelmed and feeling in control. They’ll give you clear, ready-to-use outputs that free you to focus on the court, your players, and your team culture.
This is about making coaching simpler, smarter, and more effective. That’s a win for every coach and every player.
If you’d like to explore further, check out theAIsportscoach.com, a free community for coaches to share prompts, strategies, and ways AI is helping them win both on and off the court.
In today’s game, data, analytics, and AI are reshaping how coaches prepare and how players develop. But true progress isn’t about replacing coaches with technology, it’s about using tools to strengthen how we teach and connect. That’s where The Coaching Habit comes in. By pairing its simple framework with AI-backed basketball coaching strategies, you can build smarter players, stronger leaders, and a team culture that thrives on curiosity and accountability.
1. Stay Curious Longer
Instead of jumping in with “Run this set” or “Do this drill,” lead with curiosity. Ask questions before giving instructions.
“What did you see? And what else? What’s the real challenge here for you on that coverage?”
When you lead with questions, you shift players from order-takers to decision-makers, an essential part of modern, AI-backed basketball coaching strategies.
2. Find the Real Problem, Not the First Miss
A missed layup is often a symptom, not the root issue.
Was the angle off?
Did they misread pace or spacing?
Was contact the culprit?
Stick with one issue until it’s clear, instead of piling on five quick fixes. Probe:
“Of all the things here, what’s the real challenge for you finishing through contact?”
3. Coach for Autonomy
When players own their choices, they grow faster.
Ask for their ideas before giving yours: “Give me two ways you can guard that horn set.”
Use the “Lazy Question”: “How can I help?”
The real success metric: players begin self-correcting mid-possession, no coach voice needed. This type of autonomy is central to AI-backed basketball coaching strategies, where insights meet self-led adjustments.
4. Be Strategic with Time & Energy
Coaching is a finite resource. Use it wisely.
Strategic Question: “If we say yes to more transition, what are we saying no to in half-court touches?”
Keep micro-coaching to 1–3 questions, then get back to reps.
Use short film segments (10 minutes), focused on one theme, one cue, one behavior.
5. Make Coaching a Habit
Turn your best questions into daily rituals.
Daily loop closer: “What was most useful for you today, and what will you try tomorrow?”
Make it team culture that players ask each other first, then bring the coach in.
The habit isn’t answering. The habit is asking.
Join the TeachHoops Community
TeachHoops.com offers a unique platform for coaches to share experiences and gain new insights. Learn from others who have navigated similar challenges. It’s an invaluable resource for those looking to:
Pocket Scripts You Can Use (Or Adapt with AI Insight)
Sometimes coaches need ready-made prompts they can pull out on the fly. These “pocket scripts” keep your questions sharp and consistent, whether you’re in the middle of a drill, dealing with a slump, or breaking down film.
After a defensive breakdown:
“What did you see?” → “And what else?” → “What’s the real challenge for you on that switch?” → “How can I help?” → “What was most useful?”
Shooting slump:
“What do you want on your next two shots?” → “If yes to quicker release, what are you saying no to?” → “What was most useful from that sequence?”
Film review:
“What’s on your mind from Q3?” → “And what else?” → “What’s the real challenge for you vs. #24?” → “What’s one adjustment you’ll own next game?”
Player-Led Huddle Checklist
If you want players to lead from within, give them a clear framework. This checklist turns a huddle into a space where athletes drive the dialogue, while coaches step back and listen.
What’s on your mind?
And what else?
Real challenge for you?
What do you want?
How can I/teammates help?
If yes to X, what are you saying no to?
What was most useful?
The AI Connection: Coaching Habit + Smart Tools
Pairing The Coaching Habit with modern technology gives coaches a powerful edge. AI tools like video analysis, shot-tracking software, and player workload monitors can identify patterns or hidden weaknesses. But questions keep the learning personal.
AI highlights the “what” (e.g., shot release speed slowed in the 4th quarter).
The Coaching Habit digs into the “why” (mental fatigue? defensive pressure?).
The two together form AI-backed basketball coaching strategies that are both data-driven and player-centered.
Conclusion
If your goal is to create players who think, adapt, and lead, adopting The Coaching Habit is essential. By blending this framework with AI-backed basketball coaching strategies, you give your athletes the tools to self-correct, stay engaged, and grow into leaders on and off the floor.
Running a basketball program takes countless hours of planning, preparation, and communication. Between practice planning, player development, parent updates, and game prep, it can feel like there’s never enough time in the day. That’s where AI tools for basketball coaches come in.
AI won’t replace coaches. Instead, think of it as an assistant coach who never sleeps: ready to help you brainstorm, organize, and polish your ideas so you can spend more time focusing on players and less time stuck behind a laptop.
Why AI is a Game-Changer for Coaches
AI can give coaches a big boost in daily tasks. Even saving 15–30 minutes a week adds up to hours over the course of a season. Some of the biggest practical uses include:
Jump-starting the blank page: Struggling with practice planning or game adjustments? AI generates quick first drafts that you can refine.
Pattern recognition: Use AI for drill progressions, practice checklists, and team organization.
Polished communication: Draft parent reminders, player notes, and team updates in your own tone.
Idea generation: Stuck in midseason with a struggling team? AI can suggest new drills or strategies tailored to your constraints.
Consistency: From game notes to pre-practice routines, AI helps you stay organized and efficient.
What AI Can’t Do
Like any tool, AI has its limits. It doesn’t know your players’ personalities, attention spans, or your gym layout. It also tends to default to “middle of the road” answers unless you guide it with specific prompts.
And most importantly, AI drafts the plans, but you still teach. You’re the one demonstrating, motivating, and managing your players.
Join the TeachHoops Community
TeachHoops.com offers a unique platform for coaches to share experiences and gain new insights. Learn from others who have navigated similar challenges. It’s an invaluable resource for those looking to:
AI only works as well as the instructions you give it. A vague prompt will return vague results, but a clear, specific request can deliver real value. Think of it as working with an eager assistant who’s helpful but needs direction.
Here are a few tips to make AI work for you:
Be specific with context: Include details like age group, gym setup, time available, and team focus. For example: “I’m coaching a sixth-grade girls team with two baskets and 60 minutes. Give me a practice outline that includes ball-handling, shooting, and fun competitive drills.”
Ask for follow-up questions: Before AI gives you a plan, tell it to ask clarifying questions. This makes the output more tailored and useful.
Request short formats: Instead of long paragraphs, ask for bullet points, checklists, or a one-page outline that you can glance at quickly.
Tweak and refine: Don’t settle for the first draft. Adjust, re-prompt, and reshape until it fits your style and needs.
Think of it as a library: Over time, AI can “learn” your coaching voice and store your practice plans, emails, and notes, becoming a personal coaching archive.
The key is reps: the more you practice prompting, the better your results. Just like coaching itself, using AI is a skill you sharpen over time.
Getting Started with AI
There are plenty of free and accessible AI platforms. Options like ChatGPT, Gemini, Claude, or Grok all offer different features, but you don’t need to master them all. Start by picking one and practicing with simple prompts.
Think of AI like a cookbook: it won’t cook the meal for you, but it provides the recipes, order, and ingredients. You’re still the chef. It just makes your prep work faster and more efficient.
Final Thoughts
AI tools for basketball coaches are not about replacing human coaching. They’re about making the job easier, more efficient, and more creative. By using AI for practice planning, communication, and organization, you can free up valuable time to focus on what really matters: developing your players and building your team culture.
If you’d like to explore further, check out theAIsportscoach.com, a free community for coaches to share prompts, strategies, and ways AI is helping them win both on and off the court.