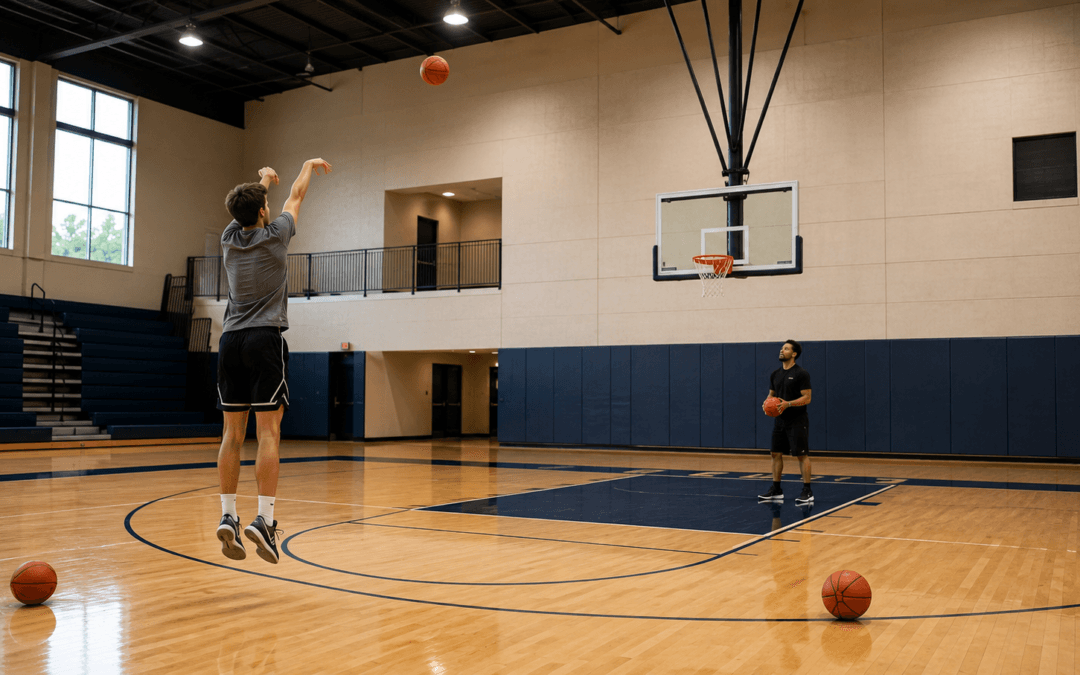
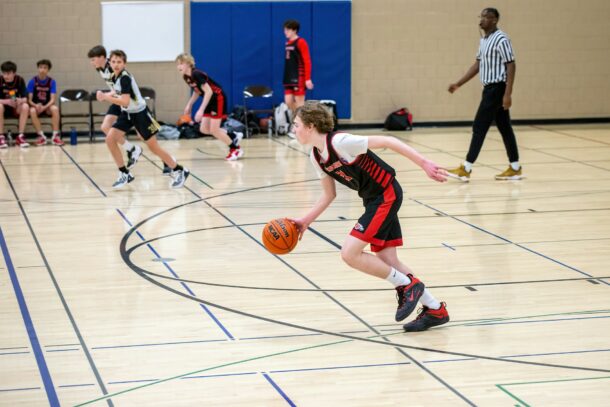
The seven basketball fundamentals every coach should teach are footwork, ball handling, passing and catching, shooting, finishing at the rim, rebounding and defense. Every play you’ll ever run depends on them. If your players can’t do these seven things, your plays won’t save you.
I coached for almost 40 years, and the teams that won the most were never the ones with the fanciest offense. They were the ones that did the simple things better than everybody else. So here’s how I think about each fundamental and how I’d teach it.
Why basketball fundamentals come first
There’s a reason I always said it’s about the Jimmys and Joes, not the X’s and O’s. Players win games. And players who can pass, catch, shoot and guard make any system look good.
Fundamentals also travel. A kid who learns to jump stop and pivot at 10 years old still uses it in a varsity game at 17. However, a set play you put in this year might be gone next year. That’s why I spent time on fundamentals every single day, at every level.
1. Footwork: the first of the basketball fundamentals
Everything starts with the feet. Stance, jump stops, pivots, triple threat and change of pace. Most turnovers I see in youth games are really footwork problems. A kid travels, gets tied up or loses balance because nobody taught them how to stop.
So teach the jump stop and the pivot early, then use them in every drill. For example, every catch in a passing drill ends with a jump stop. Then players pivot and pass. It becomes automatic.
2. Ball handling
Players need to dribble with both hands, with their eyes up and under pressure. Start stationary, then move to dribbling on the go, then add a defender.
Also teach purpose. A dribble should get you somewhere: to the rim, to a better passing angle or out of trouble. Dribbling in place just helps the defense.
3. Passing and catching
Good passing teams are hard to guard. Teach the chest pass, bounce pass and overhead pass, and teach players to pass away from the defender. Just as important, teach them to catch. Show a target, meet the pass and catch it with two hands.
Partner passing every day sounds boring, but it works. Then progress to passing on the move and passing against pressure.
4. Shooting
Shooting is built from close to the basket out. Start with form shooting a few feet from the rim. Balance, elbow in, eyes on the target and a good follow through. Then move back only when the form holds up.
Still, don’t just shoot for the sake of it. Track makes. Kids work harder when there’s a number on the line.
5. Finishing at the rim
Layups are the highest percentage shot in the game, and young teams miss a lot of them. Teach both hands, the correct footwork and how to finish through contact.
Then add pressure. A layup in a line is easy. However, a layup with a defender chasing you is what happens in a game, so practice that too.
6. Rebounding
Rebounding is effort and technique. Find a body, make contact, hold your ground and go get the ball with two hands. Teach players to assume every shot is a miss.
I always tracked rebounding in practice. Because what you measure gets done, a simple box out drill with a score changes how hard kids go after the ball.
7. Defense: the basketball fundamentals that win games
Defensive fundamentals are stance, slides, closeouts, help position and talking. You can’t play any defensive system without them, whether you play man, zone or something like our Funnel Down Defense.
Teach the stance first and hold players to it. Then add slides, closeouts and help rules one piece at a time.
How to fit basketball fundamentals into every practice
Start practice with 10 to 15 minutes of fundamentals
Use drills that combine skills, like passing into a jump stop and shot
Add pressure and competition as players improve
Track numbers so players see progress
Don’t skip them in February, that’s when teams get sloppy
Also keep it simple. One of the biggest mistakes I see from coaches is trying to do too much. Pick a few drills that teach these seven basketball fundamentals well, and run them often.
Basketball fundamentals win games
Plays come and go. Fundamentals stay with players for their whole career. Teach these seven every day, and your team will be ready for whatever system you put in.
We have fundamentals drills, practice plans and video breakdowns at TeachHoops.com for every age group.
Every good closeout drill starts with one idea. You have to get there in time, but you can’t arrive out of control. Most young players only do one of those things. Either they sprint at the shooter and fly by, or they jog out and give up an open shot. Both cost you points.
So I always treated closeouts as their own skill, not something kids would just pick up in scrimmages. When we taught it step by step, our defense got better almost overnight. Here’s how I break it down.
Why a closeout drill matters so much
Think about how many shots come off a kick out pass. The ball goes inside, the defense collapses, and then somebody has to fly back out to a shooter. That moment decides a lot of possessions.
If your players close out well, the shooter either passes again or puts it on the floor into help. However, if they close out poorly, he either shoots a wide open three or drives right by. That’s why I spent real time on this every week.
1. Sprint first, then chop
The first two thirds of the distance is a sprint. Then, the last few feet are short, choppy steps. We called it sprint and chop. Because the defender is slowing down, his weight stays back and he can still slide if the shooter drives.
For example, I’d put a line on the floor about six feet from the shooter. Players had to be chopping by the time they hit that line. It sounds simple, but it fixes most fly bys right away.
2. High hand, balanced feet
When the defender arrives, one hand goes up to contest the shot. Meanwhile, the other hand stays low to discourage the pass or the drive. Feet stay shoulder width apart with the butt down.
Also, I didn’t want kids leaving their feet. A pump fake is the oldest trick there is. If your defender jumps, the shooter just takes one dribble and goes by. So keep your feet on the floor and let the high hand do the work.
3. Take away the strong side
Most players drive to their strong hand. So we’d close out with a slight angle that forces the shooter toward his weak hand, or toward our help. Then the next defender knows where the ball is going.
This takes some scouting at the high school level. Still, even with young players, you can teach the basic idea. Make him go where you want him to go.
4. Talk on the way out
A closeout should never be silent. The defender calls “ball” or “I’ve got shooter” as he goes. As a result, teammates know he’s there and can recover to their own players.
Closeout drill progressions I used
These build on each other, so I’d usually run them in this order during the preseason.
1 on 0 closeouts.** A coach holds the ball at the wing. The defender starts in the lane, sprints, chops and contests. Then he slides back and does it again. Just footwork, no offense yet.
1 on 1 closeout and contain.** Now the coach passes to a live offensive player. The defender closes out, and the offense gets one or two dribbles to try to score. As a result, the defender has to stay balanced or he gets beat.
2 on 2 closeout drill.** Two defenders start in help. The coach skips the ball, and both have to rotate and close out. Because there’s a second offensive player, now the talk and the help matter too.
Shell with closeouts.** Finally, put it into your 4 on 4 shell. Every pass is a closeout for somebody. Stop it often at first and fix the feet.
Common mistakes
Flying by the shooter with no chop steps
Jumping at pump fakes
Closing out with both hands up and no balance
Arriving silent
Standing straight up instead of staying low
I’d watch for these during every closeout drill. Then I’d stop the drill right away when I saw one. Because the habits form fast, you want to catch them early.
Make the closeout drill a weekly habit
You don’t need much time for this. Even ten minutes twice a week makes a difference by December. Over time, players who close out well make every defense better, whether you play man, zone or something in between.
We have more defensive drills and our full Funnel Down Defense system at TeachHoops.com if you want to build on this.
Your players will decide what your program is about in the first two hours of the first basketball practice. Maybe not consciously, but they’ll decide. If the gym is organized and loud and everybody is working, that’s who you are. If kids are standing around while coaches figure out the next drill, that’s who you are too.
I made the mistake early in my career of trying to install half the playbook on day one. Nobody remembered any of it. What I learned over 27 seasons at Memorial is that the first basketball practice isn’t about what you run. It’s about how you practice. Get that right and everything else gets easier.
1. Script every minute of your first basketball practice
Write the whole practice out before you walk in the gym. Times, drills, teaching points, which coach runs which station. Give it to your assistants the night before.
Kids notice when a coach looks at a clipboard, blows the whistle and the next drill starts right away. They also notice when a coach stands there thinking. I wanted my teams to feel like practice had a pulse from the first minute.
Keep most segments short, somewhere between 6 and 12 minutes. Have a backup drill in your pocket in case something falls flat.
2. Tell them your standards, then enforce them right away
Before a ball bounces, take five minutes and tell them what you expect. Not a speech. Three or four things they can actually see. Be on time. Sprint between drills. Talk on defense. Own your mistakes.
Then the first time a group jogs to the next drill, stop everything and do it again. That first correction teaches more than anything you said in the huddle. Players are watching to see if you meant it.
3. Teach them how to practice
Where do they line up? What’s the signal to bring it in? How do lines rotate? It sounds small. It isn’t. If you can move from one drill to the next in fifteen seconds instead of a minute, you get hours back over a season.
I’d actually run a simple drill on day one just to practice the transitions in and out of it. Kids thought it was silly for about ten minutes, and then we never had to talk about it again.
4. Keep everybody moving
Day one is not the day for a drill with one kid working and eight watching. Pick stuff with lots of balls and lots of reps. Two ball layup lines. Partner shooting at every basket. Defensive slides in small groups. Simple 3 on 0 passing and cutting.
Players will judge that first practice by two things: how much they touched the ball and how tired they were at the end. Give them plenty of both.
5. One habit on offense, one on defense
Don’t teach your whole system. Pick one thing on each end that’s going to be in every practice for the rest of the year. Maybe it’s a stance and a closeout. Maybe it’s a jump stop and pivot, or a spacing rule.
Explain it, show it, have them do it with no pressure, then put a defender on them. By the time they leave, every kid on the roster should be able to show you both. That’s a good first day.
6. Compete before your first basketball practice ends
Finish with something competitive. A shooting game, a 3 on 3 rotation, a stops drill. You learn more about your players in ten minutes of competition than in an hour of drills.
Score it based on what you taught. If you harped on talking, give a point every time a team calls out a screen. If you taught jump stops, reward a bucket that comes off a good one. Now they see that your standards and winning are the same thing.
7. End your first basketball practice with something specific
Bring them in for the last couple minutes. Don’t just say good job. Name the kid who sprinted every transition. Name the one who talked on every possession. Tell them what tomorrow is about so they walk out knowing where this is headed.
Then grab your staff for ten minutes. What worked, who stood out, what needs to change. Write it down while it’s fresh. You’ll want those notes in a week.
Make your first basketball practice the blueprint
You don’t need to install everything on the first day. You need to show them how your team works. Do that well and the next hundred practices run themselves a little more.
If you want help planning out those first few weeks, we have practice plans, drill libraries and season templates at TeachHoops.com.
Youth basketball tryouts can become a rushed sorting exercise if coaches walk into the gym thinking only about who will make the team. A better approach is to treat tryouts as an opportunity to gather information. Instead of confirming what you already believe about players, build each session around discovering skills, habits, toughness, coachability and role fit that might otherwise go unnoticed.
Good evaluations require more than layup lines and long scrimmages. Coaches need specific criteria, purposeful drills and multiple chances to see players respond in different situations. Just as important, the process should help you build a roster rather than simply rank a group of athletes from first to last.
Below are seven ways to make youth basketball tryouts more useful, fair and productive.
1. Decide what you want to evaluate before tryouts begin
Walking into the gym with a vague goal of finding the “best players” leaves too much room for instinct and first impressions. Instead, decide ahead of time which basketball skills and behaviors you need to evaluate.
For example, a coach might want to identify players who can:
Finish through contact around the basket
Defend the ball for several possessions without losing focus
Communicate consistently on defense
Rebound in traffic
Handle pressure against aggressive defenders
Respond positively to coaching
Sprint back after turnovers
Make smart decisions without dominating the ball
Those traits require different situations to evaluate properly. A five-on-five scrimmage might reveal some of them, but others can disappear while certain players control the ball.
Before youth basketball tryouts begin, write down your evaluation priorities. Once those priorities are clear, you can choose drills that create opportunities to see each skill.
2. Design drills that expose the traits you’re evaluating
If toughness is one of your priorities, don’t expect players to reveal it while standing in a drill line. Put them in competitive situations where effort, physicality and persistence become impossible to avoid.
Full-court one-on-one is a great example. Give players a live ball, let them compete from one end to the other and make finishing the possession the primary expectation. In only a few minutes, you’ll see who stays engaged, who fights through mistakes and who gives up once the offensive player gains an advantage.
The same principle applies to other traits. Want to evaluate ball security? Add pressure. Want to see who communicates? Create defensive situations that require switches and help. Want to test decision-making? Shrink the space and shorten the time available. Purposeful drills produce useful information. Random drills mostly produce activity.
3. Watch what players do without the basketball
The player with the ball naturally attracts attention during youth basketball tryouts. Coaches follow drives, shots, passes and turnovers because those actions are easy to track. However, much of basketball happens away from the ball.
After a player passes, watch what comes next. Does he cut through the lane, relocate to create spacing or simply stand and observe? When possession changes, does he sprint back defensively or jog while checking the coach’s reaction?
Off-ball habits can reveal basketball IQ, effort and awareness more clearly than a highlight play. During scrimmages, intentionally spend several possessions watching one player who doesn’t have the ball. You may discover qualities you would’ve missed while following the action.
4. Give players more than one chance
One poor session shouldn’t automatically end a player’s opportunity. Young athletes can struggle during the first day of tryouts for plenty of reasons. Nerves, unfamiliar teammates, a new coach or simple bad timing can make a capable player look completely different from usual.
Three days may decide an entire basketball season, so coaches should gather information across the full evaluation window. Consider setting aside time late in the process for players near the roster cutoff. Match those athletes against one another in competitive drills or controlled scrimmages and evaluate them again.
A player who looks more confident on the final day isn’t necessarily changing his game to fool the coaches. He may simply be comfortable enough to show what he can actually do.
5. Use evaluation scores as information, not the final answer
Evaluation forms help organize observations during youth basketball tryouts, but the numbers shouldn’t select the roster by themselves. A simple average can hide the exact trait your team needs.
Imagine one player receives modest scores for ball handling and shooting but grades extremely well as an on-ball defender. Averaging every category could make him look ordinary. Meanwhile, his defensive ability might fill one of the biggest holes on your roster. Instead of creating one overall ranking, build smaller lists based on roles.
For example:
Best on-ball defenders
Best rebounders in traffic
Most dependable ball handlers
Best catch-and-shoot players
Strongest finishers around the rim
Best decision-makers under pressure
Next, compare those lists with the players already returning to your program. Roster construction should account for what your team lacks, not simply which athletes earn the highest average scores. A balanced roster needs complementary pieces.
6. Give every evaluator a specific assignment
Multiple coaches can improve the evaluation process, but only if everyone knows what to watch. Without assignments, two coaches often spend the entire session following the basketball. As a result, they collect nearly identical observations while missing everything happening elsewhere. Divide the work instead.
One coach might evaluate guards while another focuses on post players. Another option is having one coach track actions around the ball while an assistant studies screening, cutting, communication, defensive positioning and transition effort. After practice, compare notes. Disagreements deserve attention because they can expose players who need another look.
Previous coaches can provide useful context as well. A former youth, middle school or JV coach has seen habits that may never appear during a three-day tryout. They may know who improved steadily throughout the previous season, who competed consistently in practice and who handled adversity well. History shouldn’t make the decision for you, but it can help explain what you’re seeing.
7. Plan the conversation after youth basketball tryouts
Most coaches carefully organize drills, schedules and evaluation sheets. Far fewer plan what happens once the roster has been selected. The conversation with a player who doesn’t make the team deserves preparation too.
Whenever possible, speak directly with the player instead of allowing a posted list to provide the only explanation. Keep the message clear, specific and useful.
Give the player one area to improve rather than overwhelming him with five different weaknesses. The feedback should be something he can work on during individual workouts, open gyms or the offseason.
Then provide a path forward when one exists. Let the player know when open gym starts, when another evaluation opportunity may come or what he needs to improve before trying again.
Most importantly, don’t tell every player he was “really close.” False encouragement can create confusion about how much improvement is actually needed. Clear feedback may be uncomfortable for a few minutes, but it gives the player something productive to do next.
Build your youth basketball tryouts around information
The best youth basketball tryouts give coaches a clearer picture of each player than they had before the first whistle. Rankings and roster decisions come later. First, create situations that reveal how players compete, communicate, respond to coaching and contribute when the basketball isn’t in their hands.
Define your criteria before players arrive, select drills that expose those traits and evaluate athletes across multiple sessions. Then organize your observations by role, involve the right people in the process and prepare for the conversations that follow roster decisions.
Coaches looking to organize their next tryout can find basketball tryout plans, evaluation forms, practice plans and drills at TeachHoops.com. A little preparation before the gym doors open can make the entire selection process clearer for coaches and players alike.
A good 3 on 2 shooting drill gives players more than extra shots during practice. With three offensive players attacking two defenders, the offense has to recognize space, move the ball quickly and decide whether to shoot, drive or make one more pass. Meanwhile, defenders work on communication, closeouts and rotations while playing at a disadvantage.
The setup is simple, but coaches can adjust the rules to emphasize different parts of their offense. One day the focus might be jump stops and kickouts. Another practice could feature dribble penetration, ball screens or quick decisions after the catch. Because the structure stays familiar, players can spend less time learning a new drill and more time sharpening the skill of the day.
How to set up the 3 on 2 shooting drill
Start with three offensive players and two defenders. Groups of five work well because everyone stays involved, although coaches can use groups of six or seven and rotate players through each role.
The defense begins with the ball and passes it to any offensive player to start the possession. From there, the offense attacks the advantage while the defenders scramble to cover three players with only two bodies.
Keep players rotating between offense and defense instead of allowing anyone to stay permanently on one side. Doing so keeps the pace up and gives everyone experience making reads from different positions.
A basic setup can follow these guidelines:
Place three players on offense around the perimeter.
Put two defenders inside the half-court area.
Give one defender the ball to begin the possession.
Have the defender pass to any offensive player.
Let the offense play until it creates a quality shot.
Rotate players after the possession or after a set number of reps.
Coaches can set a scoring restriction such as layups and 3-pointers only, but the preferred shot profile should fit the team’s offensive system.
Teach players to find the best shot
The built-in numbers advantage should create open looks, but players still have to recognize them. A quick drive into two defenders wastes the advantage, while a jump stop, kickout and extra pass can turn a decent opportunity into a clean catch-and-shoot attempt.
Encourage players to read whether they’re guarded before deciding what comes next. If the defense closes hard, attack the space behind the closeout. If the defender helps on the drive, find the teammate who has been left open.
The goal is to build a habit of choosing shots based on the defense instead of deciding in advance who should shoot. Even if one player is the stronger shooter, consistently finding the open teammate teaches the entire group how to read the floor.
Use a 0.5-second decision rule
The 3 on 2 shooting drill fits especially well with offenses built around quick decisions. Once a player catches the ball, ask for a choice within roughly half a second: shoot, drive or pass.
Holding the ball gives the defense time to recover. Quick decisions force defenders to move again and again, which usually creates another opening somewhere on the floor.
Players should begin thinking before the catch. They can scan the defense as the ball travels toward them, then react as soon as they secure it. Over time, this approach helps eliminate unnecessary dribbles and keeps the offense moving.
Add a jump-stop and kickout emphasis
Coaches can easily turn the drill into a passing and penetration exercise. Require players to use a jump stop when they drive into the paint, then read the defense before making the next pass.
A typical possession might look like this:
The first player catches and drives.
A defender steps into the lane.
The driver jump stops and kicks the ball outside.
The defense rotates toward the next player.
The offense makes one more pass to the open shooter.
This variation encourages players to stay under control when they reach traffic. It also reinforces the idea of giving up a good shot when another pass can produce a cleaner one.
Force an early drive
Another useful variation requires either the first or second catch to attack the basket. The defense still starts the drill by passing to any offensive player, but the offense now knows that penetration must happen quickly.
Coaches can decide whether the driver is allowed to finish at the rim. If the purpose is drive-and-kick practice, removing the layup forces players to read help defense and find a teammate.
This version also puts pressure on the two defenders. One player has to stop the ball while the other reads the floor, protects an important area and prepares for the next pass. As a result, offense and defense get useful work during the same possession.
Work on defensive rotations and closeouts
Playing two defenders against three offensive players creates a difficult defensive situation by design. The defense probably won’t cover everything, so players have to communicate and prioritize.
One defender may stop the drive while the other closes toward a shooter. Once the offense moves the ball, both defenders have to adjust again.
Coaches can emphasize several defensive habits:
Stop direct drives to the rim.
Communicate during every rotation.
Close out under control.
Contest perimeter shots.
Avoid leaving players completely unattended.
Recover quickly after helping.
The drill also gives coaches a chance to reinforce a useful defensive philosophy. A temporary matchup disadvantage can be manageable, while an uncontested shot creates a much bigger problem. Players should learn to rotate toward immediate threats instead of worrying about perfect positional matchups.
Add the deny-a-shooter variation
The deny-a-shooter version places even more emphasis on recognition. After the ball handler attacks, one defender stops the drive while another defender removes one perimeter option. The driver now has to identify which teammate the defense chose not to guard.
Instead of memorizing a passing pattern, players respond to what they see. If the defense takes away one shooter, the ball should move toward the other.
This variation can work especially well early in the season because it introduces the basic language of offensive decision-making. Players learn to ask a simple question on every drive: Who did the defense leave open? Once they consistently find the answer, coaches can layer in more complicated concepts.
Add ball screens or dribble handoffs
The same 3 on 2 shooting drill can support other offensive actions without creating an entirely separate drill. Coaches who want ball-screen reps can require the possession to begin with a screen before players attack the advantage.
Teams that rely more heavily on dribble handoffs can use the same approach. After the initial action, the offense still has to recognize how the two defenders react and locate the uncovered player.
Only having two defenders can actually help the learning process. The reduced defensive coverage makes the open player easier to identify, allowing players to practice the read before seeing more complicated versions during five-on-five play.
Change the rules without changing the drill
One of the biggest advantages of this drill is its flexibility. Coaches can keep the same three-against-two framework while changing the objective based on what the team needs that day.
Possible variations include:
Layups and 3-pointers only
First or second catch must drive
No layups allowed after penetration
Jump stop required before a kickout
Ball screen required before the shot
Dribble handoff required to begin the action
One designated shooter must be denied
Offense must make an extra pass before shooting
These adjustments keep the drill fresh without forcing players to learn a completely different setup every few practices. Coaches can also increase or decrease the restrictions depending on the age, skill level and offensive goals of the team.
When to use the 3 on 2 shooting drill in practice
This drill works well early in practice because players get movement, passing, shooting and decision-making reps in a short period. It can serve as a bridge between individual skill work and larger team concepts.
However, coaches don’t have to place it in the same spot every day. If ball movement slips during practice, bringing the drill back near the end can reinforce quick passing and better shot selection before players leave the gym.
Changing its placement also keeps practice from becoming predictable. Players should learn the concepts well enough to apply them whenever the coach calls for the drill.
Build players who can read before they react
Plays can give an offense structure, but possessions rarely unfold exactly as they appear on a whiteboard. Defenders help, rotate, close out and leave unexpected players open. Offensive players have to see those changes and respond.
A 3 on 2 shooting drill gives coaches a simple way to recreate those decisions repeatedly. Players learn to attack space, move the ball, recognize help and find open teammates while defenders practice communication and recovery.
With a few rule changes, the same drill can support shooting, passing, penetration, ball screens, dribble handoffs and defensive rotations. More importantly, it gives players repeated chances to read the floor and make a useful decision before the defense has time to recover.
Some basketball practice mistakes are easy to spot. Long lines, extended lectures and constant whistles can drain the pace from a session before players get much useful work done. Other problems can hide inside normal coaching habits. A coach may think frequent instruction helps players improve, but too much talking and correcting can cut into the repetitions players need to develop.
Why basketball practice mistakes can cost players valuable reps
Gym time is limited, especially for youth basketball teams. Coaches may get only a couple of practices each week, so wasted minutes add up quickly.
A useful question is simple: How much of practice are players actually practicing? If they spend too much time watching, waiting or listening, a 90-minute session may contain far less basketball than the schedule suggests.
Coach Steve Collins points to three common issues coaches can address right away. Players need more repetitions, coaches need to talk less, and drills need enough uninterrupted time to develop a rhythm.
1. Players aren’t getting enough repetitions
Skill development depends on repetition. Players improve when they perform a movement often enough to become more comfortable, more consistent and eventually more automatic.
Collins compares the process to learning multiplication tables. A student won’t improve much by watching someone else solve 30 problems, and a basketball player won’t improve a skill by standing in line while teammates take most of the reps.
Consider the difference between a shooting drill with one long line and one with several baskets or stations. The first setup may give a player only a handful of shots, while the second can create far more opportunities in the same amount of time.
Coaches still need to teach during skill work. The key is making sure instruction leads quickly into enough repetitions for players to apply what they just heard.
Cut down standing during skill development
Some waiting is unavoidable during team drills. A scrimmage, transition drill or five-on-five segment may naturally leave a few players off the floor for short stretches.
Skill work should create more activity. When the goal is improving dribbling, passing, shooting or footwork, coaches should look for ways to keep as many players working as possible.
A few adjustments can help:
Use multiple baskets when they’re available.
Break a large team into smaller groups.
Create stations instead of one long line.
Give waiting players a basketball whenever possible.
Use partner activities that keep two players involved at once.
Pay attention to how many repetitions players actually receive.
Young players also tend to lose concentration when they stand around for too long. More reps can improve skill development while cutting down the idle time that often leads to distractions.
2. Coaches talk too much during practice
Talking too much is one of the easiest basketball practice mistakes to make. Coaches know what they want players to learn, so they sometimes keep explaining long after the players are ready to move.
Coach Collins recalled watching a coach begin practice by talking to his team for about 20 minutes. Even useful instruction loses value when it takes away a large chunk of practice time.
Coaches still need to communicate clearly. The challenge is deciding how much players need to hear before they can start learning through action.
Track how much you’re talking
Spend a week paying attention to how often your voice controls practice. Compare that time with how much players spend moving, communicating and making decisions.
You don’t need to track every second. Instead, look for explanations that can be shortened and teaching points that can wait until players have taken a few reps.
Ask yourself:
Can I explain this in less time?
Do players need every detail before starting?
Could I add the next teaching point after a few repetitions?
Am I answering something players could figure out themselves?
Are players communicating, or am I doing most of the talking?
Shorter teaching segments can help players stay engaged. Give them the key point, let them work and add more instruction when the drill creates a reason for it.
3. Coaches stop drills too often
Frequent stoppages can turn a useful drill into a series of interruptions. A player makes a mistake, the whistle blows, everyone stops, and several players lose a repetition because one person needed a correction.
Coach Collins identifies this as one of the hardest habits for coaches to change. Coaches naturally want to fix mistakes when they see them, but not every problem needs a full-team interruption.
Know when a mistake requires a full stop
Some mistakes deserve an immediate pause. If several players repeat the same error or the entire drill starts breaking down, stopping the group can prevent the team from reinforcing a bad habit.
Coach Collins describes this as a critical stop. The correction matters enough to several players that interrupting the drill becomes worthwhile.
A mistake involving one player usually calls for a different response. If one athlete has the wrong angle or poor footwork while the rest of the group is performing correctly, stopping everyone can cost more than it helps.
Instead, a coach can:
Speak briefly to the player during a natural break.
Substitute the player out for one repetition.
Have an assistant coach make the correction.
Give the player a short cue while the drill continues.
Save a minor correction until the next pause.
The player still gets feedback, while teammates keep working. Practice stays active instead of restarting every time one detail needs attention.
Let players work through some mistakes
Young athletes need chances to solve problems on their own. If a coach supplies the answer every time something goes wrong, players can start depending on instructions instead of reading the situation.
Coaches still need to watch closely and correct poor habits. The difference comes from choosing the right moment instead of reacting to every mistake with an immediate stoppage.
Sometimes the next repetition gives the player the feedback he or she needs. Other times, a quick individual cue works better than stopping nine other players who are already doing the drill correctly.
Use assistant coaches without slowing practice
Assistant coaches can make a major difference during faster drills. Instead of having every coach focus on the same action, divide responsibilities and let assistants watch for specific details.
One coach can run the drill while another handles individual corrections. If a player needs help with footwork, positioning or an angle, an assistant can pull that athlete aside briefly and send a replacement into the next rep.
This keeps the drill moving and gives players more personal instruction. It can also make correction feel less public, which may help younger athletes respond better.
How to fix basketball practice mistakes tomorrow
Improving practice doesn’t require rebuilding your entire coaching philosophy. Start by watching how players spend their time and identifying the moments when practice slows down.
Focus on three practical changes:
Create more repetitions by reducing long lines and unnecessary waiting.
Shorten explanations so players can get back to moving sooner.
Save full-team stoppages for mistakes that affect more than one player.
Those adjustments can change the feel of practice quickly. Players spend more time working, while coaches spend less time restarting drills and repeating the same instructions.
Make players the busiest people in the gym
A productive basketball practice should keep players active for most of the session. They should spend their time dribbling, passing, shooting, defending, communicating and making decisions instead of standing around waiting for the next instruction.
Coaches still guide the process, but they don’t need to control every second with their voice. Give players clear direction, create enough repetitions and step in when a correction truly helps the group or the individual.
Avoiding these basketball practice mistakes can make sessions more efficient and easier to manage. More importantly, players get more chances to practice the skills they’re there to improve.
A good basketball practice plan has to accomplish more than fitting drills into a 60- or 90-minute window. Youth coaches also need to keep players moving, listening and learning before wandering attention turns practice into crowd control.
Anyone who has coached younger players knows how quickly focus can disappear. A long line forms, the coach spends too much time explaining a drill, and suddenly one kid is bouncing the ball while another is bothering a teammate. Building more activity into practice can prevent many of those problems before they start.
Why focus can disappear during youth basketball practice
Some teams present a bigger challenge than others. On the Coaching Youth Hoops podcast, Coach Steve Collins recalled coaching a talented boys team that struggled badly with concentration and discipline despite having enough ability to win plenty of games. Keeping several of those players attentive became one of the most frustrating challenges he’d faced in 20 years of coaching.
Coaches may first think about consequences, conditioning or reduced playing time. Those options can have a place, but youth leagues sometimes require equal playing time, and punishment alone doesn’t solve a poorly structured practice. Coaches Collins and Bill Flitter kept returning to another solution: give players less time to get distracted in the first place.
1. Build your basketball practice plan around activity
Standing around creates opportunities for young players to lose focus. Collins pointed out that when kids spend too long without doing anything, especially energetic younger players, they’ll often start pulling on jerseys, poking teammates or finding some other way to entertain themselves.
So, look at your basketball practice plan from the players’ perspective. Try to keep as many athletes active as possible instead of creating long lines where eight kids watch one player get a repetition.
Before practice, consider a few simple questions:
How many players participate in this drill at the same time?
How long will players wait between repetitions?
Can I use two baskets instead of one?
Can I divide the team into smaller groups?
What can players do while they’re waiting?
Do I have another activity ready if this drill finishes early?
More movement also means more touches, shots, passes and decisions. As a result, improving concentration can also improve the amount of basketball development you squeeze into limited gym time.
2. Cut down the dead time
Youth coaches don’t have the luxury of working with players all day. As the podcast points out, many coaches see their teams only a couple of times each week, often for roughly an hour and a half at a time.
Every wasted minute matters. Coaches still need to stop practice and teach, but transitions shouldn’t drag, lines shouldn’t stretch across the court and players shouldn’t spend several minutes waiting while equipment gets organized.
A tighter practice rhythm can look like this:
Explain the drill quickly.
Get players into position.
Start the activity.
Make short corrections as needed.
Move into the next segment without a long break.
Smooth transitions take some preparation. However, once players learn the routine, coaches can spend less time organizing the group and more time teaching the game.
3. Keep instruction short
Stopping practice to explain a new concept can become one of the toughest moments with an easily distracted team. Collins and Flitter suggest condensing instruction into small pieces rather than trying to deliver a long basketball lesson while players stand and listen.
Give players enough information to begin the activity, then let them try it. Once they’ve worked through the first piece, bring them back for another short teaching point and send them out again.
For example, a coach installing a new action might:
Draw the first movement on the whiteboard.
Explain the players’ starting positions.
Run the action several times.
Stop and correct the biggest issue.
Introduce the next part of the play.
Coach Collins described using this approach when teaching from a whiteboard. Even when higher-IQ players asked what happened next, he’d keep the group on the first step before adding another layer.
4. Put energetic players to work
Some players struggle most when the team stops moving. Instead of leaving the most restless kid at the back of the group during an explanation, give that player something useful to do.
Coach Collins said he’d often choose his most hyperactive players as demonstrators. The approach keeps those players involved while also giving teammates a visual example of what the coach wants.
Coaches can use the same idea in several ways:
Have a player demonstrate footwork.
Ask two players to show the next drill.
Let a player help set up cones.
Assign someone to lead a line or station.
Use players to demonstrate offensive or defensive positioning.
Responsibility can redirect some of the energy that causes disruptions. Meanwhile, the coach gets another way to teach without delivering another long explanation.
5. Set clear rules for listening
Players should know what you expect when practice stops. If the coach has to ask everyone to stop dribbling five times during every huddle, the team needs a clearer routine.
Coach Flitter suggested setting consequences for behaviors such as continuing to dribble while a coach talks. A player might receive a warning first, followed by a predetermined consequence if the behavior continues.
Keep the expectations simple enough for players to remember. For example:
Hold the ball when a coach is speaking.
Look toward the coach during a huddle.
Stop on the whistle.
Listen before asking questions.
Be ready to start when the explanation ends.
Then apply those standards consistently. Players are more likely to adjust when they understand both the rule and what follows when they ignore it.
6. Prepare more than you expect to use
A basketball practice plan rarely unfolds exactly as expected. Some drills take longer than planned, while others fall apart quickly or simply don’t connect with a particular group.
Coach Collins offered a useful rule of thumb on the podcast: if you’ve scheduled a 90-minute practice, have far more material prepared than you think you’ll need. His point wasn’t to cram several hours of work into one session. Instead, coaches should avoid reaching the last 15 minutes with nothing left for the team to do.
Keep a few backup activities ready for those situations. They might include:
Ball-handling work
Passing competitions
Finishing drills
Shooting games
Small-sided games
Short competitive drills
You don’t have to use every drill on the plan. Extra options simply give you somewhere to go when an activity finishes early or isn’t working with your players.
7. Teach players how to pay attention
A player can lose focus without disrupting anybody. Coaches may notice an athlete staring across the gym during a huddle, avoiding eye contact or missing instructions even though the player remains quiet.
Coach Flitter described pausing when he noticed a player’s attention wandering. If the player still wasn’t engaged, he might ask the athlete to repeat the instruction he’d just given.
Young athletes are still learning verbal and nonverbal cues, so coaches may need to teach those habits directly. Knowing when to stop, look up, listen and respond becomes another part of player development.
Adjust the basketball practice plan to your team
No single practice format works for every age or every roster. A group of eighth graders may handle a longer explanation, while younger players could lose focus before the coach reaches the second teaching point.
The same differences can appear among teams of the same age. If your players struggle whenever an explanation goes beyond 30 seconds, shorten it and teach in pieces. If long lines create problems, build stations or smaller groups into your basketball practice plan.
Watch how your team reacts and make adjustments as the season continues. Coaches who recognize when attention starts to slip can often change the structure before frustration takes over.
Better practices make focus easier
Coaches will never eliminate every distraction from youth basketball practice. Kids bring different personalities, energy levels and attention spans into the gym, so managing focus will always be part of coaching.
A strong basketball practice plan can make the job much easier, though. Keep players active, remove unnecessary downtime, teach in short bursts, establish clear expectations and bring more material than you expect to use. When practice has pace and purpose, players have fewer chances to drift and more chances to play basketball.
Basketball practice games can sharpen decision-making, build confidence and prepare players for pressure. However, they work best when every player understands his job and knows what the coaching staff expects from him.
One of the toughest conversations in basketball often starts with, “Coach, I thought I was going to start.” Sometimes that expectation exists because nobody ever defined the role clearly in the first place. When coaches leave roles vague, players fill in the blanks themselves. Clear communication helps prevent confusion before it turns into frustration.
Keep every role simple
A player should be able to explain his job in one sentence. If the role takes several minutes to describe, the message probably needs to be simplified. Good role language is specific:
Pressure the opponent’s best scorer.
Sprint the floor and create early offense.
Attack closeouts instead of settling.
Protect the paint and finish possessions with rebounds.
Simple language gives players something they can carry into practice and games. It also makes corrections easier because everyone understands the standard.
Give players a job instead of a number
Calling someone the “eighth man” explains his place on the depth chart, but it doesn’t explain why he matters. Telling him, “You come in and guard their best scorer,” gives him an identity.
Players can accept smaller roles when those roles have purpose. Defensive energy, rebounding, ball pressure, screening and pace can all become meaningful responsibilities when coaches explain how they help the team.
Use basketball practice games to reinforce decisions
Basketball practice games are a great place to teach roles because players have to make decisions at game speed. Instead of defining someone only as a guard, wing or post, explain what he should do when the action starts. For example:
Attack the closeout.
Make the extra pass.
Sprint the lane in transition.
Get off the ball early against pressure.
Turn down a contested shot for a better one.
Coaches can build competitive games around those decisions. Reward paint touches, extra passes, defensive stops or successful ball-screen coverage so players practice the habits their roles require.
Define roles by decisions
Position labels can help organize a lineup, but they don’t always tell players how to play. Saying someone is a “four” gives him a position, while telling him to attack closeouts and make the next pass gives him a job.
When players know which decisions matter, they can evaluate themselves during practice instead of guessing what the staff wants.
Show players how they can earn more
“Work harder” doesn’t give a player much direction. If someone wants a bigger role, explain what improvement will create that opportunity. A coach might say:
“When you defend the ball screen without getting split, I can keep you on the floor.”
“When you make that corner shot consistently in live reps, I trust you late.”
“When you stop forcing shots and create the next advantage, your role grows.”
Specific targets give players something useful to train toward. A clear goal usually produces better practice habits than frustration ever will.
Build roles gradually
Younger players may need fewer responsibilities at first. Give them one decision to master, then add another when they’re ready.
Basketball practice games make this progression easier because coaches can repeatedly put players into the situations connected to their roles. A young guard might first focus on handling pressure, then add pick-and-roll reads or transition decisions later. This keeps players from becoming overloaded while still giving them a clear path forward.
Coach your best players, too
Stars need defined roles just like everyone else. Your leading scorer may need to move the ball sooner, your point guard may need to stop hunting pull-ups, or your best player may need to set the defensive standard.
Tell them directly and coach them consistently. When the best players receive clear feedback, role accountability becomes part of the team culture.
Revisit roles during the season
Roles change as players improve, injuries happen and rotations shift. A quick check-in can keep players from wondering where they stand.
Even a short comment such as, “You’re still our defensive stopper, and I noticed that closeout Tuesday,” can reinforce a player’s value. Small conversations often prevent bigger problems later.
Clarity builds trust
Most players already have a sense of where they stand. What wears them down is having to guess. They watch substitutions, study reactions and try to read every lineup change. Direct communication removes much of that uncertainty.
Players may not love every role, but they can respect a coach who explains expectations and gives them a path toward more.
Give every player one sentence
Before the first practice, write one sentence describing every player’s job. Use basketball language and focus on decisions instead of labels. Then ask yourself:
Does the player know what his role requires?
Can I show him how that role appears in practice?
Does he know what he must improve to earn more?
If you can’t explain the role clearly, the player probably can’t either. Once roles are defined, basketball practice games become more useful because every possession gives players another chance to practice the decisions their team needs. Clear roles won’t eliminate every difficult conversation, but they can make a season run much more smoothly.
A good basketball individual workout should prepare players for the shots they’ll actually see in games. Defenders won’t politely move their hands out of the way, so guards and wings need to learn how to bring the ball around pressure, reach their shooting pocket and get into a pull-up without wasting time.
One common problem appears when a defender extends a hand near the ball. Many players are comfortable dribbling straight into their normal shooting pocket, but an active defender can interrupt that path with a reach, slap or deflection. Instead, players should practice moving the ball around the defender’s hand and smoothly back into their normal shooting motion.
This workout teaches that skill through a simple progression. Players begin close to the basket, develop the ball path without much movement and gradually add harder dribbles, quicker feet and more game-like pull-ups.
Ball path on a pull-up jumper
Most players naturally bring the basketball through the front of their body when they shoot. They’ll pick up the dribble, move the ball directly toward the shooting pocket and rise into the jumper. However, defenders know where the ball is going, too. A low, extended hand can sit directly in the path between the dribble and the shot.
When that happens, the offensive player needs another route. Instead of carrying the basketball straight through the defender’s hand, move it slightly outside the body before bringing it back toward the shooting shoulder.
The adjustment is small, but the difference can be huge. A few inches of movement can protect the ball while still allowing the shooter to get into a familiar release.
Start your basketball individual workout close to the basket
Begin the basketball individual workout at roughly 15 feet or closer. At this stage, the goal isn’t shooting range because the player first needs to understand the movement. Have a coach or partner stand in front of the shooter with one hand extended.
The player starts with the basketball below the hand, then moves it around the obstacle and directly into the shooting pocket. Work through the movement slowly at first:
Start with the ball below the defender’s extended hand.
Move the basketball around the outside of the hand.
Bring it directly toward the normal shooting pocket.
Rise into the jumper without stopping the ball.
Repeat from both sides of the body.
Smoothness matters more than speed during the first few repetitions. Once the player understands the path, gradually increase the pace.
Avoid the hitch in your shooting motion
Players learning this move often create a pause after getting the ball around the defender. They’ll avoid the hand, bring the basketball to the shooting pocket, stop for a moment and then begin their normal shot. The problem is, this hitch gives the defense time to recover. It can also change the rhythm of the shooter’s release.
Instead, the ball should travel continuously from the dribble into the shot. Think of the entire sequence as one connected action rather than separate movements.
The pattern should feel like dribble, around, pocket and up. As players become more comfortable, the extra movement around the defender should blend into their regular pull-up mechanics.
Add a hard dribble and quicker pickup
Once the basic motion becomes comfortable, begin working from the dribble. Start near the 3-point line and attack toward the coach or partner with one strong bounce. Conduct this at game speed. Players rarely attack defenders with a soft dribble, so they should practice pounding the basketball before quickly transferring it into the shooting motion.
Listen for the sound of the dribble. A strong pound usually helps the player create rhythm and gives the basketball enough energy to return quickly to the hand. From there, keep the pickup compact. The ball shouldn’t swing away from the body or float through a wide loop before reaching the shooting pocket.
Keep the basketball quick and tight
Efficiency is the goal when working around a defender’s hand. The basketball needs to travel far enough outside the defender’s reach without creating unnecessary movement. Picture a defender’s hand occupying the space in front of the shooter’s body. Rather than lifting the basketball directly through that space, the player moves it outside the hand and brings it toward the shoulder.
A useful coaching cue is “quick and tight.” The ball should stay close to the body while moving rapidly from the dribble toward the shooting shoulder. Players can even rehearse this movement without shooting. Pound the basketball, move it around an imaginary hand and bring it directly toward the shoulder before resetting.
Train both hands
A complete basketball individual workout should include repetitions going both directions. Players who can only execute the pickup comfortably with their dominant hand become easier to defend. After working from the right side, switch to the left. Keep the same focus on ball protection, a clean shooting pocket and one continuous motion.
The shooting hand still needs to finish in its normal position. Moving the basketball around the defender shouldn’t cause the player to shoot from the side of the body or alter the release point. Instead, think of the move as changing the route to the shooting pocket. The destination stays the same.
Add outside-inside footwork
After players become comfortable with the ball movement, introduce different footwork. One useful option is an outside-inside stop. When moving right, plant the right foot first and then the left. When attacking left, plant the left foot before bringing the opposite foot into the shot.
The sequence gives players another way to stop quickly while reading a defender. It also teaches them to coordinate their feet with the protected ball pickup. Keep the steps short and sharp. A long lateral step can slow the shot and give the defender more time to react.
Read the defender instead of predetermining the move
This skill becomes especially useful against defenders who play with a hand extended near the dribble. Guards often use that low hand to bother the ball while keeping the other hand available for a contest. Watch what the defender gives you. If the hand drops into the normal shooting path, bring the basketball outside the reach before lifting it into the shot.
Meanwhile, players should learn to recognize when a defender is backing up or preparing to reach. Those reads can create the small window needed for a quick pull-up. The goal isn’t to make the movement exaggerated. Players simply need enough space to keep the defender from touching the ball.
Use a partner to make the drill more realistic
This is an easy drill to add to an individual workout with a teammate, parent or coach. One person rebounds and provides the extended hand while the shooter works through the repetitions. After several shots, switch roles. Players can also change the angle of the hand so the shooter has to react instead of repeating the exact same movement every time.
As the shooter improves, the partner can become more active. A realistic reach or late contest forces the offensive player to read the defense while maintaining good mechanics. However, keep the progression controlled. Players should master the ball path before turning every repetition into a full-speed competition.
Coaching cues for a faster pull-up
Small reminders can keep players focused throughout the workout. Coaches don’t need to overload the shooter with several corrections at once, so choose one or two cues and build from there. Useful cues include:
Pound the dribble.
Keep the ball tight.
Avoid the defender’s hand.
Get directly to the shooting pocket.
Stay in one continuous motion.
Use quick feet.
Bend the knees instead of leaning at the waist.
Keep the pickup close to the body.
Finish with your normal shooting mechanics.
Once one part looks comfortable, add the next detail. Building the movement piece by piece usually produces better results than asking the player to fix everything simultaneously.
How this basketball individual workout translates to games
Great shooters need more than perfect catch-and-shoot mechanics in an empty gym. Games force players to release the ball through traffic, adjust to different defenders and create shots when the ideal shooting path disappears. This basketball individual workout helps connect shooting mechanics with those defensive problems. Players learn how to protect the basketball, shorten their pickup and get into the shot before a defender can react.
Those details become especially valuable for guards who live in the midrange or attack hard closeouts. The quicker a player can turn a strong dribble into a balanced jumper, the harder that player becomes to contain.
Ultimately, the difference between a good shooter and a great one often appears when the shot isn’t perfectly clean. Practice getting the basketball around pressure, into the pocket and up quickly so those difficult game shots start to feel much more familiar.
You don’t have to be the tallest player on the floor to become a great rebounder. Rebounding rewards players who anticipate where the ball is going, initiate contact, understand positioning and consistently pursue missed shots. Those habits can turn an average player into someone a coach trusts for extra possessions, defensive stops and crucial plays around the basket.
For youth basketball players especially, rebounding offers one of the fastest ways to create value. Shooting percentages are relatively low at younger levels, which means missed shots create opportunity after opportunity. Players who learn where those misses are likely to go have a major advantage.
Rebounding creates opportunities
One of the first lessons players should understand is simple: most shots don’t go in. Even at the highest levels of basketball, teams miss plenty of attempts. Youth teams generally miss even more. Every missed shot creates another chance to secure possession, extend an offensive trip or prevent an opponent from getting a second opportunity.
For players searching for a role, rebounding can provide one quickly. A player who consistently chases the basketball, battles for position and finishes possessions becomes difficult for a coach to take off the floor. However, effort alone isn’t enough. Strong rebounders combine hustle with technique and anticipation.
1. Expect the shot to miss
Great rebounders don’t watch shots assuming they’ll fall through the net. They prepare for a miss. As soon as a teammate or opponent releases the basketball, rebounders should begin processing several things:
Where was the shot taken?
Where is my assignment?
Which direction is the rebound likely to travel?
Can I establish position before the ball reaches the rim?
This mindset creates an important head start. Players who wait until the ball hits the rim are reacting. Players who move as the shot goes up are anticipating. Coaches can reinforce this habit during shooting drills by requiring every player to pursue the rebound instead of standing and watching the result.
2. A Great Rebounder makes real contact on the box out
Simply standing between an opponent and the basket doesn’t complete a box out. Players need physical contact to control the opponent’s path. Depending on positioning, that contact might come through the hips, backside or forearm.
Once contact is established, the rebounder should create additional space by moving the opponent away from the ball. A strong defensive rebounding sequence looks something like this:
Locate the offensive player.
Make controlled contact.
Establish inside position.
Move the opponent away from the rebound.
Find the basketball.
Pursue it with two hands.
Young players frequently make the mistake of turning immediately toward the rim. When they do, an offensive player can slip around them and attack the glass. Instead, find the player first, then find the ball.
3. Win the battle with first contact
Rebounding often becomes a positioning contest before it becomes a jumping contest. The player who makes first contact can influence where the opponent moves. On defense, that means finding the offensive rebounder instead of waiting near the basket for contact to arrive. Get to the opponent first and steer the matchup away from the rebounding area.
Offensive rebounders can apply the same principle differently. Rather than allowing a defender to comfortably establish a box out, they should attack the space immediately. Possible techniques include:
Spinning around the defender
Swimming an arm over the defender
Changing direction quickly
Attacking an open rebounding lane
Using legal contact to prevent the defender from controlling the matchup
Either way, passive players usually lose these battles. Rebounding favors players who initiate action.
4. Read the shot to predict the rebound
Where a shot originates can provide clues about where the rebound will land. Longer shots generally create longer rebounds. Meanwhile, attempts close to the basket tend to produce rebounds closer to the rim.
A simple rule players can learn is to expect the rebound to travel roughly half the distance of the original shot. For example, a shot taken from about 20 feet might produce a rebound roughly 10 feet away from the basket. It won’t happen perfectly on every possession, but the concept teaches players to adjust their rebounding position based on shot location.
This becomes especially important as players get older and more perimeter shots enter the offense. Guards shouldn’t automatically retreat when a three-pointer goes up. Likewise, post players shouldn’t assume every rebound will fall directly beneath the basket. Watch the shot. Read the angle. Move to the likely landing area.
5. Learn to anticipate weak-side rebounds
Another important rebounding principle involves shot direction. Rroughly 70% of missed shots travel toward the weak side of the floor. A shot from the left side, for example, will frequently rebound toward the right side at a similar angle. Once players understand this tendency, they can begin moving before the ball reaches the rim. Instead of chasing the rebound after the bounce, they position themselves where the rebound is likely to arrive.
Dennis Rodman became one of basketball’s most famous examples of this skill. His rebounding wasn’t simply a product of athleticism. He studied shots, angles and rotations so he could reach the right spot before many other players recognized where the ball was heading.
Young players don’t need Rodman’s instincts immediately (or his antics ever). However, they can start developing them by paying closer attention during every shooting drill.
What separates a great rebounder?
The best rebounders combine several skills at once. They aren’t merely jumping higher or playing harder. They’re processing the possession earlier than everyone around them.
A great rebounder consistently:
Assumes the shot could miss
Finds an opponent before finding the ball
Makes first contact
Creates space during the box out
Reads the location of the shot
Anticipates the likely rebound angle
Pursues the basketball aggressively
Secures the ball instead of tipping it unnecessarily
Eventually, those actions become habits. Instead of thinking through each step, experienced rebounders begin recognizing situations automatically.
How coaches can teach better rebounding habits
Rebounding instruction shouldn’t appear only during rebounding drills. Coaches can build these habits into regular practices by attaching rebounding responsibilities to shooting, defensive and small-sided drills. For example, coaches can require players to call out their assignment when a shot goes up. They can also award points for successful box outs, offensive rebounds or rebounds secured outside the expected landing area.
Another option is to pause a drill after a missed shot and ask players where they expected the rebound to go. These small adjustments encourage players to think about rebounding rather than treating it as something that happens after the “real” play ends.
Most importantly, coaches should praise the process. A player might execute a perfect box out without securing the rebound because the ball takes an unusual bounce. The technique still deserves recognition.
Rebounding can become a player’s competitive advantage
Every team needs players willing to handle the less glamorous parts of basketball. A player might struggle to create shots or handle the basketball under pressure, but strong rebounding can still earn minutes. One offensive rebound can create another scoring chance. One defensive rebound can finish a strong possession. Over the course of a game, those possessions pile up.
The five principles are straightforward:
Expect shots to miss.
Make real contact when boxing out.
Initiate first contact.
Expect long shots to create longer rebounds.
Anticipate more misses moving toward the weak side.
Learning them doesn’t require a complicated system. Applying them consistently requires concentration, toughness and repetition. Teach players to read the shot, find a body and pursue the basketball, and they’ll start becoming more productive around the rim. More importantly, they’ll develop the instincts that can turn a willing rebounder into a great rebounder.
Teaching shot selection is one of the simplest ways youth basketball coaches can improve both individual decision-making and team offense. Young players naturally want to score, and many hear plenty about points from parents and teammates. However, good basketball requires players to recognize when they have a quality opportunity, when a teammate has something better and when the smartest decision is to keep the ball moving.
For coaches, the challenge is making those decisions easy enough for young players to understand in real time. One useful approach is to classify every scoring opportunity as a great shot, a good shot or a no shot. The language is simple, the feedback can happen immediately, and players gradually learn to evaluate their own choices instead of relying on a coach to make every decision for them.
The Importance of Shot Selection in Youth Basketball
Young players often judge offensive success by one thing: whether they scored. Adults can reinforce the same mindset by asking how many points a player had instead of asking about defense, passing or decision-making. Basketball, of course, works better when five players are working together. Sometimes the right basketball play is taking the shot. Other times, it means making one more pass.
Good shot selection also connects directly to efficient scoring. A player who consistently attempts balanced, open shots from a comfortable range gives the offense a better chance to produce points than a player forcing contested attempts simply because the ball is in his or her hands.
Coaches can start by giving players three easy categories:
Great shot: A high-quality scoring opportunity the player should confidently take.
Good shot: A reasonable attempt, although a better option might exist.
No shot: An attempt the player probably shouldn’t take based on balance, defensive pressure, distance or skill level.
This framework creates a common vocabulary that players can quickly understand during practices and games.
Teaching Shot Selection with the Great Shot, Good Shot, No Shot Method
The key to teaching shot selection is defining each category before expecting players to recognize it. At the youth level, a great shot usually comes when the shooter is balanced, open and comfortably within his or her shooting range. A wide-open layup is one of the clearest examples, especially for younger players who are still developing finishing skills and shooting strength.
A good shot might be an uncontested mid-range attempt that the player can make consistently. Meanwhile, a no shot could include a heavily contested attempt, an off-balance jumper or a three-pointer taken by a player who doesn’t yet have the strength or consistency to shoot comfortably from that distance. The goal is for coaches to give players a practical framework for evaluating what they see.
1. Ask players to explain the decision
One of the most effective parts of this approach happens during live play. During a scrimmage, a coach can stop the action after a questionable shot and ask the team to classify it. Was it a great shot, a good shot or a no shot? Then comes the important question: Why?
Rather than immediately telling players whether they’re correct, ask them to explain their thinking. A player might recognize that the shot was contested. Another might notice the shooter was off balance. Someone else may point out that a teammate had a better opportunity.
Those conversations turn shot selection into something players learn to diagnose themselves. In the podcast discussion, the coach explains that this immediate feedback helped his players begin passing up weaker attempts in favor of teammates who had better looks.
2. Use immediate feedback during scrimmages
Film can be useful for older players, but youth coaches don’t have to wait for a video session to teach better decisions. Scrimmages provide plenty of opportunities. Stop briefly when a teaching moment appears, ask the question, get an explanation and move on.
The process can look like this:
A player takes a questionable shot.
The coach stops play.
Players classify the attempt.
The coach asks why they chose that category.
Players identify factors such as balance, distance, defensive pressure or another open teammate.
Play resumes.
Keep the conversation short. Long lectures can drain the pace from practice, while a quick question keeps players thinking without turning every possession into a classroom discussion. Over time, the terminology becomes part of the team’s basketball vocabulary. Players start recognizing shot quality before the whistle ever blows.
3. Help players learn their shooting range
Distance is another important part of shot selection. Kids usually have a pretty good sense of where they’re comfortable shooting, especially once coaches give them enough repetitions in practice. Coaches can reinforce that awareness through shooting drills, small-sided games and scrimmages.
A player’s usable range should be a distance where he or she can maintain normal mechanics and make a reasonable percentage of attempts. If a player has to heave the ball toward the basket or regularly can’t reach the rim, the shot probably falls outside that player’s current range.
Instead of simply saying, “Don’t shoot threes,” give the player a reason. Explain that developing reliable range takes time. Then help the player build strength, mechanics and confidence until the longer shot becomes a realistic option. This approach keeps the conversation developmental rather than punitive.
Shot Selection should be different for different players
One important piece of teaching shot selection is recognizing that the same attempt won’t always receive the same grade for every player. Players have different skills. One child may comfortably make three-pointers, while another might struggle to reach the rim from the same distance. A strong ball handler may be able to split two defenders and finish under control, but another player attempting the same move could be forcing a low-percentage opportunity.
Coaches shouldn’t pretend those players have identical offensive abilities. Instead, shot selection should reflect what each player can currently do successfully. The podcast specifically emphasizes this type of individual differentiation, describing how a shot can be appropriate for one player while being a poor choice for someone with a different skill set.
This doesn’t mean labeling players or limiting what they can eventually become. It simply means coaching the player who’s standing in front of you right now. As skills improve, the definition of a good or great shot can change with them.
Teach players to look for a better shot
Good shot selection isn’t only about stopping bad shots. Coaches also want players looking for better opportunities. A good shot might be available, but a great shot could be one pass away. For example, a player may catch the ball open for a mid-range jumper while a teammate cuts toward the basket for an uncontested layup. The first attempt isn’t necessarily bad, but recognizing the second opportunity shows better awareness.
As players understand this distinction, passing becomes connected to scoring instead of feeling like the alternative to scoring. Players begin asking themselves:
Am I balanced?
Am I open?
Am I within my range?
Is somebody else more open?
Can we create an even better opportunity?
Those are valuable questions for any young offensive player.
Keep the shot selection system simple
Youth basketball players don’t need a complicated analytics lesson every time they take a jumper. Give them clear categories, explain what each one means and reinforce the concepts consistently.
Coach Steve and Coach Bill in the episode above recommend defining a great shot, good shot and no shot while remaining conscious of each individual player’s abilities. Learning those differences can take time because coaches first have to understand what every player can realistically do.
Once the framework is established, use it regularly during practice. Ask quick questions. Encourage players to explain what they saw. Praise the extra pass when someone gives up a decent opportunity to create a better one. Consistency matters more than complexity.
Teaching shot selection gives youth players a decision-making tool they can carry into every possession. Instead of hearing only “shoot” or “don’t shoot,” they begin understanding why one attempt makes sense and another doesn’t. The great shot, good shot, no shot system gives coaches a simple starting point. Combine it with immediate feedback, individual expectations and plenty of practice repetitions, and players can gradually learn to recognize balance, range, defensive pressure and better opportunities for teammates.
Most importantly, they start making those decisions themselves. Youth coaches want players who can think and react when the game gets fast. Helping them recognize the difference between a possible shot and the best shot is a practical place to start.
The first few minutes of practice can set the tone for everything that follows. Good basketball practice drills should do more than help players loosen up. They should get athletes moving, communicating, thinking and working on skills that matter within your system. As the coaches discuss in this TeachHoops conversation, the best opening drills connect directly to what you value as a coach and what your team needs to improve.
For some teams, that means crisp passing and constant communication. For others, it might mean finishing, footwork or learning to play under control. Either way, you don’t need an elaborate warm-up to start practice well.
Here are three basketball practice drills coaches can use to create a fast, focused and fundamentally sound start to practice.
The Importance of Opening Basketball Practice Drills
Before choosing a drill, start with one simple question: Why are you doing it? The coaches emphasize that practice design should reflect what matters within your program. In this case, passing drills work well early because they can help players become mentally focused while also getting their bodies moving and their hands ready to handle the basketball. Communication can become part of the warm-up as well.
A good opening drill can help players:
Get physically warm without wasting time
Sharpen passing and catching
Communicate with teammates
Improve footwork
Develop game-speed habits
Transition mentally from school or daily life into practice
Reinforce skills your team will use later in practice
Most importantly, your warm-up shouldn’t feel disconnected from basketball. If players are going to spend 10 minutes getting ready, those minutes might as well make them better.
1. Argentina Passing Drill
The Argentina drill is a fast-moving passing exercise built around spacing, movement and communication.
In the version discussed by the coaches, players occupy nine spots around the court, with additional players waiting behind those positions if needed. Players pass in one direction, move across the court and interchange with partners as the basketball continues moving around the formation.
Once players understand the pattern, the drill should move quickly. Ideally, the next pass is arriving at nearly the same time the player reaches the next spot.
How to run the Argentina drill
Arrange players around the court with even spacing.
Begin with the basketball moving consistently in one direction.
After making a pass, players cut across the court to their next position.
Players interchange with their designated partners.
Keep the basketball moving quickly rather than allowing players to stand and wait.
Change directions periodically so players work both sides.
Require players to call out a teammate’s name when passing.
One key coaching point is pace. Players should sprint to the next spot, while the ball moves quickly enough that nobody is waiting around for long. If players repeatedly arrive and stand still before receiving the ball, the passing pace probably needs to increase.
Add communication
The Argentina drill becomes even more useful when players have to communicate throughout it.
Require players to call teammates’ names before making passes. Now they’re running, locating a target, catching, passing and communicating at the same time. The coaches specifically point to the value of creating a loud gym during passing drills because players are forced to process several responsibilities together.
For youth teams or smaller groups, coaches can adjust the spacing and shorten the formation. The exact diagram matters less than maintaining even spacing, movement and a consistent passing rhythm.
2. Star Passing With Finishing
Plenty of coaches have used a star passing drill. However, adding finishing makes the drill much more useful. Players pass across the formation, follow their passes and continue moving through a star-shaped pattern. Instead of ending with passing alone, the final action leads into a finish at the basket. The result combines passing, movement, communication and scoring in one continuous sequence.
Basic setup
The basic rules are simple:
Set players around the court in a star formation.
Pass across the formation.
Follow every pass.
Continue through the pattern until the final player attacks the basket.
Finish at the rim.
Reverse the direction to work both sides of the floor.
Players cutting along the baseline should also move underneath the passing lane so they don’t run directly into a pass. It’s a small detail, but one that can prevent a painful interruption to practice.
Layer new skills into the drill
Once players understand the basic pattern, coaches can add different basketball actions without completely changing the drill. Possible variations include:
Require the ball to stay off the floor
Add a defender at the basket
Finish with the opposite hand
Use a one-dribble pull-up
Add a shot fake and drive
Add a jab step
Finish from a backdoor cut
Reverse the passing direction
Require players to call names on every pass
The coaches’ larger point is worth remembering: good drills can accomplish more than one thing. Instead of running separate drills for passing, communication, finishing and defensive reads, coaches can add layers to a familiar drill based on what the team needs that day. Consequently, players spend less time learning new drill structures and more time developing actual basketball skills.
3. Pivot and Footwork Lines
The third drill is far simpler. Players form four or five lines and work through basic dribbling, jump stops, pivots and passes. It may look elementary compared with more complex basketball practice drills, but the coaches make the case that many high school players still need significant work on basic footwork.
A player might:
Dribble forward.
Come to a controlled jump stop.
Execute a front pivot.
Make a strong pass.
Rotate to the next position.
After several repetitions, coaches can change the footwork. For example, switch from front pivots to reverse pivots. Then change the pivot foot. Later, add another basketball move before the pass.
Why simple footwork still matters
Players can sometimes hide poor footwork with speed or athleticism. Practice exposes those weaknesses quickly. The coaches note that even talented athletes may struggle once they’re required to stop, pivot, protect the basketball and execute another movement in sequence.
Reverse pivots are especially useful because they can help players create space while maintaining control of the basketball. From there, coaches can introduce:
Shot fakes
Step-through moves
Rip-throughs
Ball fakes
One hard dribble before the pass
Different pivot feet
Different passing angles
Those variations keep the drill fresh while preserving the same fundamental structure. Footwork isn’t glamorous, but it shows up everywhere. Players need it to attack pressure, create passing angles, finish around defenders and stay balanced with the basketball.
Don’t Be Afraid to Modify Basketball Practice Drills
One of the best points from the conversation has little to do with any single drill. Coaches should be willing to experiment.
If you have fewer players than a drill normally requires, adjust the spacing. If a passing drill feels too easy, add communication. If players have mastered the basic version, introduce defense, finishing or decision-making.
As the coaches explain, creating drills often starts with an idea, followed by drawing it up, trying it and seeing whether it works. Instead of searching endlessly for the “perfect” drill, build variations around the skills you actually need to teach.
Match the Drill to Your Team’s Needs
No basketball practice drill belongs in your plan simply because another coach uses it. Your roster should drive your choices. If your team struggles with passing under pressure, start with movement and communication. If players don’t finish well with their weak hand, incorporate weak-hand finishes into an established drill. If poor pivots lead to turnovers, spend a few minutes every day cleaning up footwork.
The coaches repeatedly return to the same principle throughout the discussion: understand the why behind the drill and connect it to your system. Before practice, ask yourself:
What skill does this drill improve?
Does the drill connect to how we play?
Are players getting enough repetitions?
Can I add communication or decision-making?
Are players moving at game speed?
Can I make the drill simpler or more challenging depending on the group?
Those questions can turn an ordinary warm-up into useful practice time.
Start Practice with Purpose
The best basketball practice drills don’t have to be complicated. They need to produce purposeful repetitions. The Argentina drill can build passing, pace and communication. Star passing with finishing combines movement with scoring and can easily be expanded with additional skills. Basic pivot lines reinforce footwork that players at every level still need.
More importantly, all three drills can be adjusted to fit your players. Choose what your team needs, coach the details and keep the pace high. When the opening minutes of practice reinforce the same habits you expect during games, the warm-up becomes part of player development instead of something players simply have to get through.
The best basketball workout examples don’t always need cones, complicated drills or an hour in the gym. Sometimes a short, focused workout can help players build good habits while also teaching them how to measure their progress. This simple shooting workout gives players a starting point with mid-range shots, free throws and three-pointers while introducing one of the most important habits in player development: tracking makes and attempts.
For players who are just beginning to organize their individual workouts, the goal isn’t to make things complicated. Start with a few basic shooting categories, work with purpose and record the results. Over time, those numbers can help players and coaches see where improvement is happening and where more work may be needed.
Why Players Should Track Their Basketball Workouts
Players often remember whether they felt like they shot well, but feelings don’t provide much useful information over several weeks or months. Tracking results creates a record players can actually use.
For example, instead of saying, “I shot pretty well today,” a player can record:
How many mid-range shots they attempted
How many mid-range shots they made
How many free throws they attempted and made
How many three-pointers they attempted and made
Those numbers provide a baseline. Then, as players repeat similar workouts, they can compare one session with another. A spreadsheet or printable workout sheet works well because it keeps everything in one place. Players can also share their results with a coach, giving both sides something specific to discuss.
Basketball Workout Examples for a Quick Shooting Session
This workout takes only about four minutes of active shooting, but players should work at a strong pace throughout each segment. They’ll get their own rebounds, reset quickly and continue shooting until the minute ends.
1. Mid-Range Shooting: 1 Minute
Start with one minute of mid-range shots. Players should move around the floor rather than repeatedly shooting from the exact same spot. After every shot:
Get the rebound.
Move into the next shooting position.
Get balanced.
Shoot again.
Keep track of both makes and attempts. Players can also use this portion of the workout to reinforce footwork. Pay attention to how the feet are positioned before the shot and whether the body is balanced when the ball is released.
2. Free Throws: 1 Minute
Next, shoot free throws for one minute. Free throws provide a different challenge because the player isn’t moving from spot to spot. Instead, the focus shifts to consistency.
Players should use the same routine before every attempt and record both their makes and total attempts. As the workout continues over several days or weeks, free-throw percentage becomes an easy number to monitor.
3. Three-Point Shooting: 1 Minute
The third portion of the workout is one minute of three-pointers. Players who are comfortable from behind the three-point line should shoot from several locations while retrieving their own rebounds. Players who don’t yet have consistent three-point range should move closer to the basket.
There’s no benefit to forcing shots from a distance that causes poor mechanics. Choose a range where the player can shoot with proper balance and technique, then gradually work farther away as strength and skill improve.
Footwork matters here too. Players can practice stepping into shots, squaring their shoulders and preparing their feet before the ball arrives.
4. Finish With Free Throws: 1 Minute
End the workout with another minute of free throws. Shooting free throws after several minutes of movement creates a useful challenge. The player may be breathing harder or feeling some fatigue, which makes maintaining a consistent routine even more important.
Again, record makes and attempts. Players can then compare their first free-throw round with the final one.
Sample Basketball Workout Tracking Sheet
A simple workout log might look like this:
Drill
Time
Makes
Attempts
Mid-range shots
1 minute
___
___
Free throws
1 minute
___
___
Three-pointers
1 minute
___
___
Free throws
1 minute
___
___
Players don’t need complicated statistics at first. Recording makes and attempts is enough to begin building the habit. Later, coaches can expand the spreadsheet with shooting percentage, different locations, workout dates or additional drills.
Why Simple Basketball Workout Examples Work
Short workouts are useful because they’re easy to repeat. A player may not always have time for a 45-minute individual session, but finding four or five focused minutes is much more manageable. More importantly, the workout has structure.
Instead of walking into the gym and randomly shooting, the player knows exactly what to do:
Shoot with a purpose.
Work for a set amount of time.
Track makes and attempts.
Record the results.
Repeat the workout later.
The routine creates accountability while giving the player a clear way to measure improvement.
Focus on Quality Before Adding More Drills
As players become more comfortable tracking their workouts, the sessions can become longer and more detailed. Coaches might eventually add timed shooting, specific numbers of makes, ball-handling combinations, game-speed footwork or shooting from designated spots. However, there’s no need to rush.
Players should first learn how to complete a basic workout correctly and record what they did. Once the process becomes familiar, adding another drill or another five minutes is simple. For younger players especially, consistency usually matters more than creating the most complicated workout possible.
Turn Your Workout Into Useful Information
Basketball workout examples like this one provide more than a few minutes of shooting practice. They teach players how to approach individual development with a plan. Shoot the mid-range shots. Track the results. Shoot the free throws. Record them. Do the same from farther out, then finish at the line.
Over time, the spreadsheet begins telling a story. Players can see whether they’re making more shots, improving their percentages or becoming more consistent from workout to workout.
If you want to become a better basketball player, don’t just work. Keep track of the work you’re doing. A simple four-minute workout is an easy place to start.
Some of the most common mistakes youth basketball coaches make come from trying to accomplish too much, too soon. Coaches want to win games, teach systems and prepare players for every situation, but young athletes still need time to build basic skills and basketball awareness. Avoiding the common mistakes youth basketball teams face can help coaches create practices that develop smarter, more versatile players while keeping kids active and engaged.
Youth basketball should build a foundation players can use as they get older. Coaches can still compete and introduce strategy, but development should stay at the center of the plan. A few small changes in how you teach defense, offense, positions and practice structure can make a major difference over the course of a season.
1. Relying Too Much on Zone Defense
Zone defense can be effective in youth basketball, especially against teams that struggle to shoot from outside. Because of that, it can be tempting to sit in a zone for most of the game and force opponents to beat you from the perimeter.
The problem comes when zone becomes the only defense your players know. Young players still need to learn how to guard the ball, move their feet, communicate and understand individual defensive responsibilities. Those skills carry over as the game becomes faster and more advanced.
There’s still a place for zone defense. A coach might use it for certain matchups or change defenses during a game. However, it should be another option in the toolbox rather than the entire defensive identity of a young team.
When teaching defense, spend plenty of time on fundamentals such as:
Staying between the offensive player and the basket
Moving your feet instead of reaching
Helping and recovering
Talking with teammates
Understanding basic defensive positioning
Teaching those habits early gives players a stronger foundation for whatever defensive system they encounter later.
2. Teaching Too Many Offensive Plays
Another one of the common mistakes youth basketball coaches make is creating an offense that requires young players to memorize too much. A youth team probably doesn’t need six different half-court plays with complicated names and multiple options. Every additional play takes practice time to teach, review and correct. Eventually, coaches can spend more time rehearsing plays than developing players.
Instead, choose a simple offensive structure and get good at it. Depending on the age group, you may also need an inbound play, a sideline play and a basic press break. Beyond that, players can benefit more from learning how to recognize what the defense gives them.
Teaching reads helps players understand questions such as:
Is the driving lane open?
Where is the help defender?
Should I pass, pivot or continue toward the basket?
What should I do if the defense takes away our first option?
Those decisions teach players how to think through the game. Over time, a player who understands basketball reads can adjust to different offenses much more easily than one who only knows how to run a collection of memorized plays.
3. Specializing Players by Position Too Early
The tallest kid on a fourth-grade team often becomes the center. The best dribbler becomes the point guard. Once those labels stick, players may spend years practicing only the skills connected to one position.
Kids grow and change, though. The tallest player in fifth grade might not be the tallest player in high school. A young post player may eventually need guard skills, while today’s point guard could develop into a wing. Youth coaches can help by giving players opportunities to do more.
Let taller players handle the ball. Let guards learn to post up. Give different players chances to rebound, pass, screen and finish around the basket. You can still use players where they’re most effective during games while giving them broader opportunities during practices.
Position flexibility helps create more complete players. It also keeps coaches from making long-term decisions based on a child’s current size or skill set.
4. Letting Players Stand Around During Practice
Long lines can quietly eat up a youth basketball practice. A coach might design a good drill, explain it clearly and still lose valuable development time because four players are waiting while one player gets a repetition. Besides reducing touches, standing around gives young athletes plenty of opportunities to lose focus, talk or mess with teammates.
One coach in the TeachHoops discussion above used tracking technology to measure movement during practice. Even though he believed his team rarely stood still, the data showed far more inactive time than expected during a 90-minute session.
The lesson is useful for any youth coach: look at practice from the player’s perspective.
If a drill has eight players and only one is moving, ask whether you can split the group. If you have several baskets available, spread players out. When possible, design drills that include movement between repetitions instead of having kids wait in a long line.
Smaller groups can produce:
More repetitions
More ball touches
Better conditioning
Less downtime
Greater concentration
More opportunities for coaching feedback
You don’t need every player moving every second. Water breaks, instruction and scrimmage substitutions naturally create some downtime. Still, reducing unnecessary standing can make a 60- or 90-minute practice much more productive.
How to Avoid Common Mistakes Youth Basketball Coaches Make
Improving a youth basketball program doesn’t require rebuilding everything at once. Start by looking at how much practice time goes toward actual player development. Ask yourself a few simple questions:
Are we teaching individual defense, or are we hiding behind a zone?
Are players learning basketball decisions, or mainly memorizing plays?
Are players developing several skills and positions?
How often are kids waiting in lines during practice?
The answers can help you decide where to make changes. In many cases, simplifying your approach creates more time for the skills young players actually need.
Keep Youth Basketball Focused on Development
Winning matters to players and coaches, and competition is part of what makes basketball fun. Still, youth basketball gives coaches an opportunity to prepare players for much more than the next weekend tournament.
Avoiding common mistakes youth basketball coaches make means choosing development over shortcuts when possible. Teach players to defend individually, read the floor, develop a complete skill set and stay active during practice. Those habits can help them now while giving them a much better basketball base for the years ahead.
The best youth practices don’t have to be complicated. Keep teaching simple, keep players moving and give them plenty of chances to think, compete and improve.
Youth basketball character lessons can be some of the most valuable things a coach teaches during a season. Players may forget a particular play, final score or weekend tournament years from now, but lessons about responsibility, resilience, teamwork and respect can stay with them long after they leave the gym.
Basketball creates those teaching opportunities almost every day. A missed shot, tough loss, disagreement with a teammate or bad call from an official can become more than a frustrating moment when a coach helps players understand how the experience connects to life outside the game.
Why Youth Basketball Character Lessons Matter
Coaches spend plenty of time thinking about shooting, defense, ballhandling and game strategy. However, youth sports also give kids a place to learn how to respond when things don’t go their way.
During the Coaching Youth Hoops discussion, the coaches emphasized that the life lessons taught through sports can be even more important than the sport itself. They also stressed the importance of helping players connect basketball experiences with situations they’ll encounter later in life.
A youth basketball season naturally creates chances to teach players how to deal with adversity, work with different personalities and accept responsibility. Coaches don’t need to manufacture those moments because practices and games provide plenty of them.
The key is recognizing the opportunity when it appears and helping players understand the bigger lesson.
7 Youth Basketball Character Lessons
1. Help Players Learn From Failure
Failure is uncomfortable, especially for young athletes who care deeply about their performance. Missing a game-winning shot, getting cut from a team or losing an important game can feel huge in the moment.
Coaches can help players view those experiences differently without minimizing their disappointment. Instead of rushing past a difficult result, talk about what the player can learn and how the experience can influence what happens next. Useful questions include:
What did you learn from this?
What can you control next time?
What could you do differently?
How will you respond at the next practice?
The transcript uses the example of a player who wanted to play college basketball but didn’t make the team despite multiple attempts. The disappointment eventually opened the door to other experiences and opportunities, illustrating how failure can lead to growth in ways an athlete may not immediately recognize.
Players don’t need to enjoy failure. They do need to learn that one setback doesn’t have to determine what happens next.
2. Teach Players How to Win and Lose as a Team
Young athletes often place too much weight on a single play. A player who misses the last shot may leave the court thinking, “I lost the game.”
A coach can help put the moment in perspective. One missed shot rarely tells the story of an entire game, especially when a team may have missed layups, committed turnovers or made defensive mistakes during the previous three quarters.
The Coaching Youth Hoops discussion highlights the importance of winning and losing as one group. A missed game-winner belongs within the context of everything the team did before the final possession, not solely on the shoulders of one player. Coaches can reinforce this mindset by making a few expectations clear:
Celebrate teammates when things go well.
Accept responsibility when you make a mistake.
Don’t blame one player for a loss.
Learn from mistakes together.
Move forward as a team.
Players still need accountability, but accountability works better when it doesn’t turn into blame.
3. Make Responsibility Part of the Routine
Some of the best youth basketball character lessons come from ordinary habits rather than dramatic moments. Being on time, bringing the right equipment and arriving ready to practice can all teach responsibility.
The transcript discusses punctuality as an example. Showing up on time wasn’t simply about following a team rule. It was connected to responsibility, preparation and learning to manage yourself.
Coaches can gradually give players more ownership as they get older. Depending on the age group, players might be expected to:
Know when practices and games start.
Bring the equipment they need.
Communicate when they’ll be late.
Complete assigned team responsibilities.
Help with setup or cleanup.
These expectations seem small, but small habits can build into bigger ones. Players begin to understand that other people are depending on them to be prepared.
4. Leave the Gym Better Than You Found It
Few character lessons are easier to reinforce than leaving a place better than you found it. Players can pick up bottles, throw away wrappers and clean the bench area before leaving the gym.
The lesson becomes even more meaningful when the trash doesn’t belong to them. The coaches discuss asking young players to pick something up even when their first response is, “It’s not mine.”
The goal isn’t simply a cleaner gym. Coaches are teaching players to notice what needs to be done and help without worrying about whether someone else technically caused the problem. A simple team routine can reinforce the idea:
Check the bench before leaving.
Pick up bottles and wrappers.
Look around the court for anything left behind.
Help teammates finish the job.
Leave the space cleaner than it was when practice started.
Those habits can carry into school, home and eventually the workplace.
5. Teach Players to Work With Different Personalities
Every team includes different personalities. Some players become close friends, while others might have very little in common once they leave the gym.
Basketball gives young athletes a chance to learn that successful teamwork doesn’t require everyone to be best friends. Players still need to communicate, cooperate and respect one another when they’re working toward the same goal.
The coaches connect this lesson directly to adult life. Players will eventually work with classmates, coworkers and other people they don’t necessarily like, so learning how to function as part of a group has value far beyond basketball.
Coaches can encourage players to:
Communicate respectfully.
Support teammates after mistakes.
Solve minor disagreements.
Separate personal feelings from team responsibilities.
Focus on what helps the team succeed.
Learning to work with different people is a practical skill, and a basketball team offers plenty of practice.
6. Show Players How to Handle Difficult People
Officials will make calls players disagree with. Coaches will make decisions players don’t like, and teammates will occasionally frustrate one another.
Parents and coaches may want to remove every difficult situation, but some normal frustrations can become valuable learning opportunities. The Coaching Youth Hoops discussion connects difficult coaches and other challenging relationships with situations players may eventually face with teachers, bosses and other adults.
Unsafe or abusive behavior requires a different response, of course. Normal disagreements, personality clashes and disappointment can instead give young athletes practice managing their emotions and deciding how to respond.
Those moments can help players develop patience and perspective instead of expecting every uncomfortable situation to disappear.
7. Teach Players to Control Their Response
One character lesson shared by a coach in the Coaching Youth Hoops community was simple: ignore the refs and play the game. Players won’t agree with every whistle, but arguing with an official rarely improves the next possession.
The larger lesson is learning to focus on controllable actions. Players can’t control every call, an opponent’s behavior or every coaching decision, but they can control their effort, attitude, communication and response.
Coaches can reinforce this approach with short reminders during games and practices. A simple “next play” after a turnover or “what can we fix?” during a timeout redirects attention toward something useful.
Over time, those reminders can help athletes become more composed when frustration hits.
How to Plan Youth Basketball Character Lessons Before the Season
Character development shouldn’t depend entirely on whatever happens during a game. Coaches can decide before the season which values they want to reinforce while still leaving room for unexpected teaching moments.
The podcast recommends identifying three or four lessons you definitely want players to learn. Coaches can then remain alert for situations during the season that create additional opportunities for character development.
Your list might include:
How to handle winning
How to respond to losing
How to communicate with adults
How to treat teammates
How to respond to officials
How to accept responsibility
How to deal with disagreement
A short list makes the message easier to repeat. Players are also more likely to remember expectations when coaches reinforce the same ideas throughout the season.
Talk to Parents About Your Expectations
Parents should understand what coaches are trying to teach. Clear communication at the beginning of the season can help families see why certain expectations matter.
A coach might explain that players will be expected to arrive prepared, treat teammates respectfully, help clean the bench and respond appropriately after mistakes. Those expectations become easier to support when parents know the reasoning behind them.
The transcript also recommends talking with parents about the values a coach intends to emphasize. Doing so helps establish expectations early and gives families a clearer picture of the type of team environment the coach wants to create.
Consistency between coaches and parents can make those messages stronger. Kids benefit when the adults around them reinforce similar expectations.
Character Development Can Fit Into Practice
Youth basketball coaches rarely feel like they have extra practice time. There’s always another skill, offensive concept or defensive rotation that could use five more minutes.
Character development doesn’t require a separate 30-minute block. Coaches can build it into the normal flow of practice by noticing small moments and responding to them.
For example, coaches can:
Praise a player who helps a teammate.
Correct negative body language.
Ask players to clean the bench area.
Discuss how the team handled a recent loss.
Recognize players who arrive prepared.
Reinforce respectful communication.
Coaching Youth Hoops incorporates life lessons into its practice-plan resources because those lessons can be part of coaching rather than something added after basketball instruction is finished.
A few minutes used well can have an impact that lasts much longer than another drill.
Youth Basketball Can Teach Lessons That Last
Winning matters, and young athletes should learn how to compete. Coaches should still teach fundamentals, demand effort and help players improve as much as possible.
The bigger opportunity is using basketball to prepare kids for situations they’ll face away from the court. Youth basketball character lessons can teach players how to handle failure, accept responsibility, work with different personalities, control their reactions and contribute to a team.
A coach may spend only one season with a player, but the habits built during those months can continue long after the final game. Helping kids become better players is worthwhile, while helping them become more responsible, resilient and respectful people can make the season mean even more.
It’s 4:47 p.m. Practice starts at 6, but one parent is already calculating when to leave, who needs a ride, whether there’s time to eat, what still needs to be packed and how pickup will work later. This is the invisible schedule, the family plan running behind every practice, game and tournament on the team calendar.
Every team has a schedule. Every sports family runs another one behind it. The official schedule tells you the basics: what’s happening, where it’s happening and when it starts. Useful information, certainly.
The invisible schedule is the family plan one parent builds around the official team schedule so everyone can show up. It includes all the decisions that usually don’t appear in the team app or calendar:
When everyone needs to leave
Who’s driving and picking up
What the player needs to bring
When dinner needs to happen
How siblings’ activities fit into the evening
Whether work schedules need to change
Who needs to know the plan
What needs to change if the team schedule changes
Individually, none of these decisions seems especially complicated. Put them together across practices, games, tournaments and multiple kids, though, and they become a second schedule. Most families just don’t call it one.
The team schedule is only the starting point
Consider a typical Tuesday practice. The team calendar says:
Practice
6 p.m.
Field 3
For the coach, those details define the event. For the family, they begin a chain of decisions.
If practice starts at 6, maybe the player needs to arrive at 5:45. If the drive takes 25 minutes, the car needs to leave by 5:20. Before then, someone has to eat, change clothes, find a water bottle and remember the equipment sitting in the garage. Meanwhile, a sibling may need to be picked up somewhere else at 6:30.
Suddenly, a simple three-line calendar entry has become transportation, timing, food, gear and family coordination. The team schedule contains the event, but the family still has to build the plan.
One schedule change can alter an entire evening
The invisible schedule becomes even easier to see when something changes. Suppose Tuesday’s 6 p.m. practice gets moved to 5:30. On the team calendar, someone changes one number. For the family, the ripple effect can be much larger.
Now someone may need to:
Leave work earlier.
Change the carpool.
Move dinner.
Find another ride for a sibling.
Tell a spouse or caregiver about the new plan.
Get the player ready sooner.
Update pickup arrangements.
A 30-minute change can affect several hours of family logistics. Coaches aren’t trying to create chaos when schedules change. Weather happens. Fields become unavailable. Tournament times move. Opponents cancel.
Still, seeing the family impact matters. Earlier, clearer communication gives parents more time to rebuild the plan behind the event.
Why one parent becomes the family scheduling system
In many sports families, one person gradually becomes the calendar keeper. There’s rarely an official conversation about it. One parent simply starts keeping track of the details and, before long, everyone relies on that person for answers.
“What time do we need to leave?”
“Who’s picking her up?”
“Are we free Saturday?”
“Where’s the game again?”
The information may technically be available to everyone. Yet one parent still knows how all the pieces fit together. That parent becomes the family’s scheduler, messenger and source of truth.
Meanwhile, much of the work stays invisible because the final result looks simple. The player arrives at practice with the uniform packed. A ride shows up. Everyone gets where they’re supposed to go. Behind that smooth arrival was a series of small decisions somebody had to make.
Shared calendar doesn’t always mean shared planning
Technology has made youth sports information easier to distribute. Team apps, calendar feeds, text alerts and notifications can put the same schedule in everyone’s hands. However, receiving the same information isn’t the same as sharing the work required to act on it.
A calendar notification can tell four family members that Saturday’s game starts at 9 a.m. It doesn’t necessarily decide:
Who’s driving
When everyone needs to wake up
What time the family needs to leave
Whether another child has a conflicting event
What the player needs to pack
Who handles pickup afterward
Those decisions still have to happen somewhere. Usually, they happen in one parent’s head.
3 questions that Make the Invisible Schedule visible
Take the next youth sports event on your family calendar and look beyond the start time.
Ask three questions.
What needs to happen before we leave?
Think about meals, homework, uniforms, equipment, travel time and anything else competing for attention.
Who needs to do what?
Consider driving, pickup, carpools, siblings, work schedules and anyone else who needs to be part of the plan.
What happens if the event changes?
Move the start time by an hour. Change the location. Imagine practice running late. Then count how many other decisions need to change. That’s when the schedule behind the schedule becomes much easier to see.
Why the Invisible Schedule matters
Parents can easily look at this constant coordination and decide they simply need to be more organized. Maybe another calendar would help, or more reminders would solve it. Perhaps everyone just needs to check the team app more often.
Those tools can certainly help, but they don’t change the basic problem. Posting a sports event delivers information. A family still needs to turn that information into a workable plan.
Recognizing the invisible schedule changes the way we look at youth sports coordination. Parents can see how much planning actually happens behind each event. Coaches and team managers can better understand why a seemingly small change may have a much larger effect at home.
More importantly, it gives us a better question to ask. Instead of stopping at, “Did everyone get the schedule?” we can start asking, “Does the family have what it needs to make this event work?”
That’s a much better finish line.
Sammi is ready to make the Invisible Schedule more visible
Sammi is being built for the sports parent who’s tired of checking team apps, copying games into the family calendar, catching schedule changes and reminding everyone where they need to be. It connects youth sports schedules with the family calendar you already use, watches for changes and helps keep everyone informed without adding another calendar to manage.
Sammi launches in winter 2026. Parents and coaches can join the early-access list now at HeySammi.com to save a spot and learn more about what’s coming.
Good youth shooting drills should help players improve their form, extend their range and handle a little pressure. The four-round shooting ladder covers all three areas while giving coaches a simple way to track progress. Players work from close-range form shots to jumpers and three-pointers across five spots on the floor.
How the Four-Round Shooting Ladder Works
Set up five shooting spots around the basket. Each spot serves as the starting point for a separate ladder, with players attempting up to five shots as they move farther from the hoop.
The progression looks like this:
One-hand form shot without the guide hand
Close-range form shot
Short jump shot
Longer two-point jump shot
Three-point attempt
A player must make each shot to continue climbing the ladder. After a miss, the player stops at the current spot and moves to the next shooting location.
Coaches can adjust the first two shots based on age and ability. Younger players may need two close-range form shots before backing up. More advanced players can begin moving into jump shots sooner.
Adding Accountability to Youth Shooting Drills
Players complete the full circuit four times, which is why the activity is called the four-round shooting drill. Each round includes five possible makes from five spots, creating 25 possible makes per round and 100 points across the entire workout.
Keeping score adds focus without making the drill too complicated. Players can record their totals after each round and try to improve during the next workout. Coaches can also track scores over several weeks to measure development.
Progress becomes easy to spot. A player who once struggled to reach the fourth shot may eventually complete several ladders in one session.
Challenge Advanced Shooters with Perfect Shots
Once players become comfortable with the basic drill, increase the difficulty by requiring perfect form shots. The first one or two attempts must go through the basket without touching the rim.
This small adjustment forces players to concentrate on balance, release and follow-through. Clean makes also provide immediate feedback. A shot that consistently hits the side or back of the rim may reveal an issue with alignment or touch.
Coaches should introduce this challenge gradually. Young players still learning proper mechanics need repetition and encouragement before tighter scoring standards are added.
Why This Drill Helps Young Players
Many Youth shooting drills focus only on the number of makes. The four-round ladder also teaches players to build their shots from the ground up.
Starting close to the basket reinforces proper mechanics. Moving backward tests whether players can maintain those mechanics as distance increases. Meanwhile, the make-to-advance format creates pressure and rewards consistency.
The drill also keeps players from rushing through careless repetitions. Every attempt matters because one miss ends the ladder at that spot.
Coaching Tips for the Four-Round Ladder
Watch the player’s feet, balance and follow-through throughout the drill. Players often change their mechanics as they move farther from the basket, especially when they lack the strength to shoot comfortably from long range.
Adjust the final shooting distance when necessary. Younger players shouldn’t sacrifice form just to reach the three-point line. Move the final spot closer until they can shoot with control and confidence.
Finally, encourage players to compete against their previous score instead of comparing themselves with teammates. Personal progress keeps the drill positive while still providing plenty of productive pressure.
Make Every Shot Count
The four-round ladder gives coaches a structured shooting workout that can fit into individual training, small-group stations or full-team practices. Players develop form, range and focus while coaches gain a clear scoring system for measuring improvement.
Add this activity to your rotation of Youth shooting drills and keep a record of each player’s score. With consistent practice, clean mechanics and a little friendly competition, young shooters can build better habits from the basket out.
Teaching basketball shot selection can be one of the toughest jobs for a youth coach. Young players often want to shoot as soon as they touch the ball, especially when they get behind the three-point line. Meanwhile, parents in the stands may be yelling for them to shoot even when a better option is available.
Players need a simple way to understand when to shoot, when to pass and when to keep the possession moving. The “good shot, great shot, no shot” method gives coaches an easy system they can use during practices, scrimmages and games.
Why Shot Selection Matters in Youth Basketball
Most young players judge their performance by how many points they score. Parents often reinforce the same idea by asking, “How many points did you have?” before asking about defense, passing or decision-making.
Scoring matters, but basketball remains a team game. A player who passes up a difficult attempt to create an open layup for a teammate has made a winning play, even if the box score does not show it.
Good shot selection also helps teams score more efficiently. Instead of settling for contested jumpers, players begin looking for open layups, balanced shots and teammates in better positions.
Coaches should connect shot selection to team success rather than making it sound like a punishment. The goal is not to stop players from shooting. The goal is to help them recognize the best available opportunity.
Teaching Basketball Shot Selection with 3 Simple Categories:
The good shot, great shot, no shot system works because young players can understand it quickly.
1. Great Shot
A great shot is the best option available during the possession. For most youth teams, great shots include:
An open layup
A shot close to the basket with no defender nearby
An uncontested attempt from a player’s comfortable range
A shot taken while the player is balanced and under control
An open attempt created by an extra pass
At the third-, fourth- and fifth-grade levels, an open layup should almost always be considered a great shot. Coaches should encourage players to attack the basket and create high-percentage opportunities before relying heavily on outside shots.
2. Good Shot
A good shot is a reasonable attempt, even if it is not the best possible option. Examples may include:
An open midrange jumper
A controlled drive by a capable ball handler
A three-pointer taken by a player who has demonstrated that range
A balanced shot taken within the flow of the offense
The difference between a good shot and a great shot often depends on what else was available. An open midrange jumper may be good, but passing to a teammate standing alone under the basket would create a great shot.
3. No Shot
A no shot is an attempt that should not be taken in that situation. Common examples include:
A heavily contested jumper
A shot taken while falling away or off balance
A three-pointer from outside the player’s reliable range
A rushed attempt early in the possession
A difficult shot when a teammate is wide open
A drive into multiple defenders by a player who cannot control the ball in traffic
Labeling an attempt a no shot should not embarrass the player. Coaches should explain why the attempt was poor and help the player identify a better option.
Use Scrimmages to Provide Immediate Feedback
Live scrimmages offer one of the best opportunities for teaching basketball shot selection. When a questionable attempt occurs, stop the action briefly and ask the players to classify it: “Was that a good shot, a great shot or a no shot?”
Let the players answer before giving your opinion. Follow up by asking why they chose that category. A player might explain that the shot was contested, outside their range or taken while off balance. Another player might notice that a teammate was open near the basket.
This process encourages players to think through the possession rather than simply obeying a coach’s command. They begin learning how to evaluate spacing, balance, defensive pressure and available passing options.
Immediate feedback also helps connect the lesson to the exact moment it happened. Players do not have to remember a possession from 20 minutes earlier. They can see the floor, recognize the mistake and try a better decision on the next trip.
Coaches should keep these stoppages short. Pause, ask the question, get an explanation and resume play. Long lectures can disrupt the pace of practice and cause players to lose interest.
Help Players Learn Their Shooting Range
A major part of shot selection involves understanding personal range. Players usually have a general idea of where they can shoot comfortably, but practice results should confirm it. A player who consistently struggles to reach the rim from the three-point line is not ready to take that shot during a game.
Coaches can identify range through shooting drills, small-sided games and scrimmages. Look for attempts where the player can maintain normal mechanics without pushing the ball from the hip or changing the release.
Range will vary from player to player. One athlete may be ready to shoot open threes, while another should remain closer to the basket. Both players can still contribute to the offense.
Shot selection should reflect current ability, not where the player hopes to shoot someday.
Shot Selection should be Different for Each Player
Coaches should avoid creating one rigid shooting rule for the entire roster. A skilled guard may be able to split two defenders and finish at the basket. The same drive might be a poor choice for a player who struggles to control the ball in traffic.
One player may be capable of making an open three-pointer. Another may provide more value by cutting, screening, rebounding or attacking from a shorter distance.
Players sometimes notice these differences and ask why a teammate can take a shot they are discouraged from attempting. Use those moments to explain that every player has different strengths.
The message should remain positive: “This is where your game is right now. Keep working, and your options will grow.”
Individual standards are not unfair. They are part of helping each player make decisions that fit their current skill level.
Review Shot Selection on Film
Older teams can reinforce the same concepts through film study. Pause the video before a shot and ask players to examine the possession. Was the shooter open? Were they balanced? Was the attempt within their range? Did another player have a better opportunity?
Film allows players to see passing lanes and defensive positioning that may have been difficult to recognize during live action. It also gives the coach a chance to praise players who passed up a decent shot to create a better one.
Youth coaches without regular access to game film can still use short practice clips recorded on a phone or tablet. Even a few possessions can lead to a useful conversation.
Make Better Shots Part of the Team Culture
Teaching basketball shot selection works best when it becomes part of the team’s everyday language. Use the same terms during drills, scrimmages, film sessions and games. Praise players for creating great shots, not only for making baskets. Recognize the extra pass, the controlled drive and the decision to avoid a contested attempt.
Players will still make mistakes. They will take rushed shots, force drives and occasionally listen to someone in the stands yelling, “Shoot!”
Consistent feedback will gradually change those habits. Players begin passing out of difficult situations, finding open teammates and understanding where they are most effective.
The improvement may not happen in one practice, but the good shot, great shot, no shot method gives players a clear starting point. Keep the definitions simple, adjust them for individual ability and provide feedback while the decision is still fresh.
Better shot selection leads to more efficient offense, improved teamwork and smarter basketball players.
The basketball 3 minutes shooting drill is a simple way to combine perimeter shooting, conditioning and mental toughness. Players move around the three-point line, track their makes and try to beat their previous score before time expires.
This drill works especially well at the end of an individual workout. By that point, the player is already tired and must focus on footwork, balance and shooting mechanics while dealing with fatigue.
How to Set Up the Drill
A player can complete the drill alone or with a rebounder.
Start in either corner and choose five to eight shooting spots around the three-point arc. A basic five-spot setup includes:
Left corner
Left wing
Top of the key
Right wing
Right corner
Set the clock for three minutes. The player must make a shot from each location before advancing to the next spot.
After reaching the opposite corner, the player turns around and shoots back through the same locations. The drill continues until the three minutes are over.
Basketball 3 Minutes Shooting Drill Without a Rebounder
When players are working alone, they must retrieve every rebound before moving to the next shot. The direction of the rebound can affect where the player takes the next attempt. A player may stay in the same corner if the ball bounces directly back or move toward the next spot if the rebound carries across the floor.
Coaches do not need to overcorrect this part of the drill. The main goal is to keep the player moving, shooting and competing against the clock.
Chasing rebounds also adds a conditioning element. Players must sprint after missed shots, get their feet organized and prepare to shoot again without a long break.
Using a Rebounder
With a rebounder, coaches can expand the drill to seven or eight locations. Extra spots can be added between the corners, wings and top of the key. The rebounder should deliver accurate passes that allow the shooter to work on game-ready footwork.
The shooter must make a basket before leaving each spot. This keeps players from rushing through difficult areas or avoiding locations where they are less comfortable.
A rebounder also increases the number of shots a player can take during the three-minute period.
Track Makes Instead of Attempts
The player should count total makes during the drill. There is no need to track every attempt. Recording makes provides a clear score that can be compared from one workout to the next. Players can write the number in a notebook, enter it into a phone or place it on a team shooting chart.
The first score creates a baseline. Future workouts give the player a chance to match or beat that number.
Progress may not happen every day, especially when the drill comes at the end of a difficult workout. Tracking results over several weeks gives coaches and players a better picture of shooting improvement.
Compete Against the Clock
The final 20 or 30 seconds can turn the drill into a pressure situation. A player may need two makes to complete another trip around the arc. The clock forces the shooter to move quickly without losing control of the shot.
Players should know exactly what they need to accomplish before time runs out. A clear target helps develop the concentration needed during late-game possessions.
The drill can also become competitive when several players complete it in the same gym. Each player keeps an individual score while watching what teammates are doing on nearby baskets.
Coaching Points
Watch for consistent footwork as the player moves from one location to the next. The feet should be set before the shot begins, even when the player is tired. Players should also maintain a balanced base, keep their eyes on the rim and hold their follow-through.
Fatigue can cause shooters to drift, rush their release or rely too heavily on their arms. Encourage players to use their legs and maintain the same shooting form they had at the beginning of the workout.
Effort between shots matters as well. Players should move quickly after rebounds rather than walking back to the three-point line.
Finish With Free Throws
After the three-minute drill, have the player shoot free throws while tired. This creates a game-like situation because free throws often come after a sprint, physical contact or a long possession. The player must slow down, control breathing and repeat a consistent routine.
Coaches can require a certain number of makes before the workout ends. Players may also shoot two free throws and record the result as part of their daily shooting chart.
Build the Drill Into Your Workouts
The basketball 3 minutes shooting drill can be used during individual workouts, team practices or offseason shooting sessions. Run it once at the end of a workout or complete multiple rounds with a short break between each one. Coaches can also change the shooting locations based on a player’s position or offensive role.
Guards may focus on three-point shots from all five spots. Post players can use short corners, elbows and trail positions. Younger players can move the locations inside the arc until they develop enough strength to shoot with proper form.
The format stays the same: make the shot, move to the next spot, track the score and compete for three minutes.
Final Thoughts
A productive shooting drill should give players a goal they can measure. The basketball 3 minutes shooting drill does exactly that while also improving conditioning, footwork and concentration.
Record each score and encourage players to compete against their best performance. Over time, the numbers will show whether the extra shooting work is paying off.
A strong player development youth basketball program should help young athletes improve without taking the fun out of the game. Winning matters, but youth coaches also need to develop confidence, decision-making, communication and a lasting interest in basketball.
The best youth programs build strong foundations instead of chasing immediate results.
Don’t be a player’s last coach
Young players are still figuring out which sports they enjoy. Coaches working with athletes under 13 should never create an experience that causes a child to quit basketball for good.
Practices should be challenging, but they should also be positive and engaging. A player who enjoys basketball will play more often. More playing time leads to more repetition, better skills and greater confidence.
Even when a child eventually chooses another sport, a positive basketball experience leaves the door open for a return.
Teach more than basketball skills
Dribbling, passing, shooting and defense are important, but youth basketball can also teach skills that transfer to everyday life. Players can learn:
Confidence and composure
Communication and leadership
Problem-solving and decision-making
Persistence and personal responsibility
Balance, coordination and agility
Coaches should ask whether practices are helping players grow as people as well as basketball players.
Keep players active during practice
Young athletes often become interested in basketball because the game is fast and exciting. Long lines, extended speeches and repetitive drills can quickly drain that excitement.
Coaches should limit standing around and give players frequent opportunities to touch the ball. Small-sided games such as 1-on-1, 2-on-2 and 3-on-3 are especially useful because every player must participate. These games help players improve spacing, passing, defense and decision-making in realistic situations.
Coaches can also adjust the rules to emphasize a skill. They might require a paint touch before a shot, limit the number of dribbles or award extra points for offensive rebounds.
Make mistakes part of development
Players need to make mistakes to improve. A player who never loses control during a dribbling drill may not be moving fast enough. A player who always chooses the safest pass may never learn how to create scoring opportunities.
Coaches should separate careless mistakes from productive ones. Productive mistakes happen when players try a new skill, make an aggressive decision or push beyond their comfort zone.
Correct the mistake without embarrassing the player. Give one clear teaching point and allow another attempt.
Fearful players avoid mistakes. Confident players learn from them.
Give players a voice
Young athletes are more invested when they have some control over their experience. Coaches can allow players to choose between two drills, select teams for a competition or help create team standards. Older players can also take part in discussions about communication, effort and accountability.
Small choices build ownership without removing structure or discipline.
Show players their progress
Development looks different for every athlete. One player may need better ball control while another needs confidence or improved coordination. Specific feedback helps players recognize improvement.
Instead of saying, “Good job,” a coach might say:
“You kept your eyes up while dribbling.”
“You made the right pass when the defense helped.”
“You stayed in your stance for the entire possession.”
Coaches should also give players one clear area to work on next. Too much information can overwhelm young athletes and slow their progress.
Plan practices with purpose
Every practice should have one or two main areas of emphasis. A coach might focus on rebounding, transition defense or attacking closeouts. Activities should connect to those goals.
Using familiar drills and shared terminology also helps practices move faster. Players shouldn’t need a full explanation every time the team repeats an activity.
Coaches should protect the pace of practice by keeping instructions short and allowing players to stay active. A useful goal is for athletes to spend most of practice playing while coaches provide brief corrections as needed.
Develop the coaches
Player development depends heavily on coach development.
Youth programs should provide coaches with guidance on practice planning, communication, age-appropriate instruction and small-sided games. New coaches also benefit from mentoring and feedback from experienced staff members.
Clear communication can prevent many common problems between coaches and parents. Before the season, coaches should explain:
Attendance expectations
Playing-time philosophy
Practice and travel schedules
Team values
Communication policies
Individual and team development goals
Parents care about their children and want to understand how decisions are made. Regular communication builds trust, even when everyone doesn’t agree.
Build the roots first
Youth basketball development takes time. Improvement may not always show up immediately in the standings or on the scoreboard.
Coaches need to create an environment where players feel safe, challenged and excited to return. When athletes enjoy practice, receive meaningful feedback and learn through competition, long-term growth becomes more likely.
Build the roots first. The results will have a better chance to follow.
The best youth basketball shooting drills should do more than keep players busy. They should create game-like movement, force players to focus and give coaches a clear way to track progress.
Good shooting drills usually include three things: lots of reps, some level of competition and shots that connect to what a team actually runs in games. A player standing still with the ball already in their hands might get shots up, but that doesn’t always match what happens on the floor.
These drills can work for youth, middle school, high school or advanced teams with a few simple adjustments. Coaches can change the distance, scoring, time limit or pressure level based on age and skill.
3-2-1 partner shooting drill
The 3-2-1 drill is a simple partner shooting drill that gives players movement, scoring and repetition.
Here’s how it works:
The shooter starts without the ball.
A partner passes to the shooter for a 3-point attempt.
After the shot, the shooter moves inside the arc but stays out of the lane for a 2-point jumper.
After that shot, the shooter cuts for a layup.
The partner rebounds each shot and keeps the drill moving.
The scoring is easy. A made 3-pointer is worth three points, a made mid-range shot is worth two points and a made layup is worth one point.
Coaches can run this drill for one or two minutes, then have partners switch roles. Teams can also track scores over time to build competition and show improvement.
A good variation is to run 3-2-1 around five spots: both corners, both wings and the top of the key. Since each spot is worth six possible points, a perfect score across five spots is 30. This adds structure while keeping the pace high.
Two-in-a-row shooting drill
The two-in-a-row drill works well when players need focused reps from specific areas of the floor.
Pick a spot, such as the left wing, right corner or top of the key. The shooter must make two shots in a row before moving to another spot. Coaches can decide whether the next spot has to be across the court, one pass away or part of a set five-spot rotation.
This drill is especially useful for 3-point shooting because it makes players repeat the same shot until they show consistency. It also adds a little mental pressure. One make isn’t enough. Players have to stack makes before moving on.
For younger teams, coaches can move the spots closer. For advanced teams, the passes can come from different angles or after a cut, flare, lift or drift.
Five-spot team shooting drill
The five-spot team shooting drill brings competition, conditioning and pressure shooting together.
Split players into two teams, with each group working at opposite baskets. Pick five spots, such as short corner, elbow, free throw line, opposite elbow and opposite short corner. Coaches can also use five 3-point spots depending on the team’s age and skill level.
Each group must make a set number of shots at one spot before moving to the next. Three makes per spot is a good starting point because it keeps the drill moving without letting players get sloppy.
To add pressure, use free throw validation. After a team makes the required number of shots at a spot, one player must make a free throw before the group can advance. If the free throw is missed, the team completes a sprint, pushups or another quick consequence before continuing.
This setup gives coaches a lot in one drill. Players get shooting reps, communicate under pressure and learn to finish a segment with a free throw. Late in games, that matters.
Once a team completes all shooting spots, coaches can finish the drill by requiring the group to make a certain number of free throws in a row. Five in a row is a strong challenge, especially when players are tired.
Add up, add down shooting drill
Add up, add down is a competitive shooting drill that can be used with almost any age group.
Create two teams and place them on opposite sides of the floor. Each team takes the same type of shot from matching spots. For example, both groups might shoot from the elbows, wings or corners.
The score moves up or down based on makes. If Team A makes a shot and Team B misses, Team A goes up one. If Team B makes the next shot, the score moves back toward zero. The goal is to be up by three.
A coach can stand under the basket and track the score with fingers, which keeps the drill moving without stopping to explain the math. Once a team wins a spot, players rotate to a new location.
This drill works well because every shot affects the score. Players feel the pressure of making a shot while the other team is shooting at the same time. Coaches can use it from mid-range, the 3-point line or anywhere that fits the team’s skill level.
Why the best youth basketball shooting drills should match your offense
General shooting drills are helpful, but the best youth basketball shooting drills should look like the shots players take in games.
If a team runs a lot of flex action, shooting work should include cuts, screens and scoring chances that come from that offense. If a team uses ball screens, shooting drills should include lift shots, slot threes, rolls, pops and drift passes. If a team relies on drive-and-kick basketball, players should practice catching on the move and shooting off real spacing. The goal is to get the right shots up.
Players build better habits when the drill matches the offense. Footwork gets cleaner. Passing angles improve. Shooters learn where their looks will come from and rebounders learn where misses are likely to go.
Coaching points for better shooting drills
No matter which drill a team uses, the details matter. Players should start in an athletic stance, show their hands, step into the shot and hold their follow-through. Passers should deliver clean, catchable passes. Rebounders should chase misses and keep the pace sharp.
Coaches also need to watch for lazy reps. When shooting drills run too long, players can start cutting corners. Shorter segments often work better than long, dragged-out rounds. A focused three-minute drill usually beats a sloppy 10-minute drill.
Competition helps, but quality has to come first. Make sure players aren’t rushing so much that their footwork, balance and mechanics fall apart.
Final thoughts on the best youth basketball shooting drills
The best youth basketball shooting drills give players game-like reps, clear goals and enough pressure to keep everyone engaged.
Coaches can use these drills as they are, but the real value comes from adapting them to fit the team’s offense. When players practice the shots they’ll actually take, shooting work becomes more purposeful, more productive and a lot more game-ready.
A good shooting basketball drill should do more than help players get up shots. It should build footwork, focus, conditioning, and confidence. The M Drill does all of that in a simple format that works well for individual workouts, small groups, or competitive practice stations.
This drill challenges players to make shots from five core spots on the floor while racing the clock. It’s easy to teach, easy to track, and easy to adjust based on age, skill level, and whether or not the shooter has a rebounder.
How the M Shooting Basketball Drill Works
The M Drill uses five basic shooting spots:
Right corner
Right wing
Top of the key
Left wing
Left corner
The goal is simple. A player must make a set number of shots from each of the five spots within a time limit.
In the first round, the player has one minute to make one shot from each spot. The shots don’t have to be made in a specific order, but the player has to keep track of which spots are finished.
Once players get comfortable, they can compete against the clock and try to beat their previous best time. Maybe they finish the first round in 45 seconds. Next time, they’re trying to get it done in 40. That little bit of pressure adds purpose to every rep.
M Drill Progression for Basketball Shooting
The best part of this shooting basketball drill is how easily it can grow with your players.
Start with this basic progression:
Round
Goal
Suggested Time
Round 1
Make 1 shot from each of 5 spots
1 minute
Round 2
Make 2 shots from each of 5 spots
1 minute
Round 3
Make 3 shots from each of 5 spots
1:40 to 1:45
Round 4
Make 4 shots from each of 5 spots
2 minutes
Coaches can adjust the time based on the player’s level and setup. A player with a rebounder should be held to a tighter standard. A player working alone may need a little more time because they have to chase every rebound, get back to the spot, set their feet, and shoot again.
That self-rebounding piece also adds value. Players have to move, recover, square up, and shoot while tired. Those are game-like habits, especially for guards and wings who need to shoot after movement.
Why Coaches Should Use the M Drill
The M Drill works because it blends shooting skill with real basketball details. Players aren’t just standing still and casually taking shots. They’re moving from spot to spot, tracking their makes, managing time, and learning how to shoot with a little fatigue.
This drill also teaches accountability. Players have to remember where they’ve made shots and where they still need to finish. Coaches can use that as a quiet focus test. If a player loses track, rushes, or drifts through the drill, the result usually shows.
For teams, the M Drill can become a great competitive station. Players can race the clock, compete against a teammate, or try to climb a team leaderboard. Coaches can also use it as a quick shooting finisher at the end of practice.
Coaching Tips for the M Drill
Keep the teaching points simple so players can focus on quality reps. Make sure players are shot-ready before every attempt. They should arrive balanced, with their feet set and hands prepared. Rushed reps don’t help if the footwork falls apart.
Encourage players to move with pace between spots. The drill should have energy, but it shouldn’t become sloppy. Strong pace plus clean mechanics is the goal.
Have players call out or clearly track completed spots. This keeps the drill organized and forces players to stay mentally locked in.
Adjust the clock as needed. Younger players may need extra time. More advanced players may need a stricter limit or a higher number of makes.
Simple Variations for the M Drill
Coaches can tweak this shooting basketball drill to fit different goals.
For catch-and-shoot work, add a passer or rebounder and require players to relocate after every shot.
For conditioning, keep the player without a rebounder and make them sprint to retrieve misses.
For pressure shooting, require the player to finish all five spots before the clock expires or restart the round.
For advanced players, move the spots behind the 3-point line or require makes from NBA range.
For younger players, move the spots closer and focus on balance, follow-through, and confidence.
Final Thoughts on This Shooting Basketball Drill
The M Drill is a simple, smart, and competitive way to build better shooters. It gives players a clear goal, keeps them moving, and forces them to shoot with focus under time pressure.
For coaches, it’s easy to plug into almost any practice plan. Use it as a warm-up, a station, a finisher, or an individual workout challenge. Over time, players can track their best scores and build confidence as they see real progress.
A great shooting basketball drill doesn’t need to be complicated. The M Drill proves that five spots, a clock, and a little competition can create a lot of value.
A good basketball warm-up should do more than get players loose. It should sharpen passing, footwork, finishing, communication and defensive habits before practice really gets rolling. For coaches who want better pace and cleaner execution, this structured warm-up gives players a quick way to touch several key skills without wasting time standing around.
Why This Basketball Warm-Up Works
The best warm-ups have a purpose. Players shouldn’t jog through layup lines, toss lazy passes or wait for the “real” practice to start. A strong basketball warm-up builds rhythm right away.
This routine works because it moves fast. Players pass, cut, finish, defend, close out and communicate in short bursts. Every segment has a simple job, and every player should know where to go before the clock starts.
Coaches can use this before a full practice, a team shootaround or a game-day walkthrough. The goal is simple: get bodies moving, get voices loud and get basketball habits locked in early.
Start with Passing, Cutting and Contact
Begin with a two-pass cutting drill. One player passes, cuts, receives the ball back and finishes at the rim. A coach or teammate can add light contact near the basket so the finisher gets used to scoring through bumps.
Keep the lines balanced. For example, send seven players to one side and seven to the other so the drill starts quickly. Players should already know which line they’re in when they leave the locker room or huddle.
Coaching points:
Pass with purpose
Cut hard after the pass
Finish through contact
Switch lines quickly
Keep the ball moving
This first piece doesn’t need to last long. Even 30 to 60 seconds can set the tone when players are sharp and organized.
Add a Three-Man Weave with Pace
Next, move into a three-man weave. Instead of going full court, have players weave to around the volleyball line or near half court, then turn and come back for a layup.
Each player should get one pass on the way out. Then the group turns, weaves back and finishes. This keeps the drill quick while still working spacing, timing and transition passing.
Make sure players don’t drift too deep before turning around. The shorter distance forces them to move with urgency and keeps the warm-up compact.
Use Curl Shots for Game-Like Footwork
After the weave, shift into curl shots. These should focus on layups and mid-range shots rather than threes. Players work on curling into space, catching under control and finishing with balance.
Add contact when possible. A little bump on the catch or finish helps players practice stronger footwork and better body control.
This part of the basketball warm-up is great for guards and wings because it gets them moving without the ball. It also helps post players and rebounders stay involved if coaches assign clear passing and rebounding roles.
Basketball Warm-Up Passing Drill: Corner Passing
Corner passing is a simple follow-your-pass drill that keeps everyone moving. Set up lines around the perimeter. The ball moves from one spot to the next, and each passer follows the pass to the next line. The final player cuts in and finishes at the rim. Coaches can add contact on the finish to make it more competitive.
When the coach yells “switch,” move the ball to the other side and run the same action in the opposite direction.
Key reminders:
Follow your pass
Sprint to the next line
Communicate on each catch
Finish strong at the rim
Reverse directions cleanly
This is a clean way to combine passing, cutting, spacing and finishing in one quick drill.
Split Posts and Perimeter Players
For the next segment, divide the work by position. Post players can work inside on catches, contact and post moves. They throw the ball out, cut across the lane, receive the entry pass and finish with a move.
At the same time, perimeter players can work near half court in pairs. Start with zigzag defense, then move into shoulder positioning and follow-style defensive movement.
This setup helps everyone get position-specific reps without slowing the whole group down. Bigs get touches. Guards get defensive footwork. Coaches get more action in less time.
Build Defensive Energy with Closeout Lines
Closeout lines should be short and loud. Put players in lines with a few balls. One player throws the ball out, yells, closes out under control and then rotates to the end of the line. After a few reps, add one dribble. The defender closes out, contains the first move and then rotates.
This drill should be noisy. Players need to talk, call ball and get used to closing space with active hands. Coaching points:
Sprint, then chop the feet
Close out with high hands
Yell on the pass
Stay balanced
Contain the first dribble
A good closeout segment can last only 30 seconds if the pace is right.
Work Four-on-Four Rotation
Once players are warm, move into a four-on-four shell-style segment. Put four offensive players around the perimeter and four defenders matched up.
The offense passes the ball around while the defense works on closeouts, help-side positioning and rotations. Defenders should be talking the entire time. Use simple cues:
Ball
Help
Deny
Closeout
Get to the help line
This is where the warm-up starts to feel like practice. Players move from individual skill work into team defense, and coaches can reinforce the habits they want to see later in live play.
Finish with Three-on-Three, Five-on-Five and Shooting
After rotation work, flow into normal three-on-three and five-on-five. Coaches can use scripted actions to start the segment, especially if the team worked on those sets earlier in the day.
End with a short shooting block. Have the top shooters take threes while other players rebound, pass, shoot free throws or work with a partner on closeouts. This keeps everyone busy and gives players useful reps before the next practice phase.
A five-minute shooting finish can work well because players are already moving, warm and locked in.
Coaching Tips for a Better Basketball Warm-Up
A basketball warm-up only works if the coach keeps it organized. Players should know the order, where the balls go and how long each drill lasts. Here are a few ways to make it smoother:
Set lines before the drill starts
Keep each segment short
Use contact where it makes sense
Demand communication early
Move quickly from drill to drill
Save extra time for the skills your team needs most
The warm-up shouldn’t feel rushed, but it should feel crisp. Coaches can always trim 15 to 30 seconds from one drill and add that time to another area, especially if the team needs more finishing, defense or shooting.
Final Thoughts
This basketball warm-up gives coaches a practical way to open practice with pace and purpose. Players pass, cut, finish, defend, rotate and shoot before the main work begins.
When players know the routine, the whole gym feels sharper. The lines move faster, the communication gets louder and the team starts practice with better habits. For coaches looking to clean up the first 10 to 15 minutes of the day, this warm-up is a simple structure worth using.
The 3-point basketball shooting drill gives players a simple way to build shooting stamina from behind the arc. Instead of taking a few casual threes and moving on, players lock into one focused shooting stretch, track their makes and learn how their form holds up when their legs start to burn.
Every coach wants shooters who can make shots late in games. Fresh legs are nice, but fourth-quarter threes usually come after sprinting, cutting, defending and fighting through fatigue. This drill helps players feel that pressure in a controlled setting.
The idea is simple. Pick a spot behind the 3-point line, shoot for time and count makes. Add rebounders when possible, then finish with free throws to train focus after fatigue.
What is the 3-point basketball shooting drill?
The 3-point basketball shooting drill is built around repeated threes from one spot or several spots. In the original version, one shooter works for five straight minutes while one or two rebounders keep the drill moving.
The shooter picks a spot behind the arc, shoots as many quality threes as possible and tracks total makes. Coaches can keep players at one location or rotate them through multiple spots around the perimeter.
A simple setup looks like this:
Drill Detail
Setup
Shooter
1 player
Rebounders
1 or 2 if available
Time
5 minutes
Shot type
3-pointers
Tracking
Count total makes
Finish
Free throws after the timed round
The drill gets its name from the burn players feel during the round. After a few minutes of repeated 3-point shots, players have to fight tired legs, tired shoulders and tired focus.
That’s where the value kicks in.
Why this 3-point basketball shooting drill works
This drill works because it forces players to shoot through fatigue while still holding their mechanics together. A player may look great during the first 10 shots, but the real teaching starts when the legs get heavy. Coaches can see a lot during this drill:
Does the player keep the same release?
Does the player’s shot start falling short?
Does the player drift left or right?
Does the player rush when tired?
Does the player stay mentally locked in?
Players also get quick feedback. They can track makes, compare scores from week to week and learn which spots feel strongest.
This drill builds more than range. It builds repeatable rhythm, conditioning and confidence from the 3-point line.
How to run the burner shooting drill
Start with one shooter behind the 3-point line. Add one or two rebounders if possible. The shooter picks a spot, such as the corner, wing, slot or top of the key. Set the timer for five minutes.
The shooter takes only 3-pointers and tracks makes. Rebounders return the ball quickly so the shooter can stay in rhythm. Coaches should encourage players to shoot game-like reps instead of rushing sloppy shots.
After the round ends, send the player to the free-throw line. This is an important part of the drill because it forces the player to calm down, breathe and shoot with touch after fatigue.
Here’s the basic flow:
Step
Action
1
Pick a 3-point shooting spot
2
Start a five-minute timer
3
Shoot threes and count makes
4
Use rebounders to keep the pace high
5
Move to free throws after the round
6
Record the score for future workouts
Coaches can run this at the beginning of a workout to wake up the legs or at the end of practice to simulate tired shooting.
Shorter version for individual workouts
Players can also run this drill on their own with a shorter timer. A 2 1/2-minute round still creates plenty of fatigue, especially when the shooter has to chase rebounds.
In a solo version, the player can rotate through different 3-point spots instead of staying in one place. This keeps the drill moving and gives the player more variety. A solo version could look like this:
Time
Spot
30 seconds
Right corner
30 seconds
Right wing
30 seconds
Top of the key
30 seconds
Left wing
30 seconds
Left corner
Players should still track makes. The goal is not just to survive the drill. The goal is to shoot with solid form while tired.
Coaching points for better 3-point reps
The best shooters keep their shot consistent even when they’re tired. Coaches should watch closely for small breakdowns during the drill. Use these cues:
Get your feet set quickly.
Keep your balance.
Hold your follow-through.
Use your legs.
Don’t fade away.
Keep your eyes on the rim.
Shoot the same shot every time.
Track makes honestly.
Players will naturally want to speed up as the timer runs. A quick pace is good, but rushed mechanics are not. Coaches should remind players to take quality shots at game speed. The best reps are fast, focused and repeatable.
Ways to adjust the drill
This drill can fit different levels by changing time, distance and scoring goals. Younger players may shoot from just inside the arc before moving back to the 3-point line. Older players can shoot from high school, college or deeper range. Advanced players can set a target number of makes before the timer ends.
Coaches can also create team competitions. Try these variations:
Variation
How it works
One-spot burner
Shoot from one location for the full round
Five-spot burner
Rotate through corners, wings and top
Partner challenge
Two players compete for most makes
Team total
Add all makes from a group
Free-throw finish
Shoot 5 or 10 free throws after the round
The free-throw finish matters. Players need to learn how to settle their bodies after a hard shooting stretch. Late-game free throws often come when players are tired, so this piece gives the drill extra value.
Final thoughts on the 3-point basketball shooting drill
The 3-point basketball shooting drill is simple, sweaty and effective. Players shoot threes for time, count their makes and learn how well their form holds up under fatigue. For coaches, it’s a great way to build shooting stamina without overcomplicating practice. For players, it creates a clear challenge they can measure and improve.
Add rebounders when possible, track scores over time and finish with free throws. Those small details turn a basic shooting segment into a better test of range, rhythm and real-game readiness.