If you’re a basketball coach striving to improve your team’s defensive prowess, the Pack Line Defense may be the strategy you’re looking for. In this article, we’ll delve into the key aspects of the defense, discuss a helpful drill to hone your team’s skills, and explore its pros and cons. Let’s get started on the path to becoming a better basketball coach.
The Pack Line Defense Philosophy
The Pack Line Defense is a well-regarded defensive strategy known for its ability to congest the paint, clog up the middle, and make it challenging for the opposing team to score easy layups. Here are the essentials of this defensive approach:
Closeouts and Help Defense: Closeouts and help defense are two fundamental components of the Pack Line Defense. Mastering these elements is crucial for success in this strategy.
The Help Defense Drill
One effective way to train your players in the art of help defense within this defense is by utilizing a specific drill. Here’s a breakdown of the drill:
Setup: Divide the players into four offensive players positioned on the arc and four defensive players forming a circle around the center of the free-throw line.
Execution: The offensive players pass the ball around in a circle, and when the coach hands the ball to one of them, the game is in play. The player with the ball attempts to drive hard to the basket, likely getting past the initial defender.
Help Defense: When the offensive player beats their initial defender, the key to success in this drill is the help defense. The player behind the beaten defender needs to step up and provide the crucial help defense.
Rotation: This drill encourages constant movement, unexpected scenarios, and ever-changing matchups. Players must adapt to different situations, making it a dynamic learning experience.
Communication: The drill also fosters communication among players. With frequent rotations and changing defensive assignments, players need to communicate effectively, ensuring no one is left unaccounted for.
Pros of the Pack Line Defense
The Pack Line Defense offers several advantages:
Paint Congestion: The Pack Line Defense excels at congesting the paint, making it difficult for the opposing team to score inside. This strategy is particularly useful if your team is undersized or undermatched.
Leveling the Playing Field: It can equalize the game, even if your team is facing a more talented opponent. By forcing the opposition to rely on three-point shooting, it challenges them to play outside their comfort zone.
Cons of the Pack Line Defense
Despite its merits, the Pack Line Defense comes with its own set of challenges:
Communication: Effective communication is essential. Without it, your team may leave offensive players unguarded, creating opportunities for the opposition.
Speed Requirement: The Pack Line Defense demands speed and quick reactions. If your team lacks the necessary speed, opponents might exploit gaps and take advantage of your inability to provide adequate help defense.
Conclusion
The Pack Line Defense is a potent strategy for basketball coaches, especially those looking to fortify their team’s defense and level the playing field against stronger opponents. By mastering closeouts, help defense, and effective communication, you can unlock the full potential of this defensive approach. However, remember that this strategy is not without its challenges, particularly regarding speed and communication. With dedication and practice, you can become a more effective basketball coach and help your team reach new heights on the court.
If you coach a K-8th grade team, we have hundreds of resources. All laid out in an easy-to-follow, step-by-step system to save you time and money. Check out coachingyouthhoops.com today!
Coaching basketball is a dynamic and complex task that requires a combination of skills, strategies, and effective training methods. Moreover, one crucial aspect of improving a basketball team’s performance is mastering the art of one-on-one drills. These drills not only help players develop their individual skills but also enhance their ability to perform under pressure. In this article, we’ll explore various one-on-one basketball drills that can be utilized to train players at different levels.
The Power of One-on-One Drills
One-on-one drills are essential for teaching the game of basketball because they focus on individual skills and decision-making. Furthermore, these drills can be adapted to suit the age and skill level of the players, making them a versatile tool in a coach’s arsenal. They encourage players to think on their feet, improve their ball-handling, and develop the ability to score in challenging situations.
Drill 1: Spin Back (Curl Back) One-on-One
In this drill, two players start under the basket.
To begin with, the offensive player jogs to about the three-point line and spins the ball back to themselves.
After gathering the ball, the offensive player gets one dribble to make a move and take a shot.
This game is played one-on-one.
Variations
For younger players, consider allowing more dribbles. Moreover, you can limit shots to inside the three-point line or in the paint, or encourage the use of the non-dominant hand.
Drill 2: Post Moves One-on-One
Designed for post players, such as centers or power forwards, this drill starts with the offensive player at the top of the key.
Importantly, there are no dribbles allowed in this drill.
The offensive player must use their post moves to score.
Variations
Allow one or two dribbles for added challenge. Additionally, restrict players to specific post moves or hand preference.
Drill 3: Sideline One-on-One
In this exercise, players start on the sideline with their non-dominant hand touching the sideline.
The offensive player decides which way to go and must reach the ball first.
The first player to reach the ball goes on offense, making it a great conditioning and fast movement drill.
Drill 4: Half Court One-on-One
Here, one player stands near the basket with the ball, and the other player is at half court.
The player with the ball initiates the game by passing to the other player.
The offensive player has four dribbles to score while the defender tries to stop them.
Variations
Adjust the number of dribbles based on the players’ age and skill level.
Drill 5: Three-Quarter Court One-on-One
The offensive player has unlimited dribbles to score on the far basket, but they must score within five seconds.
This instills a sense of urgency, mimicking fast breaks.
Variations
Encourage players to take jump shots and not give up easy layups.
Conclusion
In conclusion, one-on-one drills are invaluable tools for basketball coaches looking to develop their players’ individual skills, decision-making, and ability to handle pressure situations. Furthermore, these drills can be customized to suit players of all ages and skill levels, making them versatile and effective for improving performance on the court.
By incorporating these one-on-one drills into your training regimen, you can empower your team to become better basketball players and enhance your chances of winning more games. So, get out there, practice these drills, and watch your team’s skills soar to new heights.
If you coach a K-8th grade team, we have hundreds of resources. All laid out in an easy-to-follow, step-by-step system to save you time and money. Check out coachingyouthhoops.com today!
All of us, whether on the sidelines or right on the court, love a good challenge. Challenges keep us motivated, push us to improve, and help us set and achieve new goals. In the world of basketball, challenges can come in various forms – defensive challenges, team challenges, and of course, the ever-exciting shooting challenge.
Today, we’re diving deep into the world of shooting challenges and how they can transform not just your shooting skills but your entire game. The highlight of today’s discussion is the incredible 3-6-9-12-15 shooting drill, a favorite of Arkansas women’s basketball coach Mike Neighbors. This drill is not just about putting up shots; it’s about pushing your limits, both physically and mentally. With each round, you’ll take more shots, move across the court, and test your accuracy under pressure.
What to do with Shooting Challenges
All coaches and players love a great challenge. That challenge could be a defensive challenge, a team challenge, or in this day and age a shooting challenge. Coaches can do a variety of things with different a shooting challenge:
1. Post a leaderboard in your locker room
These leaderboards will allow all the players in your program to see now only how they currently rank for the season, but if you have an all-time leaderboard, it could motivate them to get one of the top scorers of all time. This could be a great motivator to keep encouraging your players to get shots up.
2. Discuss strengths and weaknesses with your players
If you have a player that thinks they are a great shooter, have them perform a certain shooting drill that you like. The key to the shooting drills is it must be measurable and something that can be completed fairly quickly.
3. Red-Yellow-Green Light System
Part of the discussion with your players could be the Red-Yellow-Green light system. Some coaches like having a system like this in place to give players a goal/something to shoot for to enhance their shooting opportunities on the court. The premise goes that a player with a Red Light can only shoot closer to the basket, yellow can shoot a 3 if it is in rhythm, and a green light can shooter has the most freedom to take the shots they choose.
3-6-9-12-15 Shooting Challenge
This is where the 3-6-9-12-15 shooting challenge comes into play. This is a great shooting drill from Arkansas women’s basketball coach Mike Neighbors. Players will shoot shots from the top of the key, right wing, and then left wing. There are 5 rounds. In round 1, a total of 3 shots are taken, round 2 a total of 6 shots, and all the way to round 5 with 15 total shots. Players start shooting at the top of the key, then move to the right wing, and then to the left wing.
After each round of 3-6-9-12-15, each player will shoot a free throw too. At the end of the drill, the player will have taken 50 total shots (45 3 point shots and 5 free throws).
Here is the catch though:
After every 3rd shot, the shooter (if they miss) will run around a set of cones on the other end of the court. If they miss 1 shot, they will run around the first cone, miss 2 shots around the second cone, and 3 shots around the 3rd cone.
So that means on the round of 6 shots, they could run around cones twice, 9 shots they could run around cones 3 times, and on and on until they complete the round of 15 shots. The first cone is just over half-court. The 2nd cone is right at the old 5 second line. And the 3rd cone is in the deep corner.
This is a great drill not only to get shot reps up but also for conditioning. We have learned a great score for a high school player is 32 or more. If they are able to make 32 or more in 6:30 or less, they would be in the green light status, 24-31 in the yellow light status, and 23 and below in the red light status.
This is a great drill that we have enjoyed implementing. Be sure to check out the visual that was attached with this article and the attached scorecard.
Appendix A (Scorecard for 3-6-9-12-15 Shooting Challenge)
Name:
Number of Shots
Number of Made Shots
Free Throw
3
6
9
12
15
Time:
Kyle Brasher | Gibson Southern High School
Lady Titans Basketball Coach
If you coach a K-8th grade team, we have hundreds of resources. All laid out in an easy-to-follow, step-by-step system to save you time and money. Check out coachingyouthhoops.com today!
In the world of basketball coaching, we know that nailing those shots is a game-changer. Whether you’re a seasoned coach or just starting out, we’ve got a lineup of the top 5 youth basketball shooting drills that will revolutionize your team’s accuracy and boost their confidence on the court.
Picture this: your players confidently sinking shots from all angles, their form impeccable and their focus unwavering. That’s the power of a well-practiced shooting routine, and that’s exactly what we’re here to help you achieve. We’ve curated a range of dynamic and engaging drills that target everything from catch and shoot finesse to mastering free throws under pressure.
In this blog post, we’ll walk you through the ins and outs of each drill, explaining their rationale, suggesting variations to increase the challenge, and highlighting the coaching points that will ensure your players develop solid shooting fundamentals. Plus, we’ve sprinkled in some invaluable tips on how to adapt these drills to suit different skill levels, keeping your players engaged and eager to improve.
5 Youth Basketball Shooting Drills
As coaches, we know that mastering the art of shooting is crucial for any youth basketball team. So, let’s gear up and explore the five best shooting drills that are not only effective but also fun and engaging for your players. These drills will not only improve their accuracy but also boost their confidence on the court.
1. Catch and Shoot Frenzy
Drill Details: Players form a line on the perimeter, each with a ball. The first player shoots from a designated spot, retrieves their rebound, and passes to the next player. The sequence continues until all players have shot from that spot. Then, rotate to a new spot.
Rationale: This drill develops quick release, shooting under pressure, and efficient footwork when catching and squaring up to the basket.
Variation: Add a defender who lightly contests shots to simulate game situations.
Coaching Points: Emphasize proper hand placement on the ball, balance, and using legs to generate power. Encourage players to focus on form and rhythm.
2. Form Shooting Focus
Drill Details: Players work in pairs, standing close to the hoop. They focus on perfect shooting form – elbow in, wrist locked, follow-through – without the ball touching the rim.
Rationale: Building muscle memory for correct form is crucial for consistent shooting.
Variation: Increase distance gradually and introduce light competition by challenging players to hit a certain number of consecutive shots.
Coaching Points: Stress the importance of consistent form and repetition. Use positive reinforcement to create a routine of proper technique.
3. Around the World
Drill Details: Place markers at various spots around the three-point line. Players take turns shooting from each spot. Once a shot is made, the player moves to the next spot. The goal is to complete the circuit.
Rationale: This drill improves shooting from different angles and distances, simulating various game situations.
Variation: Set a time limit for completing the circuit or require players to make a certain number of shots at each spot.
Coaching Points: Encourage players to focus on using their legs and consistent follow-through. Remind them to adjust their shooting angle based on their position on the court.
4. Partner Passing and Shooting
Drill Details: Players work in pairs, with one player passing and the other shooting. The passer alternates between chest passes, bounce passes, and overhead passes.
Rationale: Teaches players to catch and shoot quickly after receiving a pass, enhancing their overall court awareness.
Variation: Increase the distance between players for longer passes, challenging both passing accuracy and shooting range.
Coaching Points: Emphasize being ready to shoot upon receiving the pass. Highlight the importance of catching in a shooting-ready stance.
5. Free Throw Pressure Cooker
Drill Details: Players shoot a series of free throws with added pressure. For each miss, players must perform a physical activity (e.g., jumping jacks) before attempting the next shot.
Rationale: Simulates the pressure of free throws during a game and helps players focus under stress.
Variation: Increase the number of physical activities for consecutive misses to up the challenge.
Coaching Points: Discuss maintaining focus and concentration despite distractions. Remind players to take a deep breath and execute their routine before each shot.
There you have it – five engaging and effective shooting drills to elevate your youth basketball team’s shooting prowess. Remember, practice makes perfect, so integrate these drills into your training sessions and watch your players’ shooting skills skyrocket. Let’s turn those misses into swishes and create a team of confident, accurate shooters!
If you coach a K-8th grade team, we have hundreds of resources. All laid out in an easy-to-follow, step-by-step system to save you time and money. Check out coachingyouthhoops.com today!
t’s game time here on the blog, and today, we’re delving into a motion offense drill that’s going to transform your team’s offense from good to unstoppable. I’m thrilled to bring you a coaching gem that’s all about honing those essential pass and cut skills within the dynamic framework of a motion offense.
Imagine your players on the court, a symphony of movement and coordination. The ball glides seamlessly from one player to another, creating lanes, opening up opportunities, and leaving the defense scrambling to keep up. That’s the beauty of the pass and cut in a motion offense – a strategy that not only cultivates teamwork but also generates high-percentage scoring chances.
Whether you’re a seasoned coach seeking fresh ideas or a new coach eager to build a strong foundation, mastering the pass and cut with this motion offense drill is a game-changer. Get ready to lace up those sneakers, gather your team, and witness the magic unfold as players seamlessly pass, cut, and score their way to victory.
Motion Offense: Pass and Cut Practice Drill
5-out motion provides basketball teams at any level a key structure. This is especially true for youth basketball teams. This set up forces players to make decisions by reading the play of their teammates and defenders. It remains a great tool for teaching players how to play basketball.
One drill to teach basic 5-Out motion to your basketball team is a simple pass-and-cut drill.
This drill begins with Player 1 making a pass to the wing. From there, that player cuts to the basket. When that cut occurs, everyone behind the pass rotates to fill the open space along the perimeter. Player 1 takes the open space in the corner after his cut.
Next, the ball is passed to the right again and the passer cuts to the basket. Once again, the weak side players rotate to fill all open spots.
The only exception to this rule is a pass from the corner. A pass from the corner results in a short cut and retreat. A pass up from the wing to the top results in the corner player rotating up to fill on the wing, making sure all five players participate in station movement.
Stress to your players the key concept of great spacing. If they’re in the right positions at the right time, the offense should be wide open. This approach opens driving lanes and minimizes quick help from opposing defenders.
Coaches can teach 5-Out Motion in progressions to avoid their players getting overwhelmed learning an entire offense all at once.
If you coach a K-8th grade team, we have hundreds of resources. All laid out in an easy-to-follow, step-by-step system to save you time and money. Check out coachingyouthhoops.com today!
In this post, we’re diving into a fundamental skill that can shape the success of young players on the court – rebounding.
Rebounding, often hailed as the “hidden key” to basketball victory, is a skill that transcends age and experience levels. It’s not just about grabbing the ball off the rim; it’s about seizing control, shifting momentum, and creating valuable opportunities for your team. At its core, rebounding embodies the tenacity and determination that are the heartbeats of basketball.
In the following discussion, we’ll explore a collection of youth basketball rebounding drills designed to instill this critical skill from an early age. From understanding box-out techniques to enhancing positioning and fostering the right mindset, these drills go beyond the surface, nurturing players who contribute dynamically on both ends of the court. So, join us as we delve into the world of youth basketball rebounding, unlocking the techniques that can define a player’s journey from the paint to the scoreboard.
Youth Basketball Rebounding Drills: Defensive Position
Precise timing for your jump holds significance in rebounding, but it’s your positioning that ultimately places you advantageously to seize a rebound. Employing boxing-out techniques is crucial as you employ your body to fend off opponents while striving for the rebound.
For this drill, all you require is one or more partners, with one designated shooter. Ideally, the offensive and defensive players should be evenly matched in number. The defensive players position themselves around the free-throw area, while the offensive players stand slightly beyond the key. Upon the shot’s release, defensive players locate the closest offensive player, utilizing their body to box them out and prevent the rebound.
The drill’s objective for defensive players is to let the ball bounce after the shot, while the offensive players strive to secure the rebound. This drill significantly underscores the significance of sound body positioning on the defensive side. Once every offensive player has taken a shot, switch roles and repeat the process.
Youth Basketball Rebounding Drills: Timing
In this drill, the first person initiates by self-passing off the backboard, securing the rebound with a strong two-handed grip. After gaining control, pivot and pass to the next player, who replicates the drill.
This cultivates comfort in grabbing the ball, practicing pivoting, and passing post-rebound. Repetition is required. While optimal for team practice, you can adapt it for just one partner.
Youth Basketball Rebounding Drills: Hustle
The cliche many coaches acknowledge says rebounding is 20 percent skill and 80 percent hustle. The last of these youth basketball rebounding drills hones the significance of resolute ball retrieval or thwarting your partner’s attempt.
For this, you’ll need one or more partners and a ball. If possible, match sizes and positions. There will be an offensive and a defensive player. A ball is placed a few feet away.
From the defensive stance, the objective is to box out and prevent the offensive player from reaching the ball for five seconds. This drill effectively simulates the unwavering determination required to excel as a great rebounder.
If you coach a K-8th grade team, we have hundreds of resources. All laid out in an easy-to-follow, step-by-step system to save you time and money. Check out coachingyouthhoops.com today!
When practicing for end-of-game situations in youth basketball, it’s essential to focus on drills that simulate game-like scenarios and help players develop the necessary skills and decision-making abilities. Having practice drills specific for End-of-Game situations will help develop your team’s confidence in those key moments.
Here are some good youth basketball drills to run for end-of-game situations:
Practice Drills for End-of-Game Scenarios
1. Scrimmages with Time Constraints: Divide the team into two groups and play controlled scrimmages with specific time constraints, such as 1 minute or 30 seconds left on the game clock. Emphasize executing plays, managing the clock, and making quick decisions under pressure.
2. Free-Throw Pressure: Create pressure situations in free-throw shooting drills, where players have to make critical shots with the game on the line. Add consequences for missed free throws to increase the pressure.
3. Quick Transition Offense and Defense: Practice transitioning from defense to offense and vice versa quickly. Emphasize making fast decisions, passing, and attacking in transition to capitalize on opportunities.
4. Defensive Stops Drill: Set up scenarios where the defensive team needs to make consecutive stops to win the game. The offensive team tries to score, and the defensive team must secure rebounds and prevent scoring to succeed.
5. Decision-Making Scenarios: Design drills that force players to make quick decisions based on the game situation, such as whether to hold for the last shot, take an open shot, or pass to a teammate.
6. Clock Management Drill: Run scenarios where the team must manage the clock effectively, making deliberate decisions to use or save timeouts and control the pace of the game.
7. Simulated Game Endings: Recreate actual end-of-game situations from previous games or popular basketball moments. Have the team watch footage and discuss the strategies used, then try to replicate those scenarios in practice.
If you coach a K-8th grade team, we have hundreds of resources. All laid out in an easy-to-follow, step-by-step system to save you time and money. Check out coachingyouthhoops.com today!
In this post, we will focus on two critical aspects of the game: defense and rebounding. Although developing offensive skills is usually preferred by young players, as the cliché goes, defense wins championships. By incorporating effective youth basketball defensive drills and rebounding techniques, you can empower your players to become defensive forces and control the boards.
These drills are designed to improve their fundamental skills, boost performance, and foster their love for the game. Whether you are a seasoned coach or just starting, incorporating these drills into your practice plans will greatly benefit your players’ growth and development. Let’s dive into some essential youth basketball defensive drills and rebounding techniques that will elevate your team’s defensive prowess and rebounding abilities.
Defensive Drills
Defense is the backbone of any successful basketball team. By instilling solid defensive fundamentals and practicing specific drills, you can strengthen your players’ defensive skills and teamwork.
Here are three defensive drills to incorporate into your practice sessions:
1. Defensive Slides Drill
The defensive slides drill is a fundamental exercise that focuses on lateral quickness, footwork, and defensive stance. Have players start in a low defensive stance, feet shoulder-width apart. Instruct them to slide laterally from one side of the court to the other while maintaining a low posture.
Encourage players to keep their hands active, maintain balance, and stay in front of an imaginary offensive player. This drill improves agility, defensive positioning, and the ability to guard opponents effectively.
2. Closeout Drill
The closeout drill helps players develop the skills needed to close out on an offensive player and contest shots effectively. Set up cones or markers at various spots around the perimeter. Players start near the basket and, upon a coach’s signal, sprint out to the designated spot and close out on the offensive player.
Emphasize proper technique, such as getting low, chopping the feet, and extending hands to challenge the shot without fouling. This drill enhances defensive awareness, closeout speed, and shot-contesting ability.
3. 1-on-1 Defensive Drill
The 1-on-1 defensive drill is an excellent way for players to work on their individual defensive skills and competitive spirit. In a controlled setting, have two players face each other on the court. The offensive player tries to score while the defender’s objective is to prevent a basket.
Emphasize proper defensive positioning, staying in front of the offensive player, and contesting shots without fouling. This drill improves defensive instincts, on-ball defense, and the ability to guard opponents effectively.
Rebounding Drills
Rebounding is an essential aspect of the game that can significantly impact possession and create scoring opportunities. By practicing specific rebounding drills, you can teach your players the importance of positioning, timing, and boxing out.
Here are three effective rebounding drills to incorporate into your practice sessions:
1. Box Out Drill
The box out drill emphasizes the importance of securing rebounds by effectively boxing out opponents. Divide your players into pairs, with one player designated as the defender and the other as the rebounder. Instruct the defender to maintain contact with the rebounder and establish a solid position between them and the basket. The rebounder’s goal is to gain inside position and secure the rebound.
Encourage proper technique, such as using the lower body to establish leverage and arms to create space. This drill improves rebounding fundamentals, positioning, and physicality.
2. Tip Drill
The tip drill helps players develop their ability to tip missed shots and rebounds to themselves or teammates, extending possessions and creating scoring opportunities. Start by having players pair up under the basket. One player attempts a shot while the other player tries to tip the ball before it reaches the rim.
Encourage players to time their jumps, extend their arms, and redirect the ball towards themselves or their teammate. This drill improves coordination, timing, and second-chance opportunities.
3. Team Rebounding Drill
The team rebounding drill simulates game-like rebounding scenarios and emphasizes teamwork and communication. Divide the players into two teams, with one team designated as the offense and the other as the defense. The coach initiates a shot, and both teams compete for the rebound.
Encourage players to communicate, establish box-out positions, and fight for the ball. This drill enhances rebounding in a competitive setting, teamwork, and the ability to secure rebounds amidst traffic.
Youth Basketball Defensive Drills and Rebounding Techniques
In conclusion, incorporating youth basketball defensive drills and rebounding techniques into your coaching repertoire can significantly elevate your team’s performance on the court. By focusing on developing solid defensive fundamentals, such as lateral quickness, closeout techniques, and individual defensive skills, your players will become formidable defenders.
Additionally, teaching proper rebounding techniques, including boxing out, tipping, and team rebounding, will enhance their ability to control the boards and create second-chance opportunities.
Remember, mastering these skills requires consistent practice, patience, and a commitment to improvement. As a coach, your guidance and expertise play a crucial role in shaping young athletes into well-rounded basketball players. By emphasizing the importance of defense and rebounding through purposeful drills, you can instill a strong foundation that will benefit your players both on and off the court.
So, don’t underestimate the impact of youth basketball defensive drills and rebounding techniques. Incorporate them into your practice plans, foster a culture of hard work and determination, and watch your team grow into a formidable force. Together, let’s empower our players to excel in all facets of the game and embrace the challenges that come their way.
If you coach a K-8th grade team, we have hundreds of resources. All laid out in an easy-to-follow, step-by-step system to save you time and money. Check out coachingyouthhoops.com today!
In this post, we will delve into the essential skill development drills for youth basketball players on the offensive side of the ball. These drills are designed to improve their fundamental skills, boost performance, and foster their love for the game. Whether you are a seasoned coach or just starting, incorporating these drills into your practice plans will greatly benefit your players’ growth and development.
Dribbling Drills
Dribbling is a fundamental skill that every young basketball player must master. By focusing on proper dribbling techniques and ball control, players can become more confident and effective on the court.
Here are three dribbling drills to incorporate into your practice sessions:
1. Stationary Dribbling Drill
This drill helps players improve their ball-handling skills while standing in one place. Instruct your players to dribble the ball using both hands, focusing on maintaining control and keeping the ball at waist height.
Encourage them to use their fingertips, stay low, and alternate between dribbling with their right and left hand. This drill promotes coordination and helps players develop a feel for the ball.
2. Zigzag Dribbling Drill
The zigzag dribbling drill is an excellent way to work on change of direction, speed, and ball protection. Set up cones or use defenders spaced apart in a zigzag pattern. Instruct players to dribble through the course, weaving in and out of the obstacles while maintaining control of the ball.
Emphasize the importance of staying low, using quick crossovers, and protecting the ball from defenders. This drill enhances agility, quickness, and dribbling under pressure.
3. Two-Ball Dribbling Drill
The two-ball dribbling drill is a challenging exercise that enhances coordination and ambidexterity. Each player uses both hands simultaneously to dribble two basketballs.
This drill helps players develop their weak hand while improving overall ball-handling skills. Encourage players to start with simple dribbling patterns and gradually progress to more complex moves. It’s important to emphasize control, coordination, and rhythm while dribbling with both hands.
Shooting Drills
Shooting is a fundamental skill that every player wants to excel at. By incorporating specific shooting drills into your practices, you can help your players improve their shooting technique, accuracy, and confidence.
Here are three shooting drills that focus on different aspects of shooting:
1. Form Shooting Drill
The form shooting drill is a fundamental exercise that emphasizes proper shooting mechanics. Start close to the basket and have players focus on their shooting form: feet shoulder-width apart, knees slightly bent, elbow aligned with the shooting hand, and eyes on the target.
Encourage them to shoot with a smooth motion, using their legs for power. Gradually move players farther from the basket as they improve their form. This drill reinforces muscle memory and builds a solid shooting foundation.
2. Spot Shooting Drill
Spot shooting drills simulate game-like situations where players shoot from specific spots on the court. This drill helps players develop accuracy and confidence in shooting from various locations. Choose five to seven spots around the perimeter or key areas and have players take shots from each spot.
Encourage proper footwork, balance, and quick release. This drill also improves players’ ability to read the court and find open spots for shooting.
3. Catch and Shoot Drill
In games, players often need to quickly catch the ball and shoot. The catch and shoot drill focuses on receiving a pass and shooting with minimal hesitation. Have players pair up, with one player passing and the other shooting. The passer should deliver accurate passes to simulate game situations.
Emphasize quick footwork, being ready to shoot upon receiving the pass, and proper shooting technique. This drill improves players’ ability to shoot under pressure and in a dynamic setting.
Passing Drills
Passing is a vital skill in basketball that enables players to move the ball effectively, create scoring opportunities, and foster teamwork.
Here are three passing drills to incorporate into your practices:
1. Two-Person Chest Pass Drill
The two-person chest pass drill helps players develop accuracy and technique in their chest passes. Have players pair up and face each other at a moderate distance. Instruct them to use both hands, push the ball from their chest with a quick release, and aim for their partner’s chest.
Encourage players to maintain proper form, follow through with their wrists, and work on passing with crispness and precision. This drill reinforces the importance of strong and accurate chest passes in game situations.
2. Circle Passing Drill
The circle passing drill is an excellent exercise to enhance passing skills under pressure and from various angles. Form a circle with your players, spaced a few feet apart. Start with one player passing the ball to a teammate and continue the pattern around the circle. Vary the passing techniques, such as chest passes, bounce passes, and overhead passes.
Encourage players to communicate, focus on accurate passes, and adjust to different receiving positions. This drill improves passing accuracy, decision-making, and adaptability.
3. Outlet Passing Drill
Outlet passing is crucial for fast breaks and quick transition offense. In this drill, players practice long-distance, accurate passes to initiate the fast break. Set up two lines, one near the baseline and the other near midcourt. The first player in the baseline line rebounds the ball and throws an outlet pass to a teammate in the midcourt line.
Emphasize the importance of accurate and quick passes, leading the receiver, and maintaining good spacing. This drill enhances passing vision, accuracy, and decision-making in fast-paced situations.
If you coach a K-8th grade team, we have hundreds of resources. All laid out in an easy-to-follow, step-by-step system to save you time and money. Check out coachingyouthhoops.com today!
Dribbling is one of the most important skills in basketball. A good dribbler can create open shots for themselves and their teammates, and can also help to break down the defense. If you’re a youth basketball coach, you know that it’s important to help your players develop their skills and sometimes, the best way to do that is with a series of dribbling drills.
In this blog post, I’ll share 5 dribbling drills that you can use to help your players improve their skills. These drills are designed to help players develop their speed, control, and ball-handling skills.
Dribbling Drills: Figure 8
This drill is designed to help players develop their ball-handling skills in tight spaces. It forces players to change directions and pivot while dribbling, which can be difficult to do in a small space.
Set up two cones about 10 feet apart.
Start with the ball in your dominant hand at the midpoint between the cones.
Dribble the ball in a figure 8 pattern around the cones, keeping your head up and your eyes on the cones.
Repeat the drill on the other side.
Difficulty progression:
As you get better, move the cones closer together.
Once you can dribble the ball in a figure 8 pattern around cones that are spaced about 2 feet apart, you can start adding a defender.
Dribbling Drills: Pound
This drill is designed to help players develop their speed and control while dribbling. Pounding the ball into the ground helps players develop the strength and coordination necessary to dribble quickly and smoothly.
Stand with the ball in your dominant hand in front of you.
Dribble the ball down the court, pounding the ball into the ground with each dribble.
Keep your head up and your eyes on the court.
Repeat the drill.
Difficulty progression:
As you get better, increase your speed.
Once you can dribble the ball down the court at full speed while pounding the ball into the ground, you can start adding a defender.
Dribbling Drills: Hesitation
This drill is designed to help players develop their ability to change direction while dribbling. Hesitating before changing direction can help players fool defenders and create open shots.
Stand with the ball in your dominant hand in front of you.
Dribble the ball down the court, and then hesitate for a moment before changing direction.
Change direction and continue dribbling.
Repeat the drill.
Difficulty progression:
As you get better, make your hesitations more pronounced.
Once you can dribble the ball down the court and change direction quickly and smoothly, you can start adding a defender.
Dribbling Drills: Crossover
This drill is designed to help players develop their ability to crossover while dribbling. Crossovers can be used to change direction quickly and create open shots.
Stand with the ball in your dominant hand in front of you.
Dribble the ball down the court, and then crossover to your other hand.
Continue dribbling with your other hand.
Repeat the drill.
Difficulty progression:
As you get better, make your crossovers more pronounced.
Once you can dribble the ball down the court and crossover quickly and smoothly, you can start adding a defender.
Dribbling Drills: Behind-the-Back
This drill is designed to help players develop their ability to dribble behind their back. Dribbling behind the back can be used to create separation from defenders and create open shots.
Stand with the ball in your dominant hand in front of you.
Dribble the ball down the court, and then dribble behind your back to your other hand.
Continue dribbling with your other hand.
Repeat the drill.
Difficulty progression:
As you get better, make your dribbles behind your back more pronounced.
Once you can dribble the ball down the court and dribble behind your back quickly and smoothly, you can start adding a defender.
These are just a few dribbling drills that you can use to help your players improve their skills. By regularly practicing these drills, your players will develop the speed, control, and ball-handling skills they need to be successful on the court.
If you coach a K-8th grade team, we have hundreds of resources. All laid out in an easy-to-follow, step-by-step system to save you time and money. Check out coachingyouthhoops.com today!
Last month’s article dealt with the installation of various Point Motion sets. What I want to focus on in this month’s article are some drills to help install and get your players shots out of these various looks. We all know that as coaches we want todevelop the needed muscle memory, footwork, and confidence from the spots on the court where the shots will come from.
Below I will describe 3 different shooting drills with diagrams attached to help get shots for players in the spots they will shoot from.
Point Motion Shooting Drills
Drill 1: Need 2 lines. 1 line in the left pinch area where the 5 will usually receive the ball and a line on the right wing. You also need a coach/manager in the right pinch area with a ball.
The line of players with a ball will pass their ball to the right wing and immediately set a ball screen. The player on the right wing will receive the ball and drive for a layup. The player that sets the screen will pop and receive a pass from the coach/manager for a shot.
Switch lines after each rep to work both actions.
Drill 2: Same setup as Drill 1. The ball line will dribble and do a handoff with the other line. The lin without the ball to start will take that handoff and drive for a layup.
After the handoff, the player that started with the ball and shape up for a shot attempt from a pass from the coach/manager.
Switch lines after each rep to work both actions.
Drill 3: This drill needs 2 lines, 1 on the right wing and 1 on the left wing. The line on the right wing will start with balls. They will drive down to the baseline, attacking the paint. The other line will move from the left wing to the left corner.
Once the player with the ball gets to the baseline area, they will hit their teammate in the opposite corner. The player willreceive the pass in the left corner and take a shot.
Switch lines after each rep to work both actions.
Kyle Brasher | Gibson Southern High School
Lady Titans Basketball Coach
If you coach a K-8th grade team, we have hundreds of resources. All laid out in an easy-to-follow, step-by-step system to save you time and money. Check out coachingyouthhoops.com today!
Defense is a critical component of basketball success, and in this blog, we will provide you with valuable insights and effective drills to enhance your players’ defensive skills. From mastering defensive stance and closing out to excelling in rebounding and pressure defense, we have curated a collection of individual defensive drills to help your team elevate their game.
Whether you’re a coach looking to sharpen your coaching strategies or a player seeking to improve your defensive prowess, our blog is your go-to resource. Let’s dive into the world of individual defensive drills for better basketball performance!
Essential Individual Defensive Drills for Better Basketball
To maximize our practice time, it’s crucial to allocate the first 3-5 minutes to warm up our athletes mentally and physically while focusing on fundamental techniques. By repeatedly executing and reviewing the basics throughout the season, we can build a solid foundation for continuous skill development. Here are the skills I plan to emphasize during these individual defensive drills:
Stance
Closing out
Chinning a rebound followed by a good outlet pass
For the initial week and a half to two weeks, I’ll prioritize these drills daily. Building upon the previous segment, let’s move on to the next set of drills:
Defensive Drill: 1-on-1 Box Out
Coach starts with the ball on the wing, offense on the opposite wing, and defense in helpside.
The coach shoots, and the defense boxes out, pursues the ball, and rotates to offense. Intensity increases gradually as defense improves.
Defensive Drill: 1-on-1 Full Court – Force Sideline
Start in the baseline/sideline corner, with the ballhandler attempting to beat the defender to the middle of the court.
The defender’s task is to stay on the inside hip of the ball handler, forcing them up the sideline. Proper positioning is vital.
Defensive Drill: 1-on-1 Pressure the Passer
Offensive and defensive players positioned on wings, with the remaining players forming lines on the blocks.
Defense applies pressure without fouling for 5 seconds as the offense holds the ball. The offense then attempts an entry pass into the post while the defense aims for a deflection.
Defensive Drill: 1-on-1 Jump to the Ball
Offensive and defensive players start on each wing, with a coach at the top of the key. The offense passes to the coach, and the defense jumps towards the ball.
The offense then V-cuts down to the block while the defense prevents them from cutting in front of their face. Intensity increases progressively.
By incorporating these individual defensive drills into your practice routine, you’ll lay the groundwork for better basketball performance. Remember to focus on technique, gradually increase intensity, and provide feedback to enhance your players’ defensive abilities. Stay tuned for more valuable basketball insights and drills!
If you coach a K-8th grade team, we have hundreds of resources. All laid out in an easy-to-follow, step-by-step system to save you time and money. Check out coachingyouthhoops.com today!
Welcome to our guide on teaching offensive skills, plays, and offenses for better basketball performance. In this article, we present six progressive steps designed to enhance your coaching approach and help your players play better basketball on the court.
By following these steps, you’ll be able to introduce new skills effectively, ensure proper execution, increase speed, incorporate teamwork, integrate defensive elements, and ultimately apply the learned techniques in real-game situations. Whether you’re a seasoned coach or just starting out, this guide will provide you with a solid framework to teach and improve offensive skills, contributing to overall better basketball performance. Let’s dive in!
6 Steps to Teach any Offensive Skill, Play, or Offense for Better Basketball
It’s often been said that basketball is the most over coached and under taught sport on the planet. In order to help change that, here are six progressive steps that can be used to teach any offensive skill, play, or offense.
Introduce the Skill or Play
Start by introducing the specific offensive skill, play, or offense to the players.
Demonstrate the movements, positioning, and timing involved.
Use a coach or experienced player to demonstrate the skill correctly.
Alternatively, utilize a video clip that clearly shows the desired execution.
Help players form a mental picture of the skill or play being executed perfectly.
Execute the Skill at a Slow Pace
Allow players to start executing the skill at a slow pace.
Ensure that all players have the opportunity to master the required techniques and mechanics.
Pay close attention to footwork, which often determines the success of a skill.
Increase Execution Speed
Transition to executing the skill at game speed.
Focus on executing quicker and quicker.
Use highly specific and well-designed breakdown drills to accomplish this.
Simplify the drills to minimize overthinking and maximize execution speed.
Repeat and Practice
For individual skills, emphasize repetition, repetition, and repetition.
For plays or offenses, combine multiple parts and involve more teammates.
Develop mental and physical quickness, teamwork, and coordination.
Example: Add the “picker” when teaching the pick and roll instead of driving around a stationary cone.
Add Defensive Elements
Introduce defense to make the learning process more enjoyable.
Avoid skipping the previous steps and going directly to this one.
Focus on executing all the individual parts while reading defensive reactions.
Apply in Game Situations
Incorporate the newly learned skill, play, or offense into actual game scenarios.
Utilize five-on-five situations to create a game-like environment.
Avoid overlooking or taking this step for granted.
Address any difficulties in carrying skills and actions from drills to game situations.
Remember to periodically review the steps even after progressing through all six. Continual improvement is always possible, regardless of skill level.
Ep 1759 Five Skill Every Player Should Work on During the Summer
Youth Basketball Coaching Made Easy
If you coach a K-8th grade team, we have hundreds of resources. All laid out in an easy-to-follow, step-by-step system to save you time and money. Check out coachingyouthhoops.com today!
Building a solid foundation in basketball skills is crucial for any player’s success on the court. Whether you’re a coach looking for fresh drills or a player eager to improve, these basketball skill development ideas will provide the tools needed to excel. From shooting techniques to defensive strategies, get ready to elevate your game with these practical and effective practice tips. Let’s dive in!
5 Skill Development Ideas for Basketball Practice
Believe it or not there used to be only one basketball season every year. Those players who had some extra time on their hands and wanted to play a little more would go to the closest park or city gym and play in pickup games. Sometimes those games were five-on-five full court but more often than not they would be half court three on three or four on four. Since only a relatively few players actually played in the off season, those that did were noticeably better than their peers when the official basketball season eventually started up again.
Of course, now things are noticeably different. There are two separate and distinct basketball seasons – school season and club season – and it seems that as soon as one ends the other begins immediately. As a result it’s very common for players to compete in upwards of 80 games a year! Some players benefit greatly from so many games while others just end up reinforcing already bad habits without improving at all.
If you are playing game after game after game and not improving like you want to or need to then it might be time to reevaluate your training schedule. Here are 5 things to consider when working out in the offseason. They are ideas adapted from Doug Lemov’s book for classroom teachers called “Practice Perfect.”
1. Encode Success
Fighting through adversity might make you mentally tougher and much more resilient but it’s not always the best way to develop basketball skills. I’m not saying everything you work on should be easy but instead of doing flashy, complicated drills focus on those things that are simple and game like.
Train yourself to be successful and once you have mastered a skill or movement then and only then move on to something more complicated. If possible, constantly look at pictures or watch videos of someone correctly executing the skill you’re trying to perfect. Think of it as “positive brainwashing.”
2. Practice the 20
The Pareto Principle states that 80 percent of your results will come from 20 percent of your actions.
Assuming that this principle is true, if you are serious about becoming a better player you should focus on getting real good at those things which produce the most results. If it doesn’t happen in a game – and often – why are you practicing it?
3. Objectives before Drills
The majority of young players that I know prepare for an individual skills workout by thinking: “Today I want to play these two shooting games and then do these ball handling drills, and then if somebody else is in the gym maybe we can get in a few games of one on one or two on two.”
Advanced players think something like this, “I’ve been missing slightly to the left lately so I need to work on my follow through and I can correct it by using this particular drill. Then since my crossover needs to be a little tighter I’m going to get out the cones and place them really close together so my ballhandling has to be tighter and quicker. I want to improve my attacking and finishing moves from the wing so I’m going to get someone else to come to the gym and defend me 25 times.” Notice the difference? It’s huge.
4. Make Your Strengths Even Stronger
The summer is a great time to add new skills and dimensions to your game but just make sure you don’t neglect the things you already do well.
I know a local high school girl who was an outstanding shooter but didn’t drive very well or very often. She evidently worked all summer on her attacking and finishing skills because when I saw her in college she was relentlessly attacking the rim. However, she never looked for her outside shot and when she did her shot looked completely broken. After an entire summer of working out she wasn’t a better player, just a different one!
5. Drill to Develop Skills
Scrimmage to Evaluate. Playing 60 games a summer is not going to help you develop a new skill or improve a weak one. What the games will do is give you the opportunity to implement those things you’ve been practicing.
If you’re not practicing during the week then you’re just playing on the weekends! Fun? Absolutely! But not necessarily conducive to becoming a better skilled and talented player.
Ep 1759 Five Skill Every Player Should Work on During the Summer
Youth Basketball Coaching Made Easy
If you coach a K-8th grade team, we have hundreds of resources. All laid out in an easy-to-follow, step-by-step system to save you time and money. Check out coachingyouthhoops.com today!
As a coach, you understand that success is not solely determined by talent or skill, but also by consistent and effective training routines. Developing and maintaining proper workout habits is the cornerstone of athletic progress, enabling players to enhance their strength, endurance, agility, and overall performance. Join us as we delve into the significance of workout habits, share expert insights, and provide practical tips to help you and your team establish a solid foundation for success through dedicated and purposeful training.
6 Essential Workout Habits
Any serious player will surely tell you that there is a huge difference between just hanging out in the gym and actually working out. But what is that difference? How do you know if you’re taking the right approach and getting more out of your gym time than just fun? Here are 6 essential habits that can turn gym time into a productive workout?
Meticulously schedule every facet of your workout.
Plan out in advance the days, times, and length of your workouts as well as the skills you’ll be practicing. Decide beforehand what areas you want to improve and then map out drills that will help you achieve your objectives. Once the plan is made treat it like you’re going to work and don’t let anything keep you from carrying out your plan.
Use a workout partner.
Working out with someone else accomplishes three things. A) It forces you to be accountable. It’s hard to miss a workout or even take a short cut when someone else is counting on you. B) Practicing with someone else, even if it’s just a friend or a parent, allows you to use more complex drills; drills that require a passer, rebounder, or defender. C) Having a workout partner can add a competitive component to your sessions as you work to excel at every drill and to “beat” your partner.
Workouts should always include warming up and cooling down.
There are almost as many ways to warm up as there are players. I know players who swear by the benefits of active stretching and jogging while others are convinced they benefit most from jumping rope and stationary ball handling. The important thing is that you do something to elevate your core body temperature and to prepare your muscles for high intensity work. Afterwards, stretching for at least 10 minutes or more will help get rid of any lactic acid build up and will help reduce muscle soreness.
Keep a workout journal.
Write down everything – specific drills, repetitions, who you worked with, time spent, etc. Keeping detailed records will help make every practice session seem more important and will allow you to visually track your progress. Even more importantly, the information you record in your journal can and should be used to plan future workouts.
Do more than just shoot.
Working on improving your shot is absolutely necessary and should be taken very seriously. However, you mustn’t neglect everything else if you are serious about elevating your game. Current Clippers assistant and renowned skill development trainer Kevin Eastman says that every workout should include shooting, ball handling, and conditioning at the very least. If that advice is good enough for NBA players then its good advice for you too.
Use various speeds to accelerate improvement.
It may sound blasphemous to some players and coaches but “game speed” is not always the best speed. When skills are first being learned going slower is usually more effective than going too quickly. Then once the skill is learned the speed of the repetitions can be increased. As execution improves the speed continues to increase until it is actually faster than “game speed.” Eventually making things harder in practice will make things easier in games.
There’s nothing wrong with hanging out in the gym and socializing with your friends while you put up a few shots. To me it’s a lot more fun than playing video games or watching television and I know it would be for you too. However, if you’re serious about getting better then develop these 6 habits and spend some time hanging out and some more time working out!
If you coach a K-8th grade team, we have hundreds of resources. All laid out in an easy-to-follow, step-by-step system to save you time and money. Check out coachingyouthhoops.com today!
As a youth basketball coach, I’ve seen players of all levels and abilities. While there are many skills that can be valuable for players to learn, there are five essential skills that every youth player should focus on. In this post, we’ll discuss these five skills, along with specific tactics and reasoning for each one, and explain how they can be helpful for youth basketball players.
Essential Youth Basketball Skills to Develop
These five essential skills are critical for youth basketball players to learn. Ball handling, shooting, defense, passing, and rebounding are fundamental skills that players will use in every game.
Ball Handling
One of the most fundamental skills in basketball is ball handling. Without good ball handling skills, players will struggle to move around the court, protect the ball, and make passes.
To improve ball handling skills, coaches can encourage players to practice dribbling with both hands, practice changing direction while dribbling, and incorporate cone drills to work on agility and control.
Shooting
Shooting is another essential skill that all youth basketball players should learn. Accuracy is critical for players to contribute to their team and score points.
Coaches can help players improve their shooting skills by encouraging proper form, incorporating shooting drills, and helping players develop a consistent shooting routine.
Defense
A good defense can make a big difference in a basketball game. Youth basketball players should learn how to play good defense, which includes staying low, moving their feet, and keeping their eyes on the ball.
Coaches can help players improve their defensive skills by incorporating defensive drills, practicing closeouts, and encouraging communication on the court.
Passing
Passing is another essential skill that all youth basketball players should learn. Good passing skills can help players move the ball around the court, find open teammates, and create scoring opportunities.
Coaches can help players improve their passing skills by practicing different types of passes, emphasizing the importance of accuracy and timing, and incorporating passing drills.
Rebounding
Rebounding is an important part of basketball and can help a team gain an advantage on both ends of the court.
Coaches can help players improve their rebounding skills by teaching proper technique, encouraging box-outs, and incorporating rebounding drills into practice.
As coaches, we can help players develop these skills by incorporating specific drills and exercises into practice, emphasizing the importance of good technique and consistency, and providing positive feedback to encourage improvement. With these skills, youth basketball players can improve their performance and make valuable contributions to their teams.
If you coach a K-8th grade team, we have hundreds of resources all laid out in an easy-to-follow, step-by-step system to save you time and money. Check out coachingyouthhoops.com today!
As a youth basketball coach, it’s essential to design drills that help your players develop the skills they need to succeed on the court. These drills should be challenging, fun, and age-appropriate. In this post, we’ll discuss the top 10 drills for youth basketball players, along with specific tactics and approaches coaches can use to ensure their players get the most out of each drill.
10 Youth Basketball Drills
Designing effective drills for youth basketball players is essential for helping them develop the skills they need to succeed on the court.
3-on-3 Half-Court Scrimmage
This drill is excellent for improving team play, communication, and defensive skills. Divide the team into two groups of three and have them play a half-court game with no dribbling. Encourage players to communicate with each other and work together to defend and score.
Full-Court Layup Drill
This drill helps players develop their speed and agility while practicing their layup technique. Have players line up at one end of the court, then sprint to the other end while dribbling and finishing with a layup. Repeat this drill several times, alternating which hand the players use to dribble.
Shooting Relay
This drill helps players improve their shooting accuracy and speed. Divide the team into two groups and have them stand at opposite ends of the court. Each player takes turns shooting and running to retrieve the ball. The first team to make all their shots and return to the starting line wins.
Zig-Zag Dribbling Drill
This drill helps players develop their ball-handling skills and improve their footwork. Set up cones in a zig-zag pattern on the court and have players dribble the ball through the cones while maintaining control and speed.
Defensive Slide Drill
This drill helps players improve their lateral movement and defensive skills. Have players start at one end of the court and slide laterally to the other end while staying low and keeping their eyes on the coach. Repeat this drill several times, alternating the direction players slide.
Basic Rebounding Drill
This drill helps players improve their rebounding skills and timing. Have one player stand under the basket while the coach shoots the ball from various angles. The player must jump and grab the rebound, then quickly pass the ball back to the coach.
Two-Ball Dribbling Drill
This drill helps players improve their ball-handling skills and coordination. Have players dribble two balls at the same time, alternating which hand each ball is in. Encourage players to keep their eyes up and maintain control of both balls.
Line Passing Drill
This drill helps players improve their passing accuracy and speed. Have players line up facing each other, then pass the ball back and forth while walking down the court. Encourage players to use different types of passes, such as chest passes and bounce passes.
Pick and Roll Drill
This drill helps players improve their teamwork and pick-and-roll skills. Have two players set up a pick-and-roll, with one player setting a screen and the other player dribbling and using the screen to get past a defender. Encourage players to communicate and work together to execute the play.
Hot Potato Drill
This drill helps players improve their reaction time and hand-eye coordination. Have players stand in a circle and pass the ball quickly to each other, trying to keep the ball away from a defender in the middle. The defender tries to steal the ball, and if they do, they switch places with the player who lost possession.
If you coach a K-8th grade team, we have hundreds of resources all laid out in an easy-to-follow, step-by-step system to save you time and money. Check out coachingyouthhoops.com today!
Here is a great competitive half court offense drill that allows you to work on your offense while also emphasizing your defense. Teams play “live” 5-on-5 starting at half court. (If you have 12 players, you could have three groups and play 4-on-4).
Defensive team starts out by working to get a single stop. (A stop means gaining possession of the ball either by a steal, a defensive rebound, or by an offensive turnover.) After getting one stop, the defense then attempts to get two stops in a row, then three, then four and finally five straight stops.
If the offense scores then they get to play defense. The two teams alternate back and forth until one team gets five stops in a row.
The drill can also be done backwards with each team staying on defense until they get five straight stops. When both teams have stopped five straight then they compete to get four straight stops, then three, then two, then one
“Stops” A Half Court Offense Drill that Emphasizes Defense
Half court man defense versus halfcourt man offense. 5-on-5 with both the offense and defense playing “live.” This drill is done halfcourt only. Be sure to discuss with your defense your specific approach to switching screens.
The defense must get five stops in a row. A stop means getting possession of the ball or off of a turnover by the offense. The defense is allowed only one foul. If a second foul is committed, the five stops count resets to zero.
After five stops, the defense gets to switch to offense. The drill then begins again, but the switch counter goes from five to four. Each time the drill resets, the counter drops. This half court offense drill allows for an emphasis on half court defense.
One gripe you hear on social media, talk radio, and from various coaching outlets is the following: “The fundamentals of the game are lost!” The question then comes back to this: Why are basketball “fundamentals” lost? And if that truly is the case, what can be done to fix it?
As all coaches (and parents) know, what you emphasize is what you believe in. As coaches, if we do not emphasize the fundamentals then your players will not work on the fundamentals. The next question to this conundrum is what exactly are basketball “fundamentals”?
Fundamentals can be defined as the basics of the game, skills all players need to have to be successful basketball players. I believe the fundamentals center around three skills: shooting, passing, and dribbling. In our practices and drills, we strive to do things to improve our players abilities in these three areas. Below are 3 “fundamental” drills that help to teach these three skills with some fundamental principles.
Drills to Practice Basketball Fundamentals
Drill 1 (2 Foot 2 Hand Drill)
This is a super fundamental drill that will have players working on attacking a defender’s hip, landing on a 2 foot jump stop, and finishing strong through a padded defender.
Drill 2 (4 on 3 Passing)
This drill brings in the lost art of the “pass fake.” In this drill, the offense’s goal is to complete 10 clean passes without a defensive steal or deflection. The key is each offensive player must keep a foot on either the block or the elbow (whichever they were assigned). This also works on an important part of both offense and defense:communication.
Drill 3 (Perfect Passing)
This is a great drill to make sure our passes are hitting our teammates in stride, it works on our communication, and we can even test how our players do in a little more difficult situation when we randomly changedirections in the middle of the drill.
I hope you enjoyed looking through these three fundamental drills!
Kyle Brasher | Gibson Southern High School
Lady Titans Basketball Coach
There are thousands of basketball drills available in videos, books, and on the internet these days. But how can you tell which one’s a good practice drill and which one isn’t? That’s among the most difficult aspects of practice planning for new basketball coaches. Sometimes, though, it’s as easy as finding a veteran coach and building off what they used to be successful.
Here are 9 tips to recognize a good basketball practice drill that I learned from ultra successful coach Burrall Paye.
Practice Drill Tip 1: Make It Game-Like
When I was in school I was always frustrated by the teacher who would teach us tons of stuff only to find out that none of it was on the test. The gym is your classroom and the games are the test.
Help your students (players) pass the test (win the game) by teaching them what they need to know and giving them a preview of how to apply it. If it doesn’t happen in the game don’t do it in your team practices.
Practice Drill Tip 2: Make It Relevant
There are a lot of coaches who fill their practices with drills that they ran when they were in high school or college or with “favorite” drills that they have picked up along the way – even though those same drills have absolutely nothing to do with their current offense, defense, or coaching philosophy.
If a drill is not applicable or transferable to what you are trying to teach your current teams then don’t do it!
Practice Drill Tip 3: Make It Progressive
If you can lift 10 pounds in September and are still lifting 10 pounds in August you might be lifting all the time but you’re not getting any stronger. The same is true with your drill work in practice.
The best drills grow right along with your players and give them the opportunity to improve over the course of the entire season.
Practice Drill Tip 4: Make It Competitive
One of the most important and productive things you can teach your players is how to be competitive and the use of competitive drills is a great way to do this.
Whether your players are competing against another player or team, competing against themselves or competing against the clock they will benefit from increasing their competitive level as well as their skill level. Most non competitive drills are useless.
Practice Drill Tip 5: Incorporate Conditioning
Ask yourself this – how much does your team have to run at the end of practice to improve their conditioning? If it’s a lot then you are not using enough drills that contain a built in conditioning component.
Keep everyone moving, reduce standing around and remember that just about every half court drill can be turned into a full court drill with just a little tweaking.
Practice Drill Tip 6: Don’t Be Too Complicated
Great drills should make your players stretch their levels of skill, concentration and teamwork and in many cases should be tougher than an actual game situation.
However, the drills should not be impossible to master, especially at lower levels where constant perceived failure could permanently damage a player’s confidence.
Practice Drill Tip 7: Keep Groups Small
We all know and accept the fact that repetition is the mother of all learning. Then why do we run drills where lots of players are standing around watching and then only get a few repetitions when it is finally their turn?
Instead, divide the team in half and run the same drill at both ends of the court so there is less standing and more practicing. Better yet, utilize all your assistant coaches and managers and organize a series of timed drill stations where every player is constantly working and learning.
Practice Drill Tip 8: Incorporate Decision Making
If you can teach your players to be competitive and make good decisions you’ve already won half the battle. This is difficult for those coaches who want complete control over every possession and every player. That said, teaching kids how to make good decisions is synonymous with teaching them how to play.
Since there are a limited number of timeouts, at some time in every game your players will need to make some decisions on their own. It’s better that they learn how to do that in practice instead of “winging it” when the game is on the line.
Practice Drill Tip 9: Keep It Fun
Granted, not all drills need to be fun but at least they should be interesting and challenging. This is especially true with younger players and as the season progresses. LA Clippers assistant coach Kevin Eastman says that fatigue and boredom are the two biggest practice killers.
Be creative. You wouldn’t want to eat chicken cooked the exact same way every single night for 6 months! So of course, your players don’t want to run the exact same closeout drill every single night of the season!
Don’t fall into the trap of drilling just for the sake of drilling. Make sure each drill is run with a purpose and fits into your practice objective for that particular day. If you follow the 9 tips above you can become what Kevin Eastman calls a “skill coach not a drill coach.”
Failing to prepare is preparing to fail! Quickly create, organize, & manage your practice plans all in one place to help win games.
Create detailed practice plans! Add drills, notes, diagrams, videos, & groups with an easy-to-use interface to create a detailed practice plan in no time!
Getting the right rhythm and flow to practice remains one of the most challenging aspects for most basketball coaches. It’s important to change up your approach from time to time to prevent players from getting board or simply going through the motions. Adding pace-changing basketball practice activities can inject new life into each session and set players up for success.
Basketball Practice Activities: Opposites
Opposites is a 10-minute scrimmage where every player can only use their opposite hand to dribble, pass, and shoot. Their strong hand can only be used to catch passes, and as a guide for shooting and dribbling transfers. Coaches ref the scrimmage to make sure everybody’s sticking to the rules. Every player on the winning team gets 1 point for “The Practice Breakers Board.”
This activity is hilariously fun, but also strongly encourages each player to work intensely on developing their opposite hand. It gets them in the habit of forcing the issue, and experiencing the intial ups and downs along with the rest of the team. “Opposites” is a tremendous team confidence builder, and is truely a blast. Have fun!
Basketball Practice Activities: Half-Court Heroes
For “Half-court Heroes,” 3 players spread across the half-court stripe. They will all back up several feet, and with a running start at the coach’s whistle, will each take a halfcourt shot at the same time. The challenge is for them to choose the proper height, distance, and speed that will allow their shot to arrive at a different time than their two teammates. Thus giving their shot a better opportunity to go in.
The only true rule is that all three players must shoot at the same time. Coaches ref this activity as well, and often join in with the team, which makes it even more fun. The player with the most makes at the end of 10 minutes, gets a point on “The Practice Breakers Board.” Your team will love it!
Basketball Practice Activities: Stick and Pick
“Stick and Pick” is one of the most engaging basketball practice activities. The coaches select a specific shot for every player to shoot. Whoever makes(sticks) it first, gets to pick the next shot for everybody to take until the next make, which can be any shot they want, regardless of the difficulty. The more difficult each shot becomes, the safer it becomes for the current leader to protect their point for “The Practice Breakers Board”.
There are only 2 simple rules. First, the shot must be attempted from no more than a few feet beyond the 3 point line, and must be shot from in bounds. Second, the line must rotate in order every practice, so each player gets the chance to be the first shooter. It’s very similar to “H.O.R.S.E.”, but is so much more challenging and engaging.
The last player to make a shot at the end of 10 minutes, will of course, get a point on “The Practice Breakers Board”. This is also another great opportunity for coaches to participate whenever they see fit. Enjoy!
When developing any youth basketball shooting drill, a good coach must consider what types of shots they want to focus on. Drills should reinforce the skills that will help the players perform within the context of a game. So shooting drills should be designed around shots that would normally result from a team’s offensive actions. The best basketball shooting drills are representative of a team’s base offense.
Youth Basketball Shooting Drill: 3-2-1 Shooting
This drill involves at least two players and is a high-volume, high-repetition practice. Over the course of one or two minutes, non-stop, a single shooter progresses through a series of jump shots. The other player rebounds and feeds the shooter from near the hoop.
The shooter begins behind the three-point line for their first shot. From there, the shooter moves into the midrange for their second shot. The last shot in the sequence is a layup (which is worth one point). The rebounder keeps track of the shooter’s score as their teammate progresses through the drill. After the time is up, the players switch roles.
This shooting drill provides valuable practice for any shooter, regardless of talent-level. The shooter must move, set their feet and find a repeatable release. Even the other player gets reps at securing rebounds and making solid passes.
This drill can incorporate internal competition as well. The two partnered players can compete with one another, or with another pair at another hoop.
Basketball coaches everywhere are constantly searching for new Competitive Practice Games. Keeping young players engaged throughout a practice period often means mixing up physical warm-ups and stretching, technical drills and competitive contests. Coaches need to layer the information and embed key skills before introducing and installing specific sets.
4-on-4 Cut Throat is a high-energy, high-movement drill. Coaches divide their teams into sets of four, with two groups on the floor at all times. Through each progression, players navigate the possession, looking to score or get a stop. As each possession ends, the successful team (the one that scored or made the stop) stays on the floor, while the losing group comes off. The waiting team comes on and fills the vacancy.
Coaches can allow the players to free play, or can install specific needs in a possession. The free-flowing nature of the drill allows players to learn on the fly. Whatever a coach decides to emphasize in the drill often translates directly to the game.
Emphasis: Build solid offensive and defensive habits. The hidden value remains the opportunity for coaches to provide direct instruction to the teams that lose a possession. As the losing team comes off the floor, a coach can immediately pull them aside and talk through what went wrong while the other two teams progress through the drill.
Competitive Games in Basketball Practice: One-Way Basket
This is a full-court competitive game that allows coaches to install a specific play or set, while also practice key defensive principles. In the half court, the offense runs their first action against a full compliment of defenders. If this action results in a basket, then the offense and defense switch. But if the defense gets a stop, then it’s a full court game.
The defensive stop flows into transition offense as that squad seeks to score. Only points scored off of defensive stops count in this competitive practice game. This game should flow back and forth for several minutes before coaches change anything.
Emphasis: Defense. Basketball coaches that incorporate this competitive practice game look to establish the mindset that the team needs to focus on getting defensive stops before getting to the offensive end of the floor.
It’s important for coaches to allow their players to play through their mistakes and learn as these competitive practice games to unfold. These controlled situations and scrimmages also provide plenty of information for coaching staffs to digest. They’re learning the strengths and weaknesses of their teams.
One of the most important elements to designing a valuable practice plan is deciding what core basketball elements you’ll concentrate on. Many practices begin with traditional layup lines and jump shots. But how often are the players simply going through the motions of those drills? Installing the right warm up drills will vastly improve the efficiency of your practice. Adding these Youth Basketball Finishing Drills will help take your young team to the next level of its development.
Youth Basketball Finishing Drills: Star Passing with Finish
Star Passing is common one in many gyms, but this version of the drill incorporates the necessary element of finishing with a made basket. This doubles well not only as a basketball practice warm up drill, but also as a game warm up.
The drill begins with players arrayed in a star across the half court. The ball starts with the line under the basket. There are lines in the corners, as well as on the wings.
The first pass goes from under the basket to the left wing. The passer follows their pass and joins the end of that line. From there, the left wing passes to the right corner and follows. Right corner makes a baseline pass to the left corner and follows.
The final move in this initial turn through the drill involves the left corner feeding the player that cuts from the right wing. That player receives the pass and finishes the turn with a layup.
Variations of the drill can incorporate a number of additional basketball elements. Coaches can require that the ball never hits the floor. They can reverse the flow of the drill to work on left-hand layups. Coaches can have a defender waiting at the rim to challenge the finisher. The list goes on an on.
This youth basketball finishing drills stands among Coach Steger’s favorite basketball practice drills. The DeMatha Finishing drill can be particularly valuable as both a practice drill and as a pregame warmup drill.
This drill pits two players against one another in a simple clash of offense and defense. It’s a high-impact, fast-paced drill where the offensive player attacks the basket and the trailing defender needs to recover. The drill features two lines and usually a coach for passing. Players can stand in for the coaches as passers if need be.
The drill itself can be situated in a number of different spots on the floor. Where the drill starts can be dictated by the coach and what the team needs are.
The drill itself is simple. The passer feeds the offensive player, who must finish at the rim from their starting point. The offensive player can try a dunk or layup. The defender, meanwhile, must contest the shot as best they can. Physical play can be encouraged for the defense to help the offense improve finishing through contact.

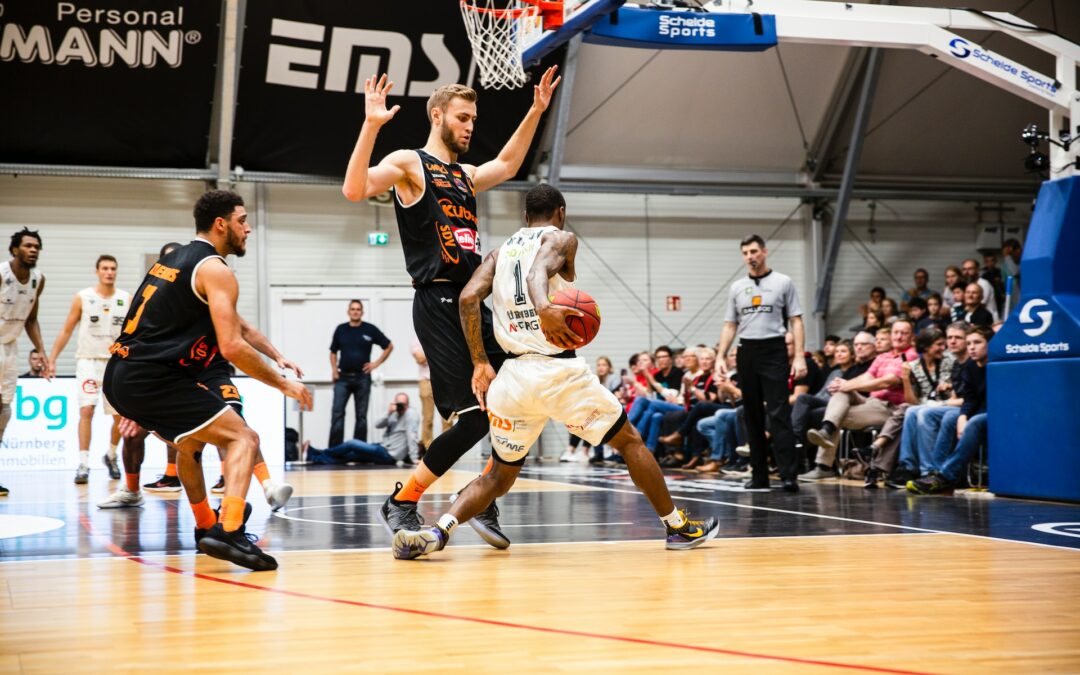


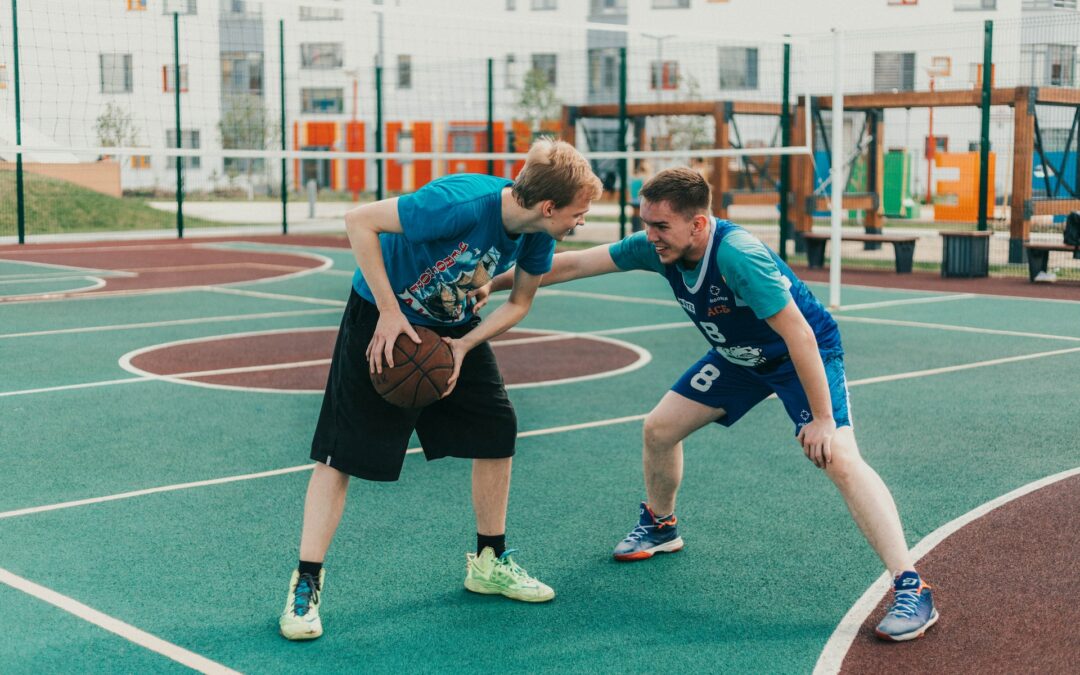
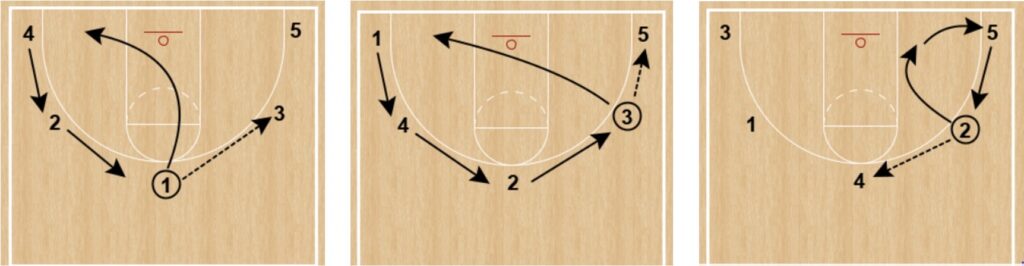
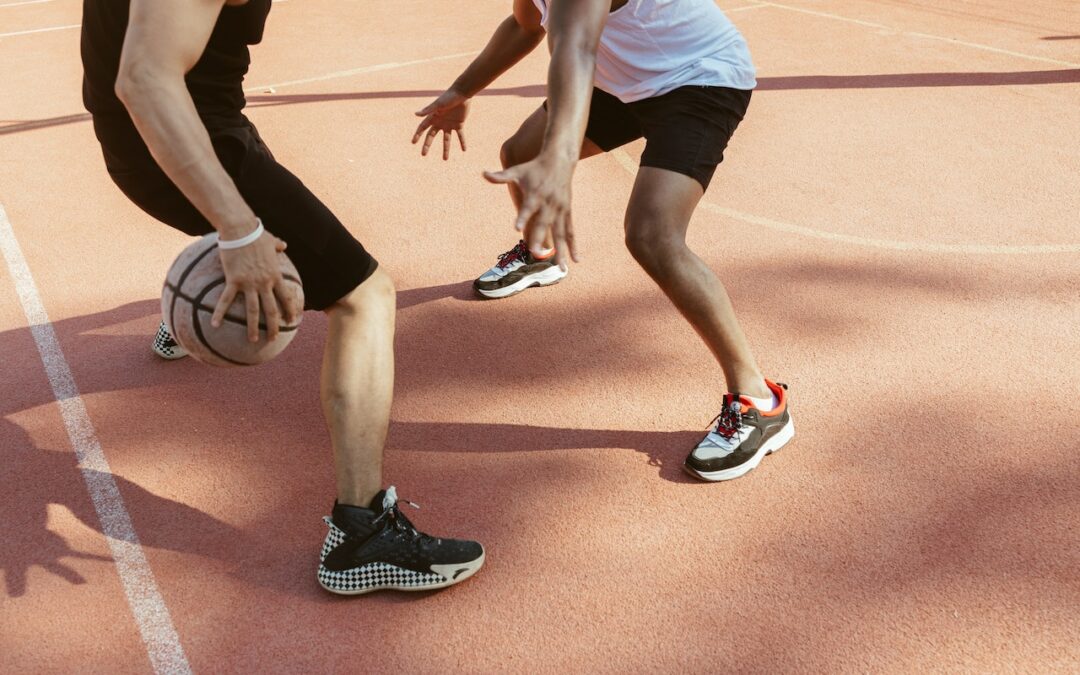
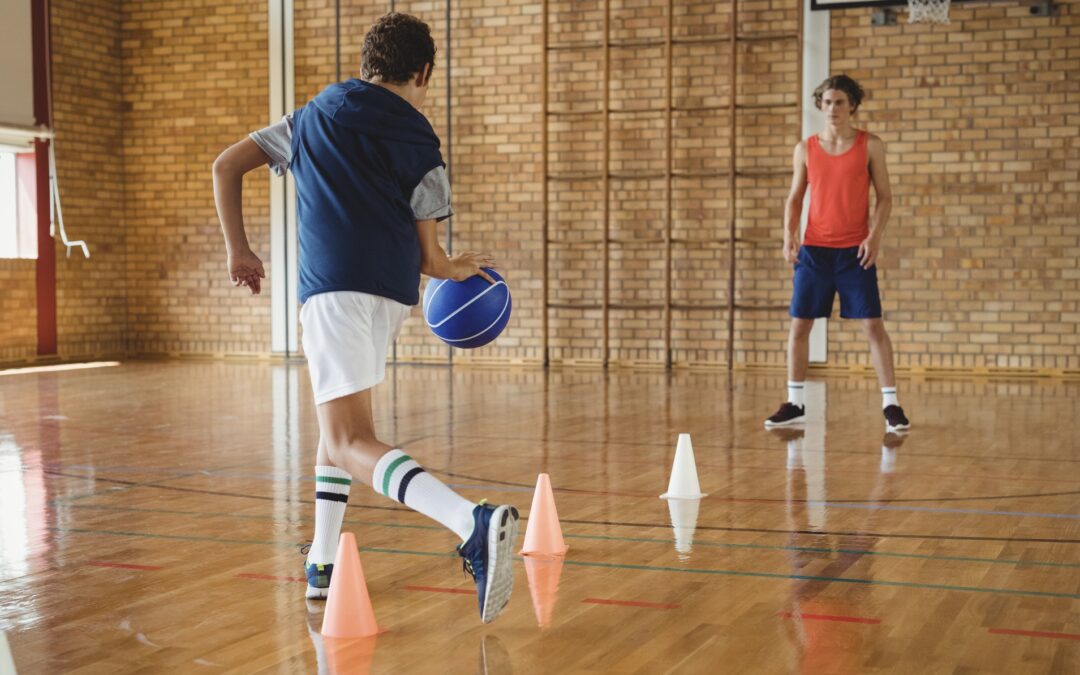

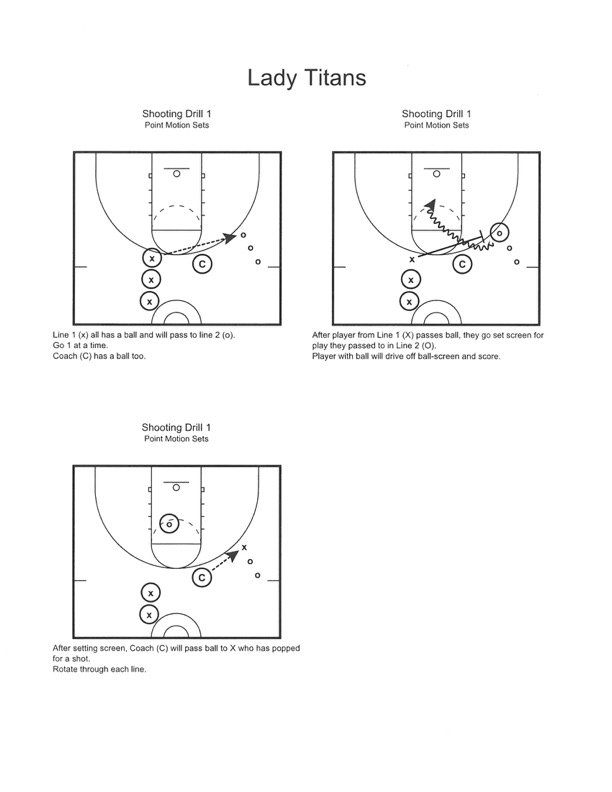
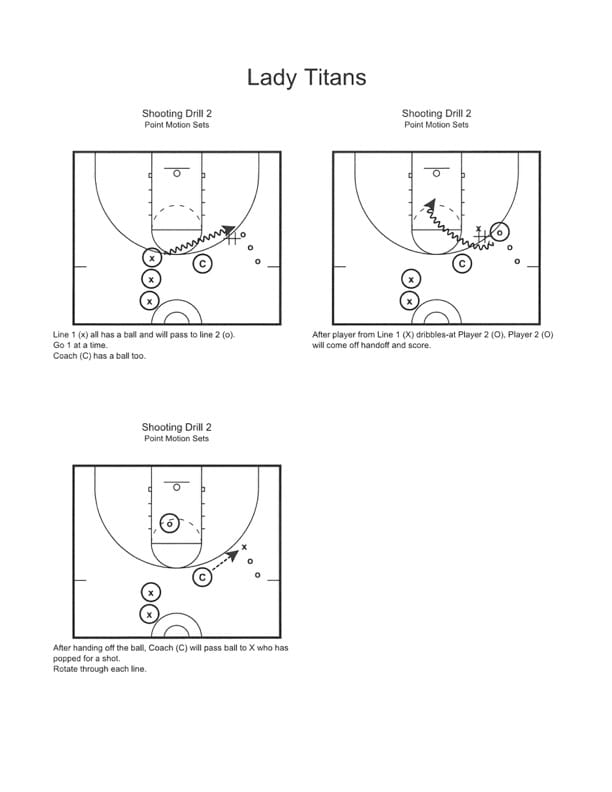
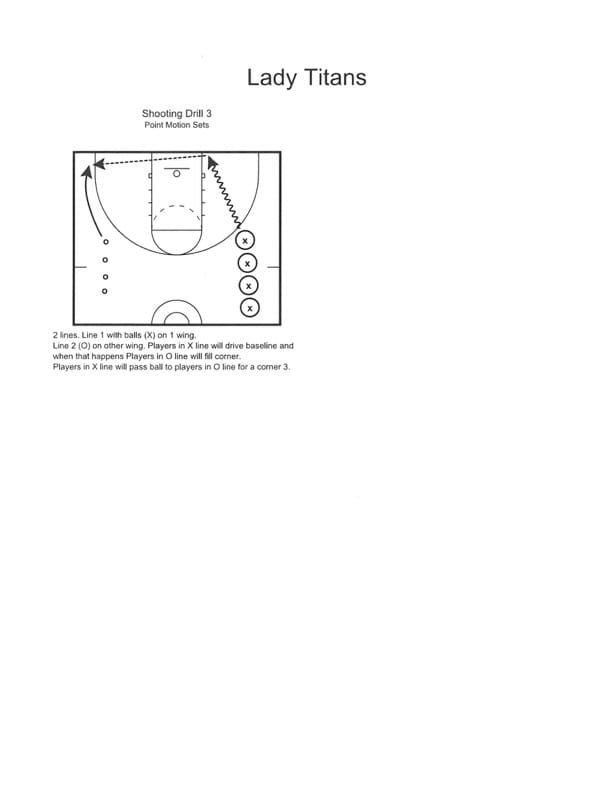
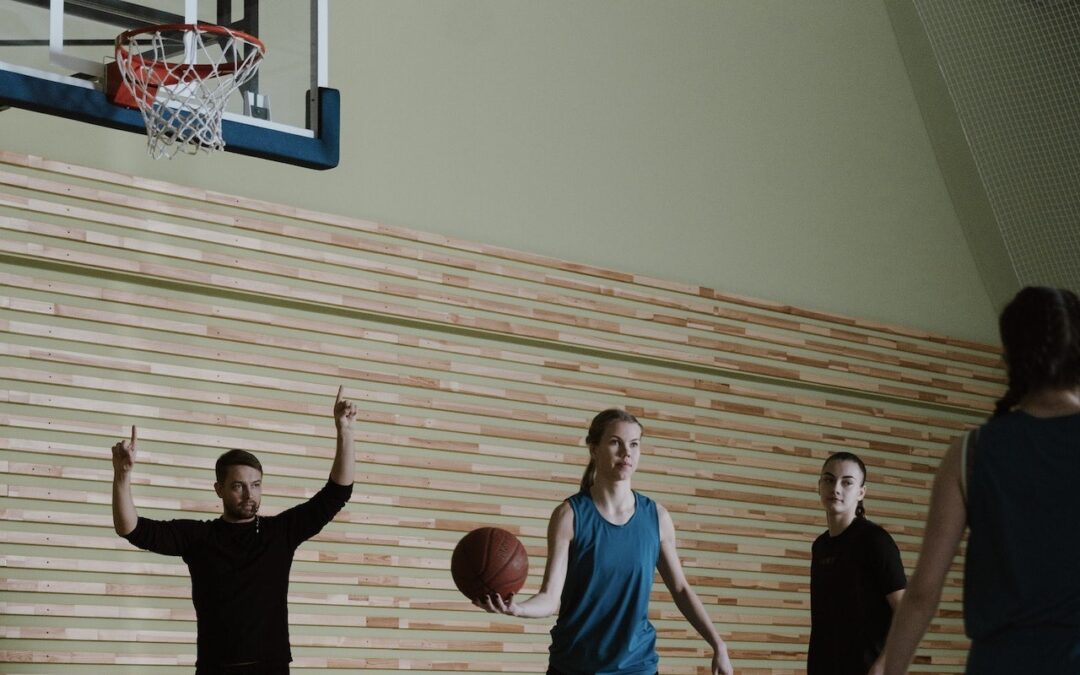
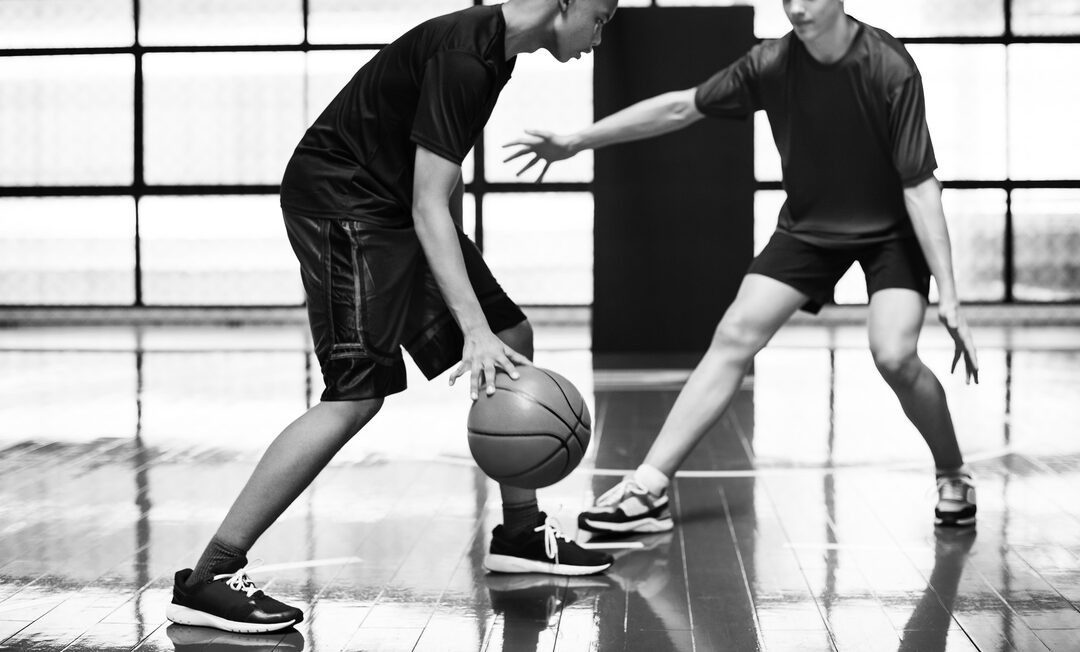
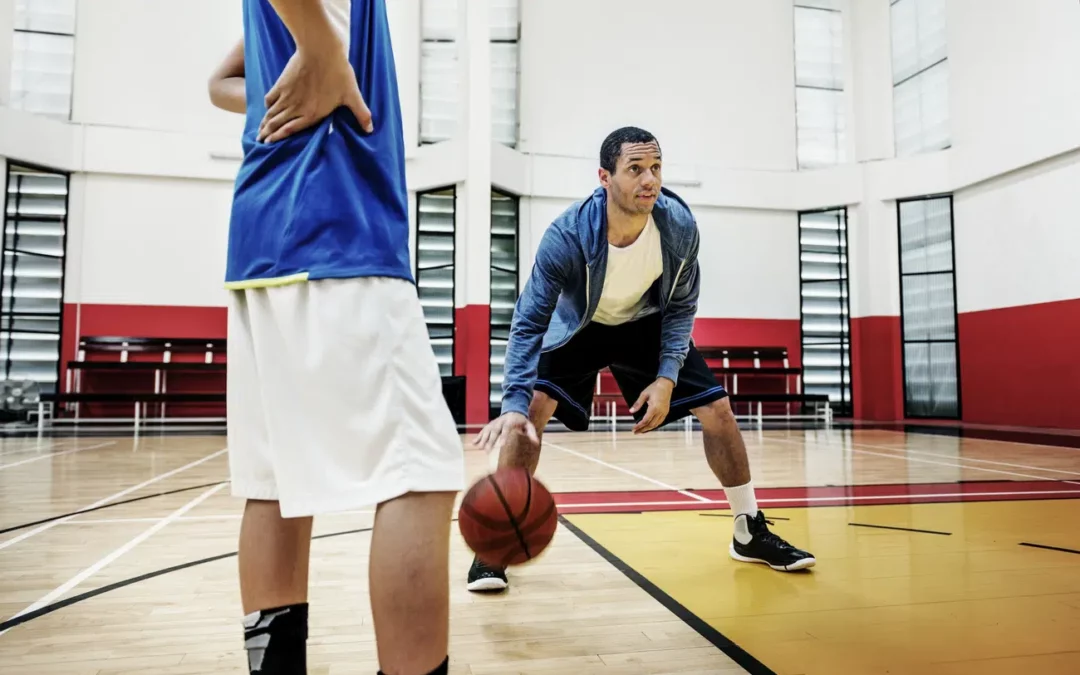
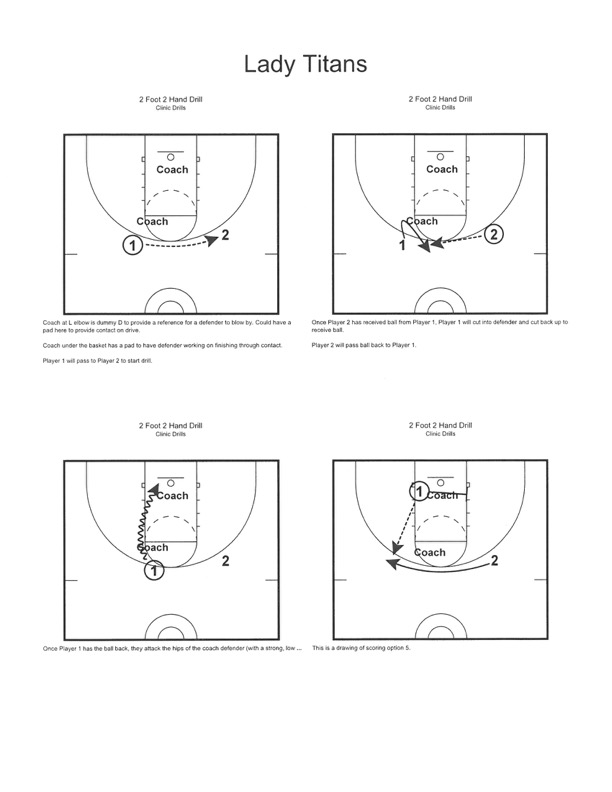
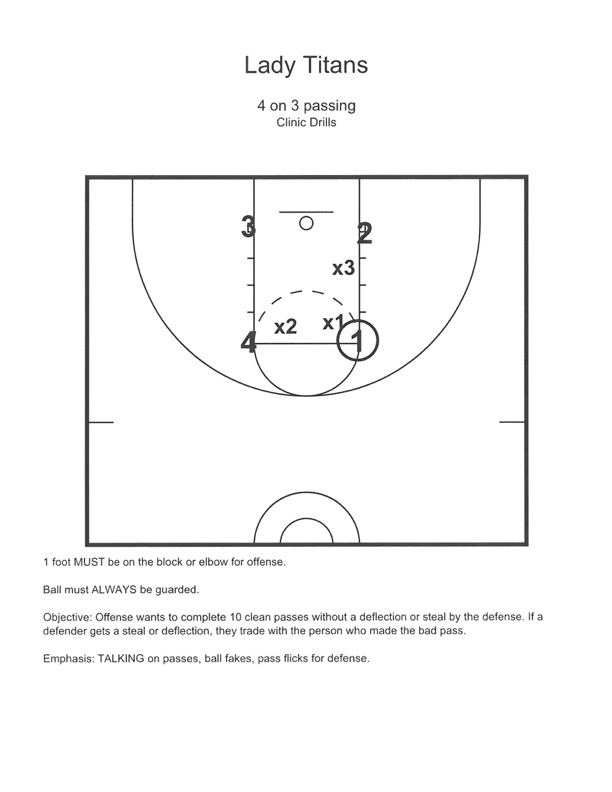
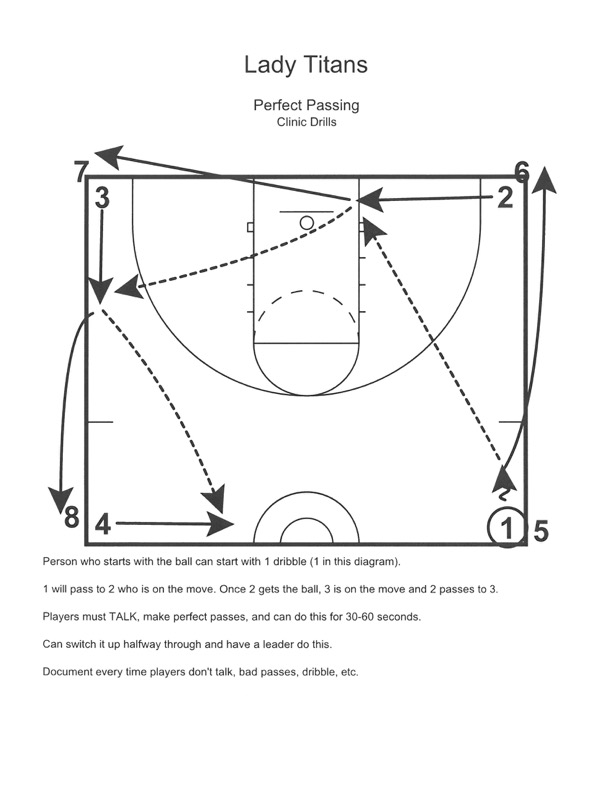
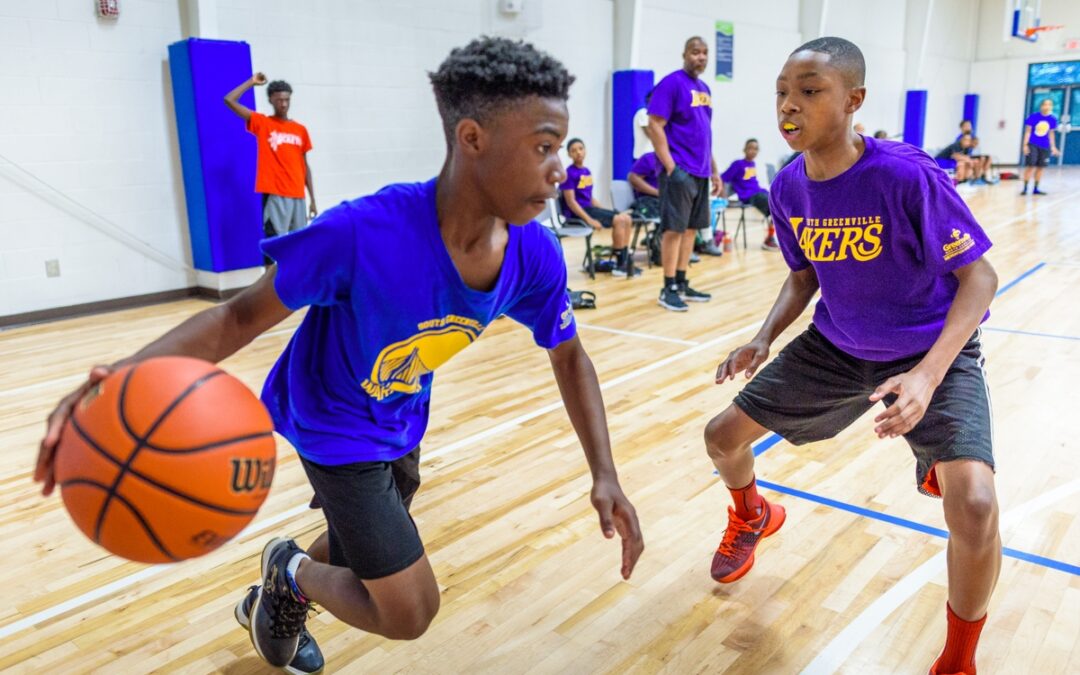

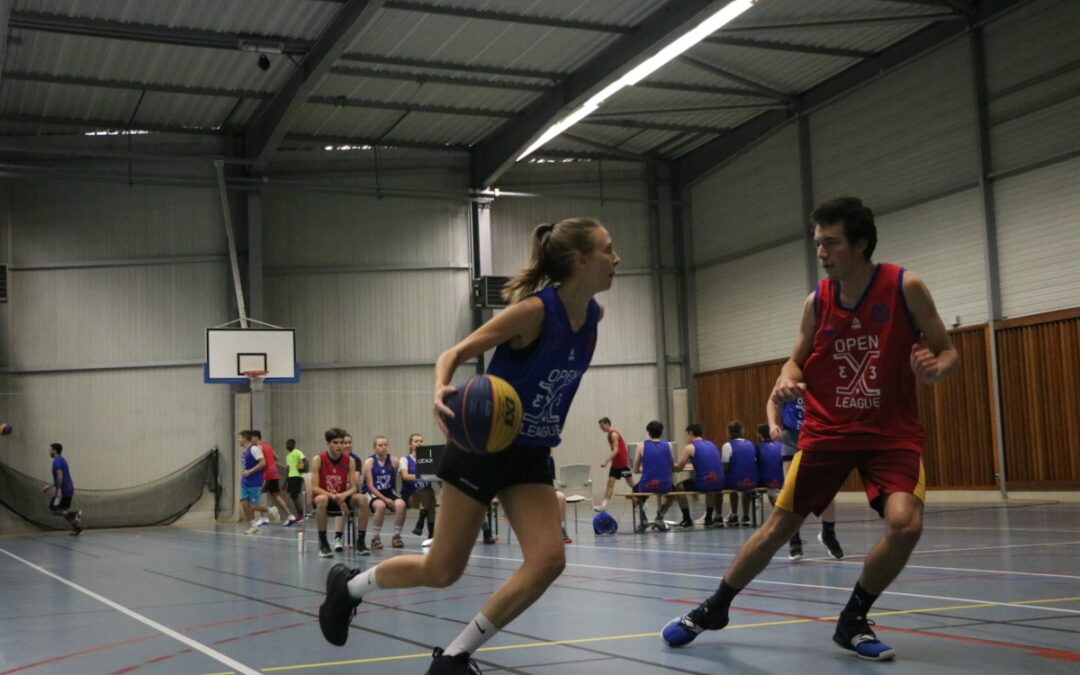
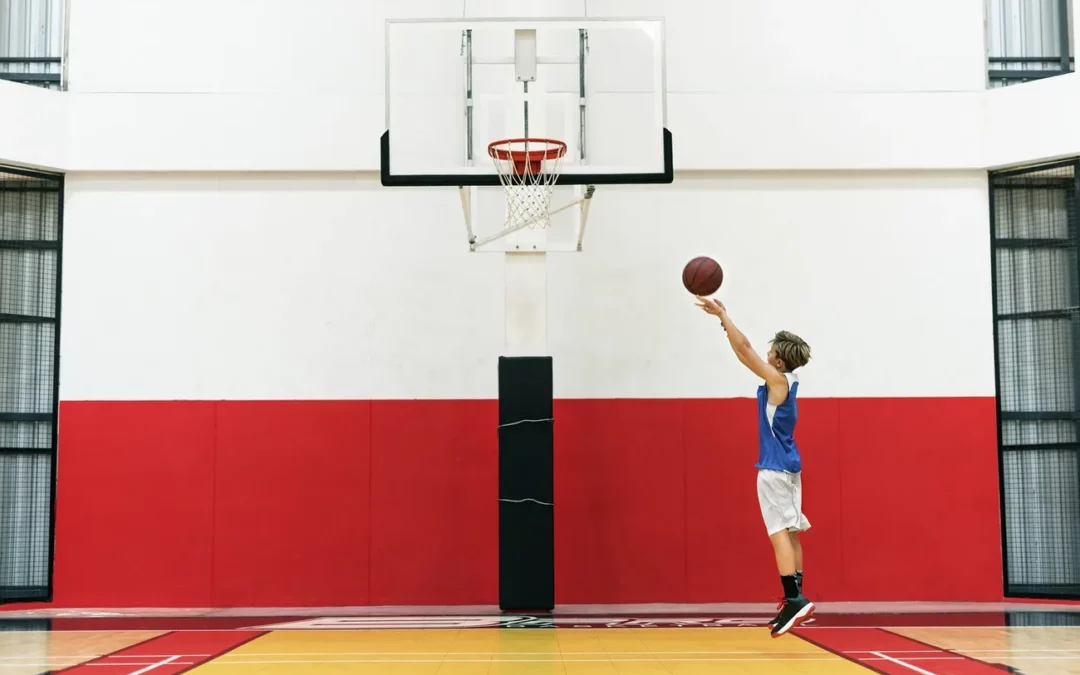
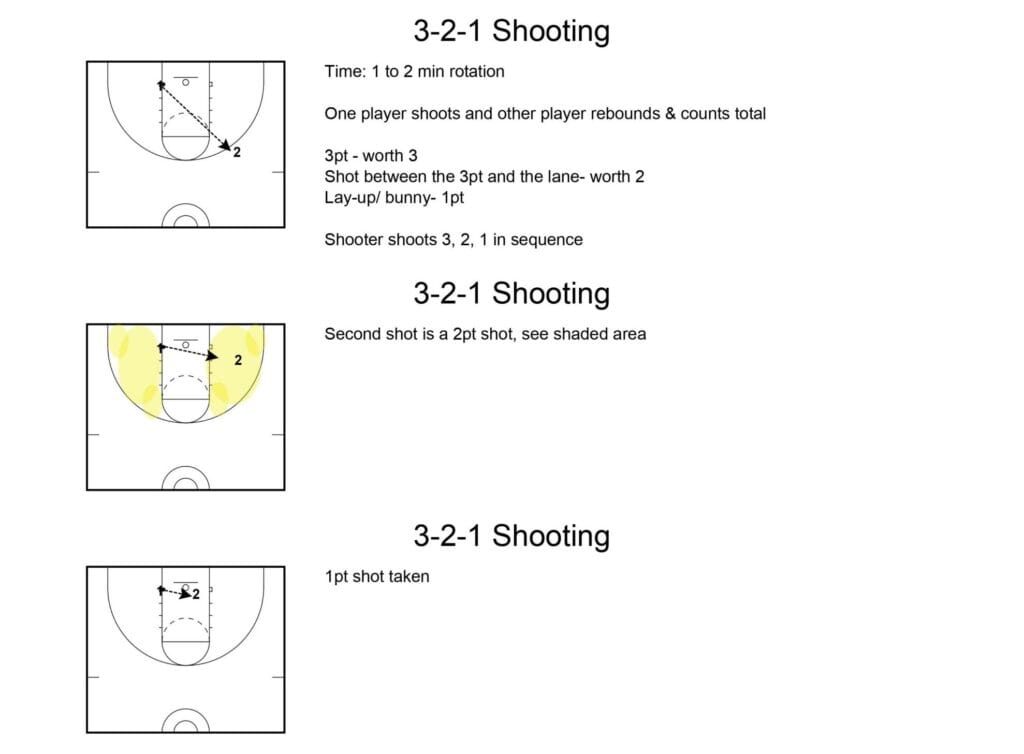
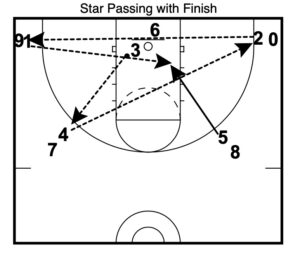 The drill begins with players arrayed in a star across the half court. The ball starts with the line under the basket. There are lines in the corners, as well as on the wings.