As a veteran basketball coach, I’ve seen countless offensive strategies come and go. However, one that consistently stands out, especially for youth teams, is the Basketball Blitz Offense. This dynamic and engaging offense is perfect for young players who are just starting to grasp the fundamentals of the game. In this post, we’ll dive into the details of the Basketball Blitz Offense and explore why it’s an invaluable tool for developing basketball IQ in younger players. We’ll also cover how to teach the basics of this offense to your team.
What is the Basketball Blitz Offense?
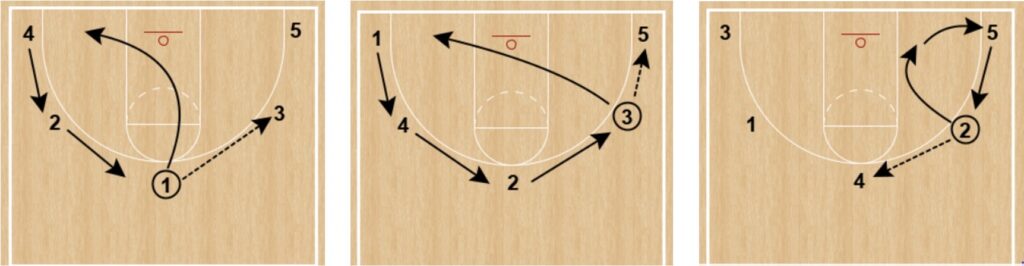
The basketball Blitz Offense is an innovative approach designed to keep all players active and engaged on the court. Unlike traditional motion offenses that can lead to ball-watching and stagnation, the Blitz Offense emphasizes constant movement, creating triple gaps, and using down screens and ball handoffs. This keeps the defense on its toes and opens up multiple scoring opportunities.
For younger players, the basketball Blitz Offense is particularly beneficial. It simplifies the game into understandable parts and reduces the overwhelming complexity often found in more advanced offensive strategies. By focusing on creating space and utilizing dribble handoffs, even fourth-grade girls can grasp and execute this offense effectively.
The Value of the Basketball Blitz Offense for Younger Players
One of the biggest challenges in coaching youth basketball is keeping young players engaged and ensuring they understand their roles. The Basketball Blitz Offense addresses this by providing clear, simple actions for each player. Here’s why it’s so valuable:
Active Participation: Every player has a role in the offense, preventing the common issue of ball-watching. This constant movement keeps all players involved and focused.
Fundamental Skills: The offense breaks down into basic basketball principles such as spacing, screening, and ball handling, which are crucial for young players’ development.
Simplicity and Clarity: The straightforward nature of the Basketball Blitz Offense makes it easier for younger players to learn and execute. They can quickly grasp the concepts of creating space and making effective handoffs.
Building Confidence: By mastering the basic components of the Blitz Offense, young players gain confidence in their abilities. This confidence translates into better performance in games and a greater love for the sport.
Teamwork: The offense relies on cooperation and communication, fostering a sense of teamwork and camaraderie among players.
Join the TeachHoops Community: Step into Enhanced Coaching
TeachHoops.comoffers a unique platform for coaches to share experiences and gain new insights. Learn from others who have navigated similar challenges. It’s an invaluable resource for those looking to:
Teaching the Basics of the Basketball Blitz Offense
Introducing the Basketball Blitz Offense to your team requires breaking it down into manageable parts. Here’s how to get started:
Start with the Goal: Explain to your players that the primary objective is to create scoring opportunities by opening up triple gaps and using down screens and ball handoffs. Use simple language and visual aids to help them understand the concept.
Break Down the Movements: Teach the basic movements of the offense one step at a time. Begin with creating space through proper spacing and moving without the ball. Next, introduce the concept of down screens and how they can free up teammates for scoring opportunities.
Dribble Handoffs: Show how dribble handoffs work and why they are crucial in the Basketball Blitz Offense. Demonstrate how to execute a handoff correctly and practice it repeatedly with your players.
Repetition and Reinforcement: Consistent practice is key. Use drills that reinforce the basic components of the offense and gradually build up to more complex scenarios. Encourage players to communicate and work together to execute the offense smoothly.
Patience and Encouragement: Be patient and provide plenty of positive reinforcement. Young players need time to understand and master new concepts. Celebrate their progress and encourage them to keep improving.
Conclusion
The Basketball Blitz Offense is a game-changer for youth basketball teams. Its simplicity, focus on fundamental skills, and emphasis on active participation make it an ideal choice for young players. By breaking down the offense into manageable parts and reinforcing the basics through practice, you can help your team master this effective strategy. Stay tuned for our next post, where we’ll dive deeper into practical drills and handling pressure situations in the Basketball Blitz Offense.
Remember, implementing the Basketball Blitz Offense is not just about winning games; it’s about developing well-rounded, confident players who love the game of basketball. So, get out there, teach the basics, and watch your team thrive!
Stay connected and join our community of like-minded coaches at teachhops.com for more tips and strategies to improve your coaching and help your team succeed.
Creating good basketball shots is fundamental to a successful offense. As a veteran basketball coach with years of experience, I have found that the key to generating high-quality shots lies in a combination of strategic planning and effective practice. Whether you’re coaching youth basketball or a high school team, here are four effective basketball shot creation tips to help your players create and take good shots.
1. Emphasizing Transition Offense
First and foremost, running a transition offense is one of the most effective basketball shot creation tips. The goal is to capitalize on the first seven seconds of possession, as this period often presents the best opportunities for open shots. Encourage your players to push the ball up the court quickly and look for early scoring chances. Studies and analytics have shown that teams tend to have higher shooting percentages when they shoot early in the shot clock, especially during fast breaks.
To implement this, practice drills that simulate fast-break situations. For instance, start players behind half-court and have them sprint towards the basket, passing and shooting within those critical first seconds. Emphasize the importance of peeking at the basket as they advance the ball to spot open teammates and scoring opportunities. Teaching players to look up and recognize these chances can make a significant difference in your team’s offensive efficiency.
2. Communicating Expectations
Another crucial aspect is establishing a clear definition of what constitutes a good shot. Not all open shots are good shots, and what’s considered good for one player might not be for another. To simplify this, use the mnemonic “ROB,” which stands for Range, Open, and Balance. A good shot should be within the player’s shooting range, taken when they are open, and executed with proper balance.
For example, set standards for your players to meet during practice before allowing them to take certain shots in games. If a player wants to shoot three-pointers, they should demonstrate their ability by making a set number of threes in practice, such as hitting 6 out of 10 shots multiple times in a row. This not only builds their confidence but also ensures that they are taking shots they are capable of making consistently.
Join the TeachHoops Community: Step into Enhanced Coaching
TeachHoops.comoffers a unique platform for coaches to share experiences and gain new insights. Learn from others who have navigated similar challenges. It’s an invaluable resource for those looking to:
Creating good shots often involves running simple actions that can create advantages for your players. Actions like dribble handoffs, pick-and-rolls, and other set plays can help break down defenses and open up high-quality scoring opportunities. Teach your players to recognize and exploit these situations effectively.
In practice, run drills that incorporate these actions. For instance, use 3-on-3 small-sided games to emphasize pick-and-roll scenarios. Have one player dribble around a coach acting as a screener, then execute the pick-and-roll, looking to create an open shot. This not only helps players understand the mechanics of these actions but also conditions them to recognize and utilize these opportunities during games.
4. Practicing Under Game-like Conditions
Finally, it’s essential to replicate game-like conditions in practice to ensure your players are comfortable executing these strategies under pressure. Incorporate drills that mimic the intensity and pace of actual games. For instance, simulate late-game scenarios where players must make quick decisions and take the first available good shot as the shot clock winds down.
Additionally, encourage your players to practice shooting while fatigued, as this better reflects the conditions they’ll face during games. Small-sided games, continuous play drills, and transition-focused practices can help players build the endurance and decision-making skills needed to succeed.
Conclusion
In conclusion, creating good basketball shots is a multifaceted process that requires strategic planning, clear communication, and effective practice. By emphasizing transition offense, defining what constitutes a good shot, utilizing simple actions to create advantages, and practicing under game-like conditions, you can help your players improve their shot selection and overall offensive performance. These effective basketball shot creation tips will guide your players through these processes, ensuring they understand and can execute the strategies that lead to high-quality shots. With dedication and consistent practice, your team will see significant improvements on the court.
As a veteran basketball coach, I’ve seen firsthand the transformative power of well-designed drills. In the competitive world of basketball, the ability to perform under pressure is a critical skill that often separates good players from great ones. One drill that stands out for its effectiveness in building both skill and mental toughness is the “pressure shooting drill.” This drill not only challenges players physically but also conditions their minds to handle the intense pressure of game situations.
Whether you’re coaching beginners or seasoned players, incorporating this drill into your training sessions can be a game-changer. Let’s dive into how you can implement the pressure shooting drill and why it’s so beneficial for your team’s development.
Understanding the Pressure Shooting Drill
What is the Pressure Shooting Drill?
The pressure shooting drill is designed to simulate game-like conditions by adding a time constraint and the need for consecutive successful shots. This drill not only hones shooting accuracy but also builds resilience under pressure—a crucial skill for any basketball player.
The concept is simple: players must make two consecutive shots from each of five designated spots on the court within a two-minute timeframe. The catch is that if they miss a shot, they must continue shooting from that spot until they make two in a row.
Step-by-Step Guide to the Pressure Shooting Drill
Setup: Position players at five designated spots around the court. These spots typically include two corners, two wings, and the top of the key. Ensuring that players start from consistent locations helps them develop a sense of spatial awareness and improves their ability to shoot from different parts of the court.
Making Shots: Players must make two consecutive shots from each spot. If they miss, they must continue shooting from that spot until they make two in a row. This requirement adds a layer of difficulty, as players must not only focus on their shooting form but also manage the mental pressure of making consecutive successful shots.
Timing: The drill is timed for two minutes. The goal is to complete all ten successful shots within this timeframe. The time constraint adds an element of urgency, mimicking the pressure of game situations where players must perform under a ticking clock.
Flexibility for Skill Levels: Adjust the distance based on the player’s age and skill level. Younger players can start closer to the basket, which helps them build confidence and ensures proper shooting form. More advanced players should challenge themselves with longer distances, such as three-point range for high school and college athletes.
Competition and Improvement: Encourage players to track their progress and aim to beat their personal best each day. This not only fosters a competitive spirit but also drives continuous improvement. By setting daily goals, players are motivated to push themselves and develop a growth mindset.
Join the TeachHoops Community: Step into Enhanced Coaching
TeachHoops.comoffers a unique platform for coaches to share experiences and gain new insights. Learn from others who have navigated similar challenges. It’s an invaluable resource for those looking to:
Transitioning from understanding the basics to effectively implementing the drill requires some nuanced insights, especially for new and inexperienced coaches.
Start Simple: Begin with shorter distances for younger or less experienced players. This helps build confidence and ensures proper shooting form before increasing the difficulty.
Emphasize Rebounding: Since players must retrieve their own rebounds, it adds an element of conditioning and hustle. Reinforce the importance of quick rebounds and returning to the shooting spot promptly.
Positive Reinforcement: Encourage players consistently, especially when they struggle to make consecutive shots. Highlight effort and incremental improvements to keep morale high.
Use Assistants: If possible, involve assistant coaches or parents to help retrieve balls. This keeps the drill flowing smoothly and maintains the focus on shooting under pressure.
Track Progress: Maintain a visible chart of each player’s progress over time. This not only motivates individual players but also fosters a team culture of continuous improvement.
Conclusion
Incorporating the pressure shooting drill into your regular practice sessions can yield significant improvements in your players’ shooting accuracy and mental toughness. By simulating game-like pressure, this drill prepares them for the high-stakes moments they’ll face in actual games. Remember to adjust the drill to fit the skill level of your players and use it as a tool for fostering a competitive yet supportive team environment. With consistent practice and the right approach, your players will not only become better shooters but also more resilient athletes.
So, coaches, why not give the pressure shooting drill a try in your next practice? You might just find it becomes a staple in your training routine, leading to marked improvements in your team’s performance on the court.
Ray Allen, renowned as one of the greatest shooters in NBA history, exemplified the art of precision and consistency. Over his illustrious 18-year career, Allen amassed over 24,000 points and set the record for the most three-pointers made, a testament to his unparalleled shooting prowess. His dedication to perfecting his craft through relentless practice serves as an inspiration to basketball players and coaches alike. In this post, we’ll explore the Ray Allen shooting drill, a training technique designed to enhance shooting accuracy and speed, crucial for any player aiming to excel in the game.
The Ray Allen shooting drill is named after this legendary shooter to embody his approach to training: relentless practice, precision, and versatility. This drill is particularly valuable for developing players who aspire to shoot with the same consistency and confidence as Allen. By implementing this drill, coaches can instill these qualities in their players, helping them elevate their game to new heights.
The Ray Allen Shooting Drill: Overview
The Ray Allen shooting drill is a highly effective training exercise that focuses on improving a player’s shooting accuracy from various spots on the court. This drill mimics in-game shooting scenarios, requiring players to adapt quickly and maintain their form under pressure. The structure of the drill is simple yet demanding, making it suitable for players at different skill levels.
The drill involves taking a series of shots from five designated positions on the court: the two corners, two wings, and the top of the key. Starting at a close range, players gradually move further back with each successful shot, with the final shot from each spot being a three-pointer. This progressive approach helps players build confidence and consistency as they extend their shooting range.
Key elements of the Ray Allen shooting drill include:
Five Designated Spots: The drill covers the corners, wings, and top of the key, ensuring comprehensive coverage of key shooting areas on the court.
Progressive Shooting: Players start close to the basket and move back step-by-step after each made shot, simulating game-like scenarios where shooters often need to adjust their distance quickly.
Time Constraint: The goal is to make 25 shots within a two-minute timeframe, adding an element of urgency and focus that mirrors the pressure of actual game situations.
Implementing this drill in your practice sessions not only enhances shooting accuracy but also helps players develop a quick release and adaptability, essential traits for any successful shooter. The Ray Allen shooting drill is a testament to the fact that consistent practice and attention to detail can significantly improve a player’s performance on the court.
Join the TeachHoops Community: Step into Enhanced Coaching
TeachHoops.comoffers a unique platform for coaches to share experiences and gain new insights. Learn from others who have navigated similar challenges. It’s an invaluable resource for those looking to:
Setting up the Ray Allen shooting drill is straightforward. Begin by marking five key spots on the court: the corners, wings, and the top of the key. The player starts close to the basket and moves back one step after each made shot. Here’s a step-by-step breakdown:
Start at a close range.
Move back step-by-step after each successful shot.
Final shot at each spot is a three-pointer.
Five spots: corners, wings, and top of the key.
Footwork and Rebounding
Effective footwork is essential in the Ray Allen shooting drill. Players should focus on quick and precise movements to ensure they are always in the optimal shooting position. Rebounding is equally critical; having a dedicated rebounder ensures a continuous flow of shots. Key points include:
Quick execution of fundamentals.
Proper foot placement for balance and accuracy.
Rebounder assists to maintain drill pace.
Passing Focus: Enhancing Team Coordination
A unique aspect of this shooting drill is its dual function as a passing drill. Accurate passing is vital for successful shooting, and this drill emphasizes passing with the weak hand to develop ambidextrous skills. During the drill, ensure players:
Receive passes on time and in rhythm.
Use their weak hand for passing.
Communicate effectively for seamless execution.
Goals and Encouragement: Achieving Excellence
The primary goal of the Ray Allen shooting drill is to make 25 shots within two minutes. This goal challenges players to maintain focus and consistency under time pressure. Encouragement and constructive feedback are crucial during this process. Coaches should:
Set clear goals: 25 shots in 2 minutes.
Encourage players to stay focused and persistent.
Provide continuous feedback to enhance performance.
Conclusion
Incorporating the Ray Allen shooting drill into your training routine can significantly improve your team’s shooting accuracy and overall performance. This drill not only hones individual shooting skills but also fosters team coordination through its integrated passing focus. As you guide your players through this drill, remember to emphasize the importance of footwork, consistent practice, and effective communication. Embrace this drill as a fundamental part of your coaching toolkit and watch your team’s shooting prowess soar.
As a veteran basketball coach, I’ve seen countless players struggle with their shooting mechanics. The journey to perfecting your shot can be challenging, but with the right techniques and drills, you can develop a consistent and reliable shooting form. One effective method that I’ve found incredibly beneficial is incorporating “squeezer shots” into your training regimen. In this post, we’ll explore the importance of this technique and how it can transform your players’ basketball shot mechanics. The best shooters in basketball are often described as having a “great feel” for the ball. This elusive quality is something every coach strives to instill in their players.
Understanding Squeezer Shots and Developing a “Great Feel”
Before we dive into the details, let’s break down what squeezer shots are. This drill focuses on overemphasizing the act of squeezing the ball to develop a better touch and feel for it. By incorporating this into your training, you help players build a strong sensory connection with the ball, crucial for effective shooting. The best shooters in basketball are often lauded for their “great feel,” and this technique can help foster that quality in your players. Here’s how to implement squeezer shots into your practice sessions.
5 Tips and Details for Incorporating Squeezer Shots into Basketball Shot Mechanics
1. Emphasize the Squeeze
Tip: Instruct your players to squeeze the ball as hard as they can before taking a shot. This overemphasis helps them develop a strong sensory feel for the ball.
Detail: When the player squeezes the ball, it sends signals to the brain, enhancing their touch and control. This is a critical step in the progression of their shot mechanics. Having a “great feel” for the ball means being intimately connected with its weight, texture, and movement.
2. Perfect Shots Focus
Tip: Start your training sessions with a focus on achieving perfect shots. This means hitting nothing but the net.
Detail: Encourage your players to get a feel for the ball and the rim. Perfect shots should ideally not touch the rim, emphasizing precision and control. The more they practice, the better their “feel” for the ball will become.
Join the TeachHoops Community: Step into Enhanced Coaching
TeachHoops.comoffers a unique platform for coaches to share experiences and gain new insights. Learn from others who have navigated similar challenges. It’s an invaluable resource for those looking to:
Tip: Make squeezing the ball a daily routine for your players, not just during shooting drills but also as they walk around.
Detail: This constant engagement with the ball helps players develop a natural feel for it, making it an extension of their hand. It becomes second nature, which is essential for consistent shooting. Consistency in feeling the ball’s texture and weight is key to developing a “great feel.”
4. Brain Sensory Training
Tip: Use squeezer shots to train the brain’s sensory response to the ball.
Detail: By squeezing the ball before shooting, players train their brains to anticipate the shot, improving their focus and consistency. It’s about building muscle memory and a strong neural connection. A shooter with a “great feel” has a brain finely tuned to the ball’s every move.
5. Integration with Drill Work
Tip: Incorporate squeezer shots into regular drill work and practice routines.
Detail: Whether it’s a shooting drill or a scrimmage, remind players to squeeze the ball before shooting. This reinforces the technique and ensures it becomes a fundamental part of their shooting mechanics. Drills that emphasize the “great feel” for the ball will naturally improve basketball shot mechanics.
Conclusion
Mastering basketball shot mechanics requires dedication, repetition, and the right techniques. Squeezer shots offer a unique approach to developing a strong sensory connection with the ball, enhancing touch, control, and overall shooting accuracy. As coaches, it’s our job to equip our players with the best tools and practices. By incorporating squeezer shots into your training sessions, you can help your players improve their shooting mechanics and become more confident shooters on the court.
Remember, consistency is key. Make these drills a regular part of your practice routine, and watch your players’ shots transform over time. For more tips and comprehensive coaching resources, be sure to subscribe and visit our site. Together, we can help every player reach their full potential.
By integrating these insights into your coaching strategy, you’re not only refining your players’ skills but also paving the way for their success. Happy coaching!
In the competitive world of basketball, honing your shooting skills can make all the difference. As a veteran basketball coach with over 30 years of experience, I’ve seen firsthand the transformative power of structured practice. Today, I want to introduce you to a highly effective timed shooting workout that I’ve used to develop precision and consistency in my players: the Magic 20 Shooting Drill.
The Magic 20 Timed Shooting Workout Sequence
The Magic 20 Shooting Drill is a comprehensive workout designed to improve various types of shots within a timed framework. Here’s a breakdown of the sequence:
Layups: Two left-handed layups and two right-handed layups.
Mikan Shots: Two right-handed Mikan shots and two left-handed Mikan shots.
Reverse Mikan Shots: Two reverse left-handed Mikan shots and two reverse right-handed Mikan shots.
Bank Shots: Two right-handed bank shots and two left-handed bank shots.
Elbow Shots: Two right-handed elbow shots and two left-handed elbow shots.
The goal is to complete all 20 shots as quickly as possible, making each one before moving on to the next. By timing this drill, players can track their progress and push themselves to improve.
Importance of Proper Shooting Form
Executing each shot with proper form is crucial for success in the Magic 20 Shooting Drill. Proper shooting form ensures that players develop consistent mechanics, which translates to better performance during games. Here are a few key points to remember:
Balance: Maintain a strong base with feet shoulder-width apart.
Hand Position: Place your shooting hand under the ball and your guide hand on the side.
Follow Through: Extend your arm fully and flick your wrist for a proper follow-through.
Focus: Keep your eyes on the target, whether it’s the rim or a specific spot on the backboard.
Emphasizing proper form during each shot helps in building muscle memory and reduces the likelihood of developing bad habits.
Join the TeachHoops Community: Step into Enhanced Coaching
TeachHoops.comoffers a unique platform for coaches to share experiences and gain new insights. Learn from others who have navigated similar challenges. It’s an invaluable resource for those looking to:
Timing yourself during the Magic 20 Shooting Drill is essential for measuring improvement. Here’s how to get the most out of this timed shooting workout:
Record Your Time: Use a stopwatch to track how long it takes to complete all 20 shots.
Track Progress: Maintain a notebook or a digital log to record your times and identify trends over time.
Repeat and Improve: Aim to complete the drill multiple times in a session, striving to beat your previous best time.
Free Throw Practice: After completing the Magic 20, shoot five free throws to simulate game-like pressure and improve your accuracy.
By regularly tracking and aiming to improve your times, players can stay motivated and see tangible progress in their shooting abilities.
Conclusion
The Magic 20 Shooting Drill is an excellent timed shooting workout for basketball players looking to enhance their shooting skills. By focusing on proper form and consistently tracking progress, players can develop the precision and consistency needed to excel on the court. Incorporate this drill into your regular practice routine, and watch as your shooting performance reaches new heights.
For more drills, tips, and a roadmap to becoming a nationally ranked coach, be sure to visit ts.com. Let’s continue to elevate our game, one shot at a time!
As a veteran basketball coach, I’ve seen firsthand the transformative power of the youth pass and cut offense. This offense is perfect for developing young players, teaching them essential skills, and preparing them for more advanced concepts as they grow. Here’s a comprehensive guide on implementing the youth pass and cut offense effectively.
Introduction to the Youth Pass and Cut Offense
The youth pass and cut offense is a foundational system designed specifically for young basketball players. It’s structured around a 4 out and 1 in alignment, which means four players are positioned around the perimeter while one player is inside. This setup emphasizes the importance of passing and cutting to the rim, providing a straightforward yet effective way to create scoring opportunities. The simplicity of this offense makes it ideal for younger players who are still mastering the basics of the game.
Structure and Movement in the Youth Pass and Cut Offense
In the youth pass and cut offense, player positioning is crucial. Players are spaced around the perimeter, ensuring that passes are manageable for younger athletes. The primary rule is that after a player passes the ball, they must make a rim cut, moving towards the basket. This movement not only opens up driving lanes but also helps players learn to play without the ball. The “blocker,” or inside player, moves opposite the ball to create additional space for dribble penetration, enhancing scoring chances.
Join the TeachHoops Community: Step into Enhanced Coaching
TeachHoops.comoffers a unique platform for coaches to share experiences and gain new insights. Learn from others who have navigated similar challenges. It’s an invaluable resource for those looking to:
3 Key Principles of the Youth Pass and Cut Offense
Understanding the key principles of the youth pass and cut offense is essential for both coaches and players:
Top-to-Bottom Pass: When the ball is passed from a higher to a lower position on the court, the passer makes a rim cut and then replaces their spot.
Bottom-to-Top Pass: When passing from a lower to a higher position, the player cuts through the lane and returns to their original spot.
Top-to-Top Pass: Passes from one top position to another also result in a cut, with the player emptying to the opposite side of the ball.
These movements create a continuous flow, teaching players to read and react rather than relying solely on set plays.
Benefits and Adaptations of the Pass and Cut Offense
The youth pass and cut offense is highly beneficial for young players, encouraging them to understand the game more deeply. This system prioritizes reading the defense and reacting accordingly, which is a crucial skill for basketball development. Additionally, the offense can be easily adapted to suit different age groups. For instance, coaches can adjust the spacing for younger players or integrate more advanced actions, such as screens, as players progress.
Additional Tips and Variations
To maximize the effectiveness of the youth pass and cut offense, consider these tips and variations:
Simplify Terminology: Use easy-to-understand terms for younger players to help them grasp the concepts more quickly.
Introduce Midline Concepts: Teach players about the midline, explaining how to cut to the opposite side of the midline to create space.
Utilize the Blocker: The blocker can be used for post isolations or ball screens, adding layers to the offense. This role can help in teaching players the importance of positioning and timing.
By focusing on these principles and adapting the offense as needed, you can help your players develop crucial basketball skills that will serve them well throughout their careers.
Conclusion
Implementing the youth pass and cut offense is an excellent way to teach young players the fundamentals of basketball. Its emphasis on movement, spacing, and reading the game provides a solid foundation for future development. As a coach, your role is to guide your players through these concepts, helping them build confidence and competence on the court. For more tips and detailed breakdowns, feel free to reach out to me or explore additional resources available online. Let’s continue to teach and inspire the next generation of basketball stars!
As a veteran basketball coach with over 30 years of experience, I’ve come to understand the importance of effective shooting drills in developing well-rounded, skilled players. In this post, I’ll share three valuable shooting drills that I’ve consistently used in my coaching clinics. These drills are designed to improve movement, accuracy, and offensive rebounding skills. Whether you’re a new or inexperienced coach, these valuable shooting drills will help you enhance your team’s performance on the court.
Valuable Shooting Drills #1: Shoot and Relocate
Objective: To improve shooting accuracy while teaching players the importance of movement and offensive rebounding.
Instructions:
Setup: Players start with a ball and a partner (the passer). Position them around the three-point line.
Execution:
The shooter takes a shot from a set position.
Immediately after the shot, the shooter relocates to a different spot on the floor.
If the shot is missed, the shooter retrieves the rebound and shoots again.
If the shot is made, the passer rebounds and passes back to the shooter at the new location.
Rebounding: Emphasize the importance of rebounding every shot, whether it’s made or missed. This teaches players to read the ball and react quickly.
Tips for Coaches:
Encourage constant movement. Players should not stand still after taking a shot.
Correct shooting form and ensure the ball is not brought below chest level to prevent steals from shorter defenders.
Run this drill for 35-40 seconds per player before switching roles.
Joining the TeachHoops Community: A Step Towards Enhanced Coaching
TeachHoops.comoffers a unique platform for coaches to share experiences and gain new insights. Learn from others who have navigated similar challenges. It’s an invaluable resource for those looking to:
Valuable Shooting Drills #2: Screen and Curl Shooting
Objective: To develop shooting skills off the dribble and from screens, simulating game-like situations.
Instructions:
Setup: Place a cone to act as a screen. Position a passer near the top of the key and the shooter near the wing.
Execution:
The shooter starts by moving off the cone (screen) and curling towards the basket.
The passer delivers the ball to the shooter, who then takes a jump shot.
If the shot is missed, the shooter rebounds and takes a follow-up shot.
Variation: Alternate between shooting off the curl, dribbling to the paint, and baseline shots to keep the drill dynamic.
Tips for Coaches:
Teach players the importance of reading the defense when coming off screens.
Discuss different theories on following shots – some players believe every shot will go in, while others should follow their shot to improve rebounding chances.
Encourage quick decision-making and fluid movements.
Valuable Shooting Drills #3: Conditioning and Shooting Combo
Objective: To combine conditioning with shooting practice, ensuring players can perform under fatigue.
Instructions:
Setup: Position a rebounder under the basket and the shooter at the free-throw line.
Execution:
The shooter runs from the free-throw line to the baseline and back.
Upon returning, the shooter receives a pass and takes a 15-foot jump shot.
Repeat this sequence, increasing the number of down-and-back runs each time (e.g., run once, shoot; run twice, shoot; run thrice, shoot).
Ensure the shooter rebounds their own shot if missed and quickly returns to the drill.
Tips for Coaches:
Focus on proper shooting form even when players are tired.
Use this drill to build endurance and simulate game-like conditions where players need to shoot accurately while fatigued.
Adjust the distance as well as number of runs based on the players’ fitness levels.
Conclusion
Incorporating these three shooting drills into your practice sessions will help your players improve their shooting accuracy, movement, and rebounding skills. And remember, consistency and repetition are key. Encourage your players to practice these drills regularly and watch their performance on the court soar. Also, for more coaching tips and resources, visit teachhoops.com and join our community of coaches dedicated to excellence.
As a seasoned basketball coach, I’ve found that the best drills are those that simulate real game situations and push players to develop their skills in dynamic ways. One such drill that has become a staple in my coaching repertoire is the Ball Drop Drill. This drill is fantastic for enhancing players’ decision-making, spacing, and overall game sense. Let’s dive into how you can implement this drill to elevate your team’s performance on the court.
The Ball Drop Drill: A Comprehensive Guide
Introduction to the Drill
The Ball Drop Drill is designed to improve players’ ability to read the game and make quick decisions under pressure. This drill involves placing the ball on the defender’s back, who is facing away from the basket. Once the ball is dropped and I dribble once, the drill goes live. This setup forces players to react quickly and make smart choices, just as they would in a real game.
Setting Up the Ball Drop Drill
Positioning: Start by placing the ball on the defender’s back. The defender faces the basket while the offensive player prepares to react once the ball is in play.
Initiating Play: As soon as the ball drops and I dribble, the play becomes live. This element introduces an element of surprise and requires the offensive player to quickly decide their next move.
Game-Like Situations: The drill can be performed in various formats, including one-on-one, three-on-three, or even four-on-four scenarios. Each variation helps players adapt to different defensive setups and make better decisions.
Key Focus Areas
Reading and Decision-Making: The primary goal of this drill is to enhance players’ ability to read the defense and make quick, effective decisions. They need to determine whether to drive, pass, or shoot based on the defender’s position and movements.
Spacing and Movement: Effective spacing is crucial in basketball. This drill emphasizes the importance of maintaining proper spacing, cutting, and holding positions to create optimal scoring opportunities.
Passing and Footwork: Players are encouraged to make precise passes and use proper footwork to maintain the flow of the game. Emphasizing these fundamentals ensures that players can execute plays efficiently under pressure.
Joining the TeachHoops Community: A Step Towards Enhanced Coaching
TeachHoops.comoffers a unique platform for coaches to share experiences and gain new insights. Learn from others who have navigated similar challenges. It’s an invaluable resource for those looking to:
One of the best aspects of the Ball Drop Drill is its versatility. You can adapt it to different team sizes and skill levels. For example, running the drill with a 4-on-3 setup gives the offensive team an advantage, mimicking scenarios where quick ball movement is essential to break down a rotating defense. Additionally, starting the drill from various positions on the court helps players learn to initiate plays from different spots, enhancing their overall versatility.
Execution and Learning
It’s important to note that the drill might look messy at first, especially during early practice sessions. However, this is a normal part of the learning process. As players become more familiar with the drill, you’ll notice significant improvements in their decision-making and game awareness. Encourage your players to focus on making good decisions and maintaining proper spacing, even when the drill doesn’t go perfectly.
Conclusion
The Ball Drop Drill is a powerful tool for any youth basketball coach looking to develop their players’ game intelligence and decision-making skills. By incorporating this drill into your practice routine, you’ll help your team learn to react quickly, make smart choices, and maintain effective spacing on the court. Remember, the key to success is consistent practice and a willingness to learn from each session. Happy coaching, and may your team thrive with the Ball Drop Drill!
As a veteran basketball coach, I’ve seen firsthand how crucial it is for teams to effectively handle defensive pressure. Whether you’re facing a full-court press or intense half-court traps, your players must be prepared to stay calm and execute under pressure. In this post, I’ll share some effective drills and strategies to teach young players how to deal with pressure, along with practical tips to implement in your coaching routine.
Teaching Young Players about Breaking Basketball Pressure
One of the most challenging aspects of coaching basketball is teaching young players how to stay composed under defensive pressure. It’s not just about physical skills but also mental toughness and quick decision-making. Here are some key principles to focus on:
Consistency in Practice: Handling pressure is not a skill that can be mastered overnight. It requires consistent practice. Incorporate pressure drills into your daily practice routine to help players develop the necessary skills and confidence.
Simulate Game-Like Conditions: Practice should mimic the intensity and unpredictability of actual games. This helps players acclimate to the chaos and make better decisions during real matches.
Focus on Fundamentals Under Duress: Ensure that players can execute basic skills like pivoting and passing under pressure. Emphasize the importance of strong footwork and clear communication.
Joining the TeachHoops Community: A Step Towards Enhanced Coaching
TeachHoops.comoffers a unique platform for coaches to share experiences and gain new insights. Learn from others who have navigated similar challenges. It’s an invaluable resource for those looking to:
Here are some drills that have proven effective in helping teams handle defensive pressure:
Two to the Ball Drill:
Setup: This drill can be done in various formats such as 3-on-3, 4-on-4, or 5-on-5.
Execution: Every time the ball is passed, two defenders immediately converge on the ball handler. This creates a high-pressure environment, forcing the offense to make quick decisions and precise passes.
Objective: Simulate intense pressure and develop the players’ ability to read the game and make smart, quick decisions.
Four on Four, Two to the Ball:
Setup: Position four offensive players and four defensive players on the court.
Execution: Similar to the previous drill, two defenders always pressure the ball handler. This drill can also include no-dribble rules to enhance passing and movement.
Objective: Create a game-like scenario that emphasizes ball movement, spacing, and strategic passing under pressure.
Wild Transition Drill:
Setup: This drill involves a constant rotation of players, creating a chaotic and fast-paced environment.
Execution: As soon as a shot is taken, an extra defender joins the play, immediately applying pressure. The offense must transition quickly and find ways to beat the sudden press.
Objective: Improve transition play, quick decision-making, and the ability to handle unexpected defensive pressure.
Conclusion
Incorporating these drills into your practice routine will not only prepare your players for the intense pressure they’ll face in games but also build their confidence and mental toughness. Remember, the key to breaking basketball pressure lies in consistent practice, simulating game-like conditions, and focusing on fundamental skills under duress. By using these strategies, you can help your team stay composed and execute effectively, no matter how intense the pressure becomes.
Stay tuned for more coaching tips and drills to help your team succeed on the court. Keep pushing, keep practicing, and let’s win more games!
As a veteran youth basketball coach, one of the most crucial skills I’ve found that needs emphasis is player movement without the ball. Many young athletes tend to stand still, waiting for a pass, which can severely limit offensive opportunities. Today, I want to share an effective drill that not only gets players moving but also enhances their understanding of spatial awareness and teamwork: the Four Corner Passing Drill.
Teaching Player Movement at the Youth Basketball Level
Teaching young players to move without the ball is fundamental for developing a dynamic offense. Movement off the ball creates spacing, opens passing lanes, and forces the defense to work harder. At the youth level, this concept can be challenging to instill, but it is essential for their growth as players.
To teach effective movement, I emphasize a few key principles:
Constant Activity: Players should always be looking to move, whether it’s cutting to the basket, filling open spots, or setting screens.
Purposeful Cuts: Every movement should have a purpose, whether it’s to get open for a pass, create space for a teammate, or confuse the defense.
Communication: Players must communicate on the court to coordinate their movements and avoid congestion.
Joining the TeachHoops Community: A Step Towards Enhanced Coaching
TeachHoops.comoffers a unique platform for coaches to share experiences and gain new insights. Learn from others who have navigated similar challenges. It’s an invaluable resource for those looking to:
The Four Corner Passing Drill: Execution and Coaching Tips
The Four Corner Passing Drill is a fantastic tool to teach and reinforce these principles. Here’s a step-by-step guide to executing this drill:
Setup:
Position players in the four corners of the half-court.
Have additional players line up behind each corner if you have more participants.
Drill Execution:
Start with a ball at one corner.
On a signal (e.g., a ball slap), the player with the ball initiates the movement by passing to a flashing teammate.
The receiver then makes a hard cut towards the basket or moves to another spot.
Continue the passing and cutting sequence, ensuring that all players are involved and moving continuously.
Coaching Tips:
Encourage Quick Movement: Players should move decisively towards the ball, not wait for it to come to them.
Focus on Passing Accuracy: Stress the importance of crisp, accurate passes to keep the drill flowing smoothly.
Promote Strong Finishes: When a player cuts to the basket, they should catch the ball and finish without dribbling. This reduces the risk of turnovers and reinforces good habits.
Rotation and Inclusion: Rotate players through different positions to ensure everyone gets the chance to handle the ball and practice cutting.
Conclusion
Implementing the Four Corner Passing Drill in your practice sessions can significantly enhance your team’s offensive movement. By encouraging constant activity, purposeful cuts, and strong communication, you help your players develop a more dynamic and effective offense. Remember, the key to success in youth basketball is repetition and positive reinforcement. Keep pushing your players to move without the ball, and you’ll see significant improvements in their game.
For more coaching tips and drills, make sure to explore additional resources and join coaching communities where you can learn from others and share your experiences. Let’s keep developing young athletes into smart, skilled basketball players!
In youth basketball coaching, the efficiency of practice is key to developing young players effectively. The challenge lies in creating drills that are both engaging and instructional, optimizing the limited time available for practice. The 4-minute basketball shooting drill I’m about to share is designed to maximize the engagement of young players by keeping them active and focused throughout the session. This drill works well as a quick warm-up or as a regular practice routine to improve shooting accuracy and speed.
The Importance of Proper Shooting Form
Before incorporating any shooting drill into practice, it’s critical to teach players the correct shooting mechanics. Proper form is the cornerstone of good shooting and includes several key components:
Stance: Teach players to position their feet shoulder-width apart with knees slightly bent. This stance provides balance and stability.
Grip: Players should learn to place the shooting hand under the ball and the non-shooting hand on the side as a guide. The fingers should be spread comfortably on the ball.
Alignment: Encourage players to align their elbow directly under the ball with the shooting eye forming a straight line to the hoop, which promotes accuracy.
Follow-Through: Stress the importance of a relaxed wrist and a follow-through where the fingers point downward toward the basket. The saying “cookie jar” is a useful metaphor to teach kids to reach into the jar on the follow-through.
Spending time correcting and refining these techniques during early practices will help young athletes develop muscle memory and increase their shooting consistency over time.
Joining the TeachHoops Community: A Step Towards Enhanced Coaching
TeachHoops.comoffers a unique platform for coaches to share experiences and gain new insights. Learn from others who have navigated similar challenges. It’s an invaluable resource for those looking to:
Practice Breakdown: The 4-Minute Basketball Shooting Drill
This drill is concise and designed to cover several fundamental shooting skills within a short period:
Mid-Range Shots (1 Minute)
Instruct players to begin shooting from various spots within the mid-range area. Use cones or marks to designate specific shooting spots around the key.
This segment should focus on quick, rhythmic shooting with immediate rebounds. Emphasize the importance of maintaining form even when moving fast and fatigued.
Free Throws (1 Minute)
After mid-range shots, players should proceed to the free throw line. This is an excellent opportunity to focus on mental toughness and shooting accuracy.
Coaches should monitor each player’s form and provide feedback, emphasizing the need to replicate their optimal free throw routine each time.
Three-Point Shots (1 Minute)
This segment is for more advanced players or older children. For younger players, adjust the distance to ensure they are not straining to make the shot, which can lead to bad habits.
Focus on maintaining good form from beyond the arc and encourage players to observe the differences in their shooting technique from long range.
Returning to Free Throws (1 Minute)
Revisiting free throws after shooting from the field tests players’ ability to maintain focus and accuracy while tired.
It’s beneficial to have players track their own shots during this drill to encourage personal responsibility and awareness of their performance.
Conclusion: The Value of Efficient Practice
Implementing this 4-minute drill in your practice sessions provides a structured method for players to improve their shooting skills while also enhancing their physical conditioning and mental focus. Encouraging players to track their shots using a simple spreadsheet not only helps in setting goals but also in monitoring improvements over time. This kind of structured, high-intensity practice is crucial for developing competitive skills in young basketball players. As a coach, your ability to provide concise, effective training sessions will greatly influence your team’s development and enthusiasm for the game.
As a veteran basketball coach, I’ve seen my fair share of games where the outcome hinged not just on talent or strategy, but on the ability to handle pressure. Specifically, the pressure of breaking a full-court press with limited ball-handling resources. It’s a scenario that can intimidate even the most experienced teams, turning potential victories into frustrating defeats. Yet, with the right approach, breaking the press with one ball handler can be demystified and even turned into an opportunity to gain an advantage.
Breaking the Press with One Ball Handler: A Strategy Guide
In basketball, the press break is as much about mental fortitude as it is about physical skill. Here are several key points and coaching tips to help your team master the art of breaking the press, even when relying heavily on one ball handler:
1. Create Space and Movement
Coaching Point: Emphasize the importance of spacing on the floor. Players should spread out, making the defense work harder to cover ground. This not only creates passing lanes but also tires out the pressing team over time.
2. Use Angles and Quick Passing
Coaching Point: Teach your players to make sharp, angled cuts against the press. Quick, decisive passing can exploit the brief moments when defenders are out of position, creating opportunities to advance the ball with minimal dribbling.
3. Strategic Player Positioning
Coaching Point: Consider starting your best player out of bounds as the inbounder. This tactic allows them to receive the ball back immediately in a position where they are most likely to be open, giving them better control to orchestrate the press break.
4. Attack from Behind
Coaching Point: Instead of lining up across the frontcourt, pull players back towards the half-court line or further. This draws the press back and creates more room to maneuver in the frontcourt, making it easier to initiate the press break.
5. Minimize Dribbling
Coaching Point: Instill in your players the discipline to avoid over-dribbling. When faced with a press, the instinct is often to dribble through it, but this usually results in traps and turnovers. Encourage players to look for quick passes and move the ball swiftly.
Make an impact with your players this year! This is a made to order painting on stretched canvas signed by the artist, Candice Griffy. Choose your own colors, name and number for this unique piece of artwork! The canvas has stapled back and is ready to hang directly on the wall so there is no need for further framing!
Mastering the press break, particularly with a limited number of ball handlers, is an achievable goal with disciplined practice and strategic planning. By focusing on space creation, movement without the ball, and smart player positioning, a team can effectively neutralize the press. Moreover, emphasizing quick, sharp passes over dribbling can prevent common pitfalls that many teams face. Remember, the key to breaking the press is not just in the physical execution but in the mental preparation and confidence you instill in your players. With these strategies, your team can turn a potentially stressful situation into an advantage, maintaining composure and control against even the most aggressive presses.
In the dynamic realm of basketball coaching, the relentless pursuit of excellence remains paramount. Whether you’re a seasoned veteran or a coach just starting out, integrating effective drills into your coaching arsenal is fundamental. In this comprehensive guide, we’ll delve into a series of dynamic basketball drills meticulously designed to not only enhance your players’ skills but also elevate your coaching game to new heights. Explore these essential drills to power up your basketball workout routines and foster player development.
Basketball Workout – Mastering the Fundamentals: Dribbling Drills
Full Extension Dribbling:
Objective: Enhance ball control and hand-eye coordination.
Reasoning: Mastering full extension dribbling is crucial for players seeking to refine their skills in every basketball workout. This drill fosters better control, ensuring a solid foundation during high-intensity training sessions.
Seamless Between-the-Legs and Behind-the-Back Dribbles:
Objective: Cultivate seamless transitions between different dribbling techniques.
Reasoning: Fluidity in dribbling is essential during any basketball workout. Players adept at between-the-legs and behind-the-back dribbles become versatile, adding a layer of unpredictability to their workout routines.
Crossover with Quick Read and React:
Objective: Improve decision-making skills during offensive plays.
Reasoning: Effective crossovers are integral to any basketball workout routine. Incorporating quick reads and reactions elevates the intensity of drills, preparing players for real-game scenarios.
Basketball Workout – Finishing Strong: Layups and Power Moves
Contact Layups:
Objective: Train players to absorb contact during layups for successful finishes.
Reasoning: Contact layups are an essential component of a well-rounded basketball workout routine. This drill instills confidence in players, preparing them for challenging situations when driving to the basket.
Power Finishes with Opposite-Hand Layups:
Objective: Develop the ability to finish with power using the non-dominant hand.
Reasoning: Strengthening offensive versatility is a key focus in any basketball workout. This drill ensures players can confidently execute power finishes from both sides of the basket, making their workout routines more comprehensive.
Make an impact with your players this year! This is a made to order painting on stretched canvas signed by the artist, Candice Griffy. Choose your own colors, name and number for this unique piece of artwork! The canvas has stapled back and is ready to hang directly on the wall so there is no need for further framing!
Objective: Instill anticipation and adaptability in players through read-and-react progressions.
Reasoning: Basketball workout routines demand dynamic drills that enhance decision-making. Read-and-react progressions prepare players for fast-paced game scenarios, making their workouts more effective.
Effective Change of Direction:
Objective: Teach players to execute effective changes of direction using behind-the-back and fake crossover moves.
Reasoning: Quick changes of direction are game-changing elements in basketball workout routines. Mastering these moves adds an element of unpredictability, creating space and confounding defenders during training.
Conclusion
By incorporating these detailed and purposeful drills into your coaching regimen, you’re not only honing your players’ skills but also transforming yourself into a coach who understands the intricacies of the game. As you focus on fundamental dribbling techniques, powerful finishing moves, and game-changing offensive strategies, you’ll notice a significant improvement in your players’ performance and overall team dynamics. This commitment to excellence will undoubtedly solidify your reputation as a basketball coach dedicated to continuous improvement and success on the court. Elevate your basketball workout routines with these proven drills for lasting success.
Welcome, basketball enthusiasts and coaches, to an exclusive breakdown of a game-changing basketball shooting drill presented by Coach Shane Hennon from Hennon Workouts. In this article, we’ll delve into the intricacies of the “5-Shot Series Shooting Drill” – a dynamic drill designed to enhance shooting skills and elevate your game.
The 5-Shot Series Shooting Drill: Precision in Every Shot
Coach Shane kicks off the drill in the short corner, seamlessly transitioning to the deep corner, wing, catch and shoot three, and a challenging transition three. The grand finale involves drifting back to the corner, creating a comprehensive series that hones accuracy, agility, and shooting versatility.
Drill Instructions
Short Corner to Deep Corner (Shot 1): Start in the short corner and swiftly move to the deep corner for the first shot. Focus on a quick release and maintain balance throughout the motion.
Deep Corner to Wing (Shot 2): Progress to the wing after the first shot. Emphasize proper footwork and positioning, setting the stage for a fluid shot from the wing.
Catch and Shoot Three (Shot 3): Return to the wing for a catch and shoot three. Develop the ability to execute precise shots under varying conditions, simulating in-game scenarios.
Transition Three (Shot 4): Engage in a transition three, emphasizing speed and accuracy. This shot challenges players to seamlessly move from offense to defense while maintaining shooting precision.
Drifting Back to Corner (Shot 5): Conclude the series by drifting back to the corner for the final shot. This requires adaptability and showcases a player’s ability to maintain accuracy even in challenging situations.
Repeat the 5-Shot Series Shooting Drill for three trips, aiming to make as many shots as possible out of the 15 attempts.
Elevate the 5-Shot Series Shooting Drill Challenge
Why This Drill? The 5-Shot Series is strategically designed to enhance shooting skills from various positions on the court. It promotes quick decision-making, adaptability, and the ability to maintain accuracy under pressure – crucial aspects of a well-rounded player.
Variations to Increase Difficulty:
Time Constraints: Challenge players to complete the series within a specified time frame, simulating game scenarios with shot clocks.
Defensive Pressure: Introduce defensive players to add pressure during catch and shoot situations, enhancing players’ ability to shoot under defensive challenges.
Randomized Order: Mix up the order of shots in each trip, requiring players to stay mentally sharp and adapt to changing circumstances.
Conclusion
Incorporating the 5-Shot Series Shooting Drill into your training regimen can be a game-changer for both players and coaches. By focusing on precision, adaptability, and versatile shooting skills, this drill cultivates the essential qualities of a top-tier basketball player. Elevate your game, master the art of precision, and watch as your shooting proficiency reaches new heights. Don’t forget to subscribe to Coach Shane’s channel and stay tuned for more transformative drills on Hennon Workouts.
Hey there, fellow coaches! As a veteran in the world of basketball coaching, I’m excited to share some insights into a crucial aspect of the game – installing an effective offense. Whether you’re a rookie on the coaching scene, looking to enhance your skills, or guiding a youth team, this guide will provide you with actionable steps to master the art of installing a basketball offense for youth teams.
The Importance of Installing a Basketball Offense
Understanding Different Learning Styles
Reasoning: Recognize that players have diverse learning styles. Some are visual learners, while others grasp concepts better through practical application.
Actionable Steps: Incorporate video analysis, walkthroughs, and small-sided games into your installation process. Cater to the varied learning preferences of your team.
Utilizing Full-Court Practices
Reasoning: The game is not just about half-court strategies. Emphasize full-court practices to simulate real-game scenarios and enhance players’ transition skills.
Actionable Steps: Devote a significant portion of your practice sessions to full-court drills. Develop a continuous flow from defense to offense to create a seamless transition during games.
Strategic Counteractions
Reasoning: Anticipate defensive strategies from opponents and have counters ready. A well-prepared offense includes responses to common defensive tactics.
Actionable Steps: Identify potential challenges such as overplays or traps. Develop specific counters, like backdoor cuts or ball screens, to keep your offense dynamic and adaptable.
Prioritizing Basics over Complexity
Reasoning: In the limited time available, focus on mastering the fundamentals before diving into complex plays. It’s crucial to crawl before you walk.
Actionable Steps: Implement a step-by-step approach, gradually introducing more advanced elements as the season progresses. Build a strong foundation to ensure players are comfortable with the basics.
The Importance of Installing a Basketball Offense for Youth Teams
Building a Lifelong Love for the Game:
Reasoning: For youth teams, offense installation is not just about winning games but fostering a love for basketball. A well-designed offense makes the game enjoyable and encourages continued participation.
Actionable Steps: Incorporate fun and engaging drills into your practices. Ensure that the offense is designed to involve all players, promoting inclusivity and enjoyment.
Developing Fundamental Skills:
Reasoning: Youth players are in the developmental stage, making it crucial to focus on fundamental skills. An organized offense helps instill these skills from an early age.
Actionable Steps: Design drills that emphasize passing, shooting, and basic court awareness. A solid foundation in these skills will serve youth players well as they progress in their basketball journey.
Conclusion
As you embark on your coaching journey, whether with seasoned players or youth teams, remember that offense installation is both an art and a science. By understanding diverse learning styles, emphasizing full-court practices, planning strategic counteractions, prioritizing fundamental skills, and considering the unique needs of youth teams, you’ll be on the path to creating a formidable and adaptable offensive strategy. Trust the process, stay adaptable, and lead your team to success on the court!
Basketball is a fast-paced and physically demanding sport that requires players to have exceptional skills and conditioning. Whether you’re a coach looking to improve your team’s abilities or an individual player aiming to take your game to the next level, this article introduces a series of skill development drills that can help enhance your game and boost your physical conditioning on the court.
Handling Physical Contact and Ball Control
Getting Used to Contact
Basketball often involves physical contact, and it’s essential for players to be comfortable with it. This drill focuses on helping players adapt to contact while maintaining ball control.
Execution:
The player starts dribbling with a coach or partner providing light physical contact, such as arm hacks and gentle pushes.
The player dribbles for about 15 seconds while getting used to the contact.
The level of contact intensity can be gradually increased as the player becomes more comfortable.
Two-Ball Dribbling for Ball Control
Dribbling is a fundamental skill in basketball, and mastering ball control is crucial. This drill combines two-ball dribbling with ball control techniques.
Two-Ball Dribbling:
The player practices dribbling with two basketballs simultaneously, focusing on pounding the balls hard to improve ball-handling skills.
Start with stationary two-ball dribbling and transition to moving while maintaining control.
Dribbling with a Balloon
Dribbling with a balloon is an unconventional yet effective drill that enhances ball-handling skills, agility, and concentration.
The Drill:
Players must dribble a basketball while simultaneously keeping a balloon afloat using their non-dribbling hand.
This exercise promotes ball control and multitasking abilities.
Agility and Defensive Skills
Chair Agility Drill
Improving agility is essential for both offense and defense. This chair agility drill focuses on developing lateral quickness and defensive movements.
Execution:
Players start in the middle of the paint.
The coach calls out numbers (e.g., 1, 2, 3), corresponding to different locations on the court.
Players sidestep to the indicated spot and then simulate closing out on a defensive play.
Key Emphasis:
This drill enhances defensive footwork and agility.
Players develop the ability to react quickly to offensive movements.
Conditioning & Mental Toughness: The TeachHoops Conditioning Challenge
This conditioning challenge is designed to push players physically and mentally, improving their overall conditioning and determination.
The Challenge:
Players must complete a sequence of running and dribbling while multiplying the numbers assigned to each segment by 5 seconds.
The sequence typically includes numbers like 1, 3, 5, 7, 9, 11, 13 (and then back down).
The goal is to complete the entire sequence in one attempt.
Progression:
Initially, players may aim to reach a specific number (e.g., 11) before progressing to the full sequence.
Coaches can make it a prerequisite for accessing certain team privileges, promoting dedication and determination.
Explore TeachHoops for More
Don’t forget to explore TeachHoops, a valuable resource for basketball coaches. It offers a range of resources, including one-on-one coaching calls and a supportive community. Whether you’re coaching youth or high school teams, TeachHoops can provide you with the tools and knowledge to become a more successful basketball coach.
Basketball is a game that requires continuous skill development, conditioning, and mental toughness. By incorporating these drills into your training routine, you can improve your abilities and elevate your performance on the court. Whether you’re a player or a coach, the right drills and resources can make a significant difference in your basketball journey.
If you coach a K-8th grade team, we have hundreds of resources. All laid out in an easy-to-follow, step-by-step system to save you time and money. Check out coachingyouthhoops.com today!
Coaching basketball is a dynamic and complex task that requires a combination of skills, strategies, and effective training methods. Moreover, one crucial aspect of improving a basketball team’s performance is mastering the art of one-on-one drills. These drills not only help players develop their individual skills but also enhance their ability to perform under pressure. In this article, we’ll explore various one-on-one basketball drills that can be utilized to train players at different levels.
The Power of One-on-One Drills
One-on-one drills are essential for teaching the game of basketball because they focus on individual skills and decision-making. Furthermore, these drills can be adapted to suit the age and skill level of the players, making them a versatile tool in a coach’s arsenal. They encourage players to think on their feet, improve their ball-handling, and develop the ability to score in challenging situations.
Drill 1: Spin Back (Curl Back) One-on-One
In this drill, two players start under the basket.
To begin with, the offensive player jogs to about the three-point line and spins the ball back to themselves.
After gathering the ball, the offensive player gets one dribble to make a move and take a shot.
This game is played one-on-one.
Variations
For younger players, consider allowing more dribbles. Moreover, you can limit shots to inside the three-point line or in the paint, or encourage the use of the non-dominant hand.
Drill 2: Post Moves One-on-One
Designed for post players, such as centers or power forwards, this drill starts with the offensive player at the top of the key.
Importantly, there are no dribbles allowed in this drill.
The offensive player must use their post moves to score.
Variations
Allow one or two dribbles for added challenge. Additionally, restrict players to specific post moves or hand preference.
Drill 3: Sideline One-on-One
In this exercise, players start on the sideline with their non-dominant hand touching the sideline.
The offensive player decides which way to go and must reach the ball first.
The first player to reach the ball goes on offense, making it a great conditioning and fast movement drill.
Drill 4: Half Court One-on-One
Here, one player stands near the basket with the ball, and the other player is at half court.
The player with the ball initiates the game by passing to the other player.
The offensive player has four dribbles to score while the defender tries to stop them.
Variations
Adjust the number of dribbles based on the players’ age and skill level.
Drill 5: Three-Quarter Court One-on-One
The offensive player has unlimited dribbles to score on the far basket, but they must score within five seconds.
This instills a sense of urgency, mimicking fast breaks.
Variations
Encourage players to take jump shots and not give up easy layups.
Conclusion
In conclusion, one-on-one drills are invaluable tools for basketball coaches looking to develop their players’ individual skills, decision-making, and ability to handle pressure situations. Furthermore, these drills can be customized to suit players of all ages and skill levels, making them versatile and effective for improving performance on the court.
By incorporating these one-on-one drills into your training regimen, you can empower your team to become better basketball players and enhance your chances of winning more games. So, get out there, practice these drills, and watch your team’s skills soar to new heights.
If you coach a K-8th grade team, we have hundreds of resources. All laid out in an easy-to-follow, step-by-step system to save you time and money. Check out coachingyouthhoops.com today!
All of us, whether on the sidelines or right on the court, love a good challenge. Challenges keep us motivated, push us to improve, and help us set and achieve new goals. In the world of basketball, challenges can come in various forms – defensive challenges, team challenges, and of course, the ever-exciting shooting challenge.
Today, we’re diving deep into the world of shooting challenges and how they can transform not just your shooting skills but your entire game. The highlight of today’s discussion is the incredible 3-6-9-12-15 shooting drill, a favorite of Arkansas women’s basketball coach Mike Neighbors. This drill is not just about putting up shots; it’s about pushing your limits, both physically and mentally. With each round, you’ll take more shots, move across the court, and test your accuracy under pressure.
What to do with Shooting Challenges
All coaches and players love a great challenge. That challenge could be a defensive challenge, a team challenge, or in this day and age a shooting challenge. Coaches can do a variety of things with different a shooting challenge:
1. Post a leaderboard in your locker room
These leaderboards will allow all the players in your program to see now only how they currently rank for the season, but if you have an all-time leaderboard, it could motivate them to get one of the top scorers of all time. This could be a great motivator to keep encouraging your players to get shots up.
2. Discuss strengths and weaknesses with your players
If you have a player that thinks they are a great shooter, have them perform a certain shooting drill that you like. The key to the shooting drills is it must be measurable and something that can be completed fairly quickly.
3. Red-Yellow-Green Light System
Part of the discussion with your players could be the Red-Yellow-Green light system. Some coaches like having a system like this in place to give players a goal/something to shoot for to enhance their shooting opportunities on the court. The premise goes that a player with a Red Light can only shoot closer to the basket, yellow can shoot a 3 if it is in rhythm, and a green light can shooter has the most freedom to take the shots they choose.
3-6-9-12-15 Shooting Challenge
This is where the 3-6-9-12-15 shooting challenge comes into play. This is a great shooting drill from Arkansas women’s basketball coach Mike Neighbors. Players will shoot shots from the top of the key, right wing, and then left wing. There are 5 rounds. In round 1, a total of 3 shots are taken, round 2 a total of 6 shots, and all the way to round 5 with 15 total shots. Players start shooting at the top of the key, then move to the right wing, and then to the left wing.
After each round of 3-6-9-12-15, each player will shoot a free throw too. At the end of the drill, the player will have taken 50 total shots (45 3 point shots and 5 free throws).
Here is the catch though:
After every 3rd shot, the shooter (if they miss) will run around a set of cones on the other end of the court. If they miss 1 shot, they will run around the first cone, miss 2 shots around the second cone, and 3 shots around the 3rd cone.
So that means on the round of 6 shots, they could run around cones twice, 9 shots they could run around cones 3 times, and on and on until they complete the round of 15 shots. The first cone is just over half-court. The 2nd cone is right at the old 5 second line. And the 3rd cone is in the deep corner.
This is a great drill not only to get shot reps up but also for conditioning. We have learned a great score for a high school player is 32 or more. If they are able to make 32 or more in 6:30 or less, they would be in the green light status, 24-31 in the yellow light status, and 23 and below in the red light status.
This is a great drill that we have enjoyed implementing. Be sure to check out the visual that was attached with this article and the attached scorecard.
Appendix A (Scorecard for 3-6-9-12-15 Shooting Challenge)
Name:
Number of Shots
Number of Made Shots
Free Throw
3
6
9
12
15
Time:
Kyle Brasher | Gibson Southern High School
Lady Titans Basketball Coach
If you coach a K-8th grade team, we have hundreds of resources. All laid out in an easy-to-follow, step-by-step system to save you time and money. Check out coachingyouthhoops.com today!
In the ever-evolving world of basketball strategy, one challenge that every coach faces sooner or later is dealing with switching defenses. As a youth basketball coach, I understand that navigating this defensive tactic can be like solving a puzzle on the court. That’s why I’m thrilled to share with you today some valuable insights into how we can use the Flex Offense as a powerful tool to dismantle switching defenses.
In this article, we’re going to explore a game plan that will help your youth basketball team thrive when facing teams that love to switch on defense. We’ll delve into the nuances of the Flex Offense, break down its key principles, and uncover how it can exploit defensive switches to create scoring opportunities.
As a coach, you know that adaptability and versatility are crucial skills for your players to develop. The ability to read and react to the defense is a vital part of a player’s growth, and the Flex Offense can be a potent tool in their development. We’ll discuss not only how to beat switching defenses but also how this strategy can teach your players essential basketball IQ and teamwork.
Flex Offense vs Switching Defenses
When coaches see their opponent running the flex offense, most of them will immediately go into a switching man-to-man defense. If you see this, don’t panic!
Too many times, when coaches see the defense switching everything, they will immediately change offenses in hopes of preventing confusion for their players. However, through careful drilling and teaching your kids what to do in this situation, you will be able to use the switching defense to your favor.
There are three main reasons for why coaches change defenses to a switch-all scenario:
To keep their players from being affected by any of the flex screens or downscreens
By switching everything, defenders will be able to get out and more effectively deny the passing lanes
Defenders will be able to keep their post by defending block-to-block instead of coming out and defending the perimeter
Knowing this, it is our job as coaches to put our players in situations where they will be able to achieve maximum success. Knowing why the opposing team switches defenses, we are now able to recognize weaknesses and take advantage of them.
There are two ways we can turn this defensive adjustment into our advantage:
The defense will be looking to play the passing lanes even more than usual, making them more susceptible to backdoor cuts and slips on the screens.
Because they are switching everything, you must find a way to get their weakest defender or smallest player defending and switching on the block.
Back Doors and Slips
The first advantage we are going to talk about is the back-door cuts and slips. When the defense starts to switch everything, they will be eagerly looking for an opportunity to get a deflection or steal and a dunk on the other end. Knowing this, we must make adjustments in what we are looking for out of the offense.
There are two prime areas where you can expose the defense and score cheap buckets.
Back Door
After the flex cut occurs on the baseline, 1 sets a downscreen for 4. 4 comes off the screen and X1 switches. X1 is now in the passing lane denying the pass, so 4 must cut backdoor.
If 4 does not receive the pass on the back door, then he must fill the same corner. 1 would then pop up to the top to receive the reversal pass.
Slip
After the flex cut occurs on the baseline, 1 sets a downscreen for 4. X1 and X4 switch. X4 is now in front of 1, who set the downscreen. 1, seeing this, fakes the screen and flashes to the basket.
If 1 doesn’t get the ball on the flash, 4 fills the top spot and 1 fills the corner.
The Flex Motion Offense!
Don’t miss the latest sale offer from Coach Collins!
This incredibly useful tool has the opportunity to transform your team into a hard-to-defend offense! The easy to download PDF provides over 100 diagrams with detailed, in-depth instructions to easily teach this offense.
Contents includes: Basic Motion, Corner Options, Flex Offense vs Switching Defense, and Disguising the Flex Offense. What’s more, you’ll get access to Quick Hitters and Shooting Drills to incorporate into your next practice!
If you coach a K-8th grade team, we have hundreds of resources. All laid out in an easy-to-follow, step-by-step system to save you time and money. Check out coachingyouthhoops.com today!
Welcome to our blog post all about the “Flex Motion Offense” – a dynamic and effective offensive scheme that can transform your team’s performance on the court. As a youth basketball coach, I understand the challenges of developing young players and creating cohesive, winning teams. That’s why I’m eager to share with you the numerous benefits of the Flex Motion Offense, which I believe can be a game-changer for your squad.
In this post, we’ll break down the fundamental concepts of the Flex Motion Offense, explore how it can improve your team’s ball movement, spacing, and decision-making, and discuss the valuable life skills that players can learn through this system. Whether you’re a seasoned coach looking to refresh your playbook or a newcomer searching for effective strategies, you’ll find valuable insights and practical tips to help your team reach new heights.
Introduction to the Flex Motion Offense
The flex offense is a 4-out, 1-in (four perimeter players with one inside man) motion type offense where all five players may become interchangeable throughout the possession. In order to run a successful flex motion, your players will need to be fundamentally sound in all areas of the game. They must have the ability to throw crisp passes, set solid screens, execute sharp cuts, and make mid-range jump shots.
Along with these skills, it is also extremely beneficial to have versatile, inside-out type players. These are player who can both post-up inside and shoot the basketball on the perimeter. While the flex offense is generally considered to be a jump-shooting offense, there are many post-up opportunities available for the team that favors an inside-oriented game.
The flex is also a great offense for teams that are currently competing at the middle school and high school level. This is because the flex is extremely simple in its most basic form. It can be taught and learned rather quickly. Many coaches also find that this offense offers them an opportunity to use basic motion concepts to teach their athletes the fundamentals of the game while still maintaining a level of offensive control.
Benefits to the Flex Motion Offense
Great offense for improving a player’s basic fundamental skills
All five players are interchangeable, forcing the other team’s defensive players to guard all areas of the court and all offensive positions
A true motion offense with only a few key principles, making it very easy to teach and learn
Has a myriad of sets and counter plays, making itan extremely fun half-court offense to coach
With its initial 4-out-1-in alignments, the flex transitions smoothly from any fast- breaking system.
One of the few offenses that can be equally successful against a man-to-man or a zone defense
Emphasis is on teaching rather than playing, which helps players improve more quickly
Provides the offense with multiple scoring opportunities
Excellent offense for teams lacking a true point guard or a true post player
Can be used as a delay-game offense and/or to control tempo throughout a game
The Flex Motion Offense!
Don’t miss the latest sale offer from Coach Collins!
This incredibly useful tool has the opportunity to transform your team into a hard-to-defend offense! The easy to download PDF provides over 100 diagrams with detailed, in-depth instructions to easily teach this offense.
Contents includes: Basic Motion, Corner Options, Flex Offense vs Switching Defense, and Disguising the Flex Offense. What’s more, you’ll get access to Quick Hitters and Shooting Drills to incorporate into your next practice!
If you coach a K-8th grade team, we have hundreds of resources. All laid out in an easy-to-follow, step-by-step system to save you time and money. Check out coachingyouthhoops.com today!
Welcome to our basketball coaching blog, where we dive deep into the strategies and tactics that can turn a good team into a great one. Today, we’re about to unveil the ultimate weapon in a coach’s arsenal – “zone busters.”
Zone defenses can be formidable obstacles on the basketball court, but with the right knowledge and execution, your team can crack even the most impenetrable zones. In this post, we’ll explore the art of attacking zone defenses, breaking down the key principles, strategies, and plays that will make your team a force to be reckoned with on the court.
So, whether you’re a coach looking to add some firepower to your playbook or a player seeking to excel in any situation, let’s dive into the world of zone busting and unlock the secrets to offensive success.
7 Universal Zone Busters to Use This Season
Zone busters are specific offensive strategies or plays designed to exploit weaknesses in a zone defense. They are tactics used to break down the defensive structure of the opposing team when they are playing a zone defense, which typically involves players guarding specific areas of the court rather than individual players.
Zone busters can involve quick ball movement, sharp perimeter shooting, player positioning, and penetration to create scoring opportunities within the zone. The goal is to force the zone defense to collapse or shift, creating open shots or passing lanes for high-percentage scoring chances. Successful execution of a zone buster can make the difference between struggling against a zone defense and scoring consistently.
1. Dribble Penetration
Dribble penetration is quickly becoming the number one method that teams are utilizing when faced with a zone defense. One of the reasons teams are implementing dribble penetration is due to the decreasing number of skilled shooters today.
To become a great shooting team, coaches have to take valuable time out of their practice to focus on the necessary repetition of shooting drills, and many have to work tediously on correcting shooting form. Many players today are better ball handlers than shooters, and so it is easier and takes less practice time to play to their strengths.
Dribble penetration is most effective when players are attacking the gaps. Penetrating the gaps forces the defense to pinch in and stop the ball, leaving both inside and outside outlet options available.
2. Ball Reversal
Perhaps the most common instruction coaches will verbalize to their players when facing a zone is “ball reversal.” Reversing the ball forces the defense to shift as a whole unit from side to side, and if just one defender is slow in shifting, the whole zone will become distorted and openings will appear.
However, what coaches should be stressing is QUICK ball reversal, as this is what can often make or break a zone offense. At first, your team’s tendency will be to look at the basket right away for any immediate scoring opportunities, but doing this will give the defense an extra fraction of a second to recover. You may get a good shot right away, but ball reversal can get you a great shot!
On a side note, most players and teams do not utilize the skip pass enough. Skipping the ball over the top of the zone, usually from wing to wing, can provide shooters with wide-open looks, since defenses are often not prepared to react that quickly.
3. Flashing to the Middle
Sending one or more players flashing or breaking into the middle of the key forces the zone to immediately react, collapse, and cover up. When the defense collapses, shooters will be free to spot up on the perimeter for catch-and-shoot opportunities, and baseline runners will be able to move in from underneath the zone.
There are two main ways to flash to the middle. (1) with a post player breaking up from the block to the high post. And (2) breaking a perimeter player in from behind the defense (weak side), where the defenders can’t see him coming.
4. Behind the Zone
Working the baseline is one of the most underused principles of attack. In fact, many coaches instruct their players to intentionally avoid the baseline in fear of the baseline acting as a 6th defender. If you are one of those coaches, then you are denying your team three distinct advantages.
Attacking from behind a zone: (1) gives your players an inside rebounding position;(2) allows your team to easily post up against any zone; and (3) keeps the bottom line of the defense busy and also forces them to play lower (closer to the baseline), which stretches the zone and creates bigger gaps in the middle.
5. Screening the Zone
Another major way to attack any zone is to simply screen the defense. For years, coaches shied away from this technique, believing that it could only be used effectively against man-to-man defenses.
On-ball screens, flare screens, back screens, cross screens, and screens for baseline runners are all extremely effective against zone defenses when used properly. The best zones are very similar to sloughing man-to-man – take advantage of this fact and get some screens into your offense.
6. Fast Break
One of the easiest ways to defeat a zone is to simply get out and run, run, run! In order to set up a zone, the defenders need time to get back into their rightful spots, especially those who play at the bottom of the zone.
Even though defensive guards are usually the first ones back, they often stop at the top of the circle, and this leaves the basket unprotected. I can guarantee that your point guard is faster than their 5-man, and so if you can consistently beat the defensive center down the floor, your opponent will be in big trouble.
7. Crash the Boards
A topic of great debate over the years has been whether crashing the offensive boards should be considered a legitimate method of attack. The answer completely depends on your team’s mindset! By crashing the boards aggressively and fearlessly, you are putting tremendous pressure on the defense to box out.
In a zone, defenders are not matched up to a man, per se, but rather an area, which makes it much harder for defenders to box out. Since they don’t have specific box-out responsibilities, zone defenders often turn and watch the flight of the ball every time a shot is taken, which makes it even easier for offensive rebounders to get to the rim untouched.
For what it’s worth, we send four players to the offensive glass every time we play against a zone. Occasionally, our best zone offense has been to simply get the ball up on the glass and let our four rebounders relentlessly go after it.
Zone Busters!
Championship offenses to destroy any zone defense!
This easy download provides detailed breakdowns of 18 different offensive strategies that will dismantle any zone defense a team might try.
Some of what you’ll find in this offer includes important concepts to consider when facing a zone, and universal methods to deploy when attacking this defensive strategy.
This incredible sale item also includes detailed notes on motion offenses and several quick hitters to use when trying to catch the defense unprepared.
If you coach a K-8th grade team, we have hundreds of resources. All laid out in an easy-to-follow, step-by-step system to save you time and money. Check out coachingyouthhoops.com today!
In the world of basketball coaching, we know that nailing those shots is a game-changer. Whether you’re a seasoned coach or just starting out, we’ve got a lineup of the top 5 youth basketball shooting drills that will revolutionize your team’s accuracy and boost their confidence on the court.
Picture this: your players confidently sinking shots from all angles, their form impeccable and their focus unwavering. That’s the power of a well-practiced shooting routine, and that’s exactly what we’re here to help you achieve. We’ve curated a range of dynamic and engaging drills that target everything from catch and shoot finesse to mastering free throws under pressure.
In this blog post, we’ll walk you through the ins and outs of each drill, explaining their rationale, suggesting variations to increase the challenge, and highlighting the coaching points that will ensure your players develop solid shooting fundamentals. Plus, we’ve sprinkled in some invaluable tips on how to adapt these drills to suit different skill levels, keeping your players engaged and eager to improve.
5 Youth Basketball Shooting Drills
As coaches, we know that mastering the art of shooting is crucial for any youth basketball team. So, let’s gear up and explore the five best shooting drills that are not only effective but also fun and engaging for your players. These drills will not only improve their accuracy but also boost their confidence on the court.
1. Catch and Shoot Frenzy
Drill Details: Players form a line on the perimeter, each with a ball. The first player shoots from a designated spot, retrieves their rebound, and passes to the next player. The sequence continues until all players have shot from that spot. Then, rotate to a new spot.
Rationale: This drill develops quick release, shooting under pressure, and efficient footwork when catching and squaring up to the basket.
Variation: Add a defender who lightly contests shots to simulate game situations.
Coaching Points: Emphasize proper hand placement on the ball, balance, and using legs to generate power. Encourage players to focus on form and rhythm.
2. Form Shooting Focus
Drill Details: Players work in pairs, standing close to the hoop. They focus on perfect shooting form – elbow in, wrist locked, follow-through – without the ball touching the rim.
Rationale: Building muscle memory for correct form is crucial for consistent shooting.
Variation: Increase distance gradually and introduce light competition by challenging players to hit a certain number of consecutive shots.
Coaching Points: Stress the importance of consistent form and repetition. Use positive reinforcement to create a routine of proper technique.
3. Around the World
Drill Details: Place markers at various spots around the three-point line. Players take turns shooting from each spot. Once a shot is made, the player moves to the next spot. The goal is to complete the circuit.
Rationale: This drill improves shooting from different angles and distances, simulating various game situations.
Variation: Set a time limit for completing the circuit or require players to make a certain number of shots at each spot.
Coaching Points: Encourage players to focus on using their legs and consistent follow-through. Remind them to adjust their shooting angle based on their position on the court.
4. Partner Passing and Shooting
Drill Details: Players work in pairs, with one player passing and the other shooting. The passer alternates between chest passes, bounce passes, and overhead passes.
Rationale: Teaches players to catch and shoot quickly after receiving a pass, enhancing their overall court awareness.
Variation: Increase the distance between players for longer passes, challenging both passing accuracy and shooting range.
Coaching Points: Emphasize being ready to shoot upon receiving the pass. Highlight the importance of catching in a shooting-ready stance.
5. Free Throw Pressure Cooker
Drill Details: Players shoot a series of free throws with added pressure. For each miss, players must perform a physical activity (e.g., jumping jacks) before attempting the next shot.
Rationale: Simulates the pressure of free throws during a game and helps players focus under stress.
Variation: Increase the number of physical activities for consecutive misses to up the challenge.
Coaching Points: Discuss maintaining focus and concentration despite distractions. Remind players to take a deep breath and execute their routine before each shot.
There you have it – five engaging and effective shooting drills to elevate your youth basketball team’s shooting prowess. Remember, practice makes perfect, so integrate these drills into your training sessions and watch your players’ shooting skills skyrocket. Let’s turn those misses into swishes and create a team of confident, accurate shooters!
If you coach a K-8th grade team, we have hundreds of resources. All laid out in an easy-to-follow, step-by-step system to save you time and money. Check out coachingyouthhoops.com today!
t’s game time here on the blog, and today, we’re delving into a motion offense drill that’s going to transform your team’s offense from good to unstoppable. I’m thrilled to bring you a coaching gem that’s all about honing those essential pass and cut skills within the dynamic framework of a motion offense.
Imagine your players on the court, a symphony of movement and coordination. The ball glides seamlessly from one player to another, creating lanes, opening up opportunities, and leaving the defense scrambling to keep up. That’s the beauty of the pass and cut in a motion offense – a strategy that not only cultivates teamwork but also generates high-percentage scoring chances.
Whether you’re a seasoned coach seeking fresh ideas or a new coach eager to build a strong foundation, mastering the pass and cut with this motion offense drill is a game-changer. Get ready to lace up those sneakers, gather your team, and witness the magic unfold as players seamlessly pass, cut, and score their way to victory.
Motion Offense: Pass and Cut Practice Drill
5-out motion provides basketball teams at any level a key structure. This is especially true for youth basketball teams. This set up forces players to make decisions by reading the play of their teammates and defenders. It remains a great tool for teaching players how to play basketball.
One drill to teach basic 5-Out motion to your basketball team is a simple pass-and-cut drill.
This drill begins with Player 1 making a pass to the wing. From there, that player cuts to the basket. When that cut occurs, everyone behind the pass rotates to fill the open space along the perimeter. Player 1 takes the open space in the corner after his cut.
Next, the ball is passed to the right again and the passer cuts to the basket. Once again, the weak side players rotate to fill all open spots.
The only exception to this rule is a pass from the corner. A pass from the corner results in a short cut and retreat. A pass up from the wing to the top results in the corner player rotating up to fill on the wing, making sure all five players participate in station movement.
Stress to your players the key concept of great spacing. If they’re in the right positions at the right time, the offense should be wide open. This approach opens driving lanes and minimizes quick help from opposing defenders.
Coaches can teach 5-Out Motion in progressions to avoid their players getting overwhelmed learning an entire offense all at once.
If you coach a K-8th grade team, we have hundreds of resources. All laid out in an easy-to-follow, step-by-step system to save you time and money. Check out coachingyouthhoops.com today!




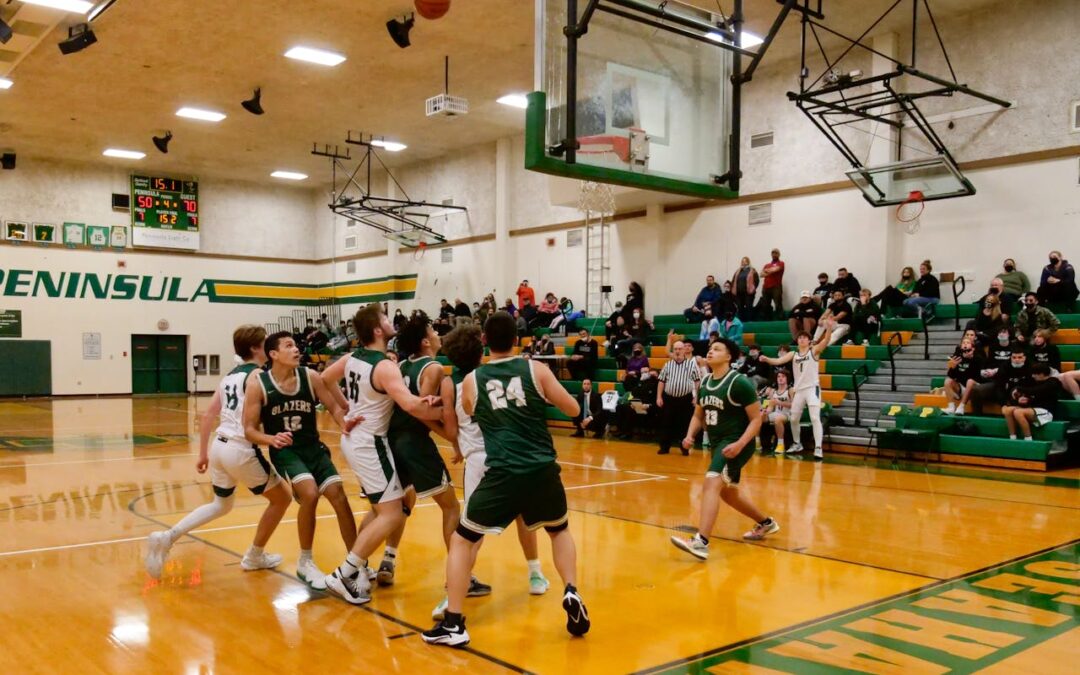
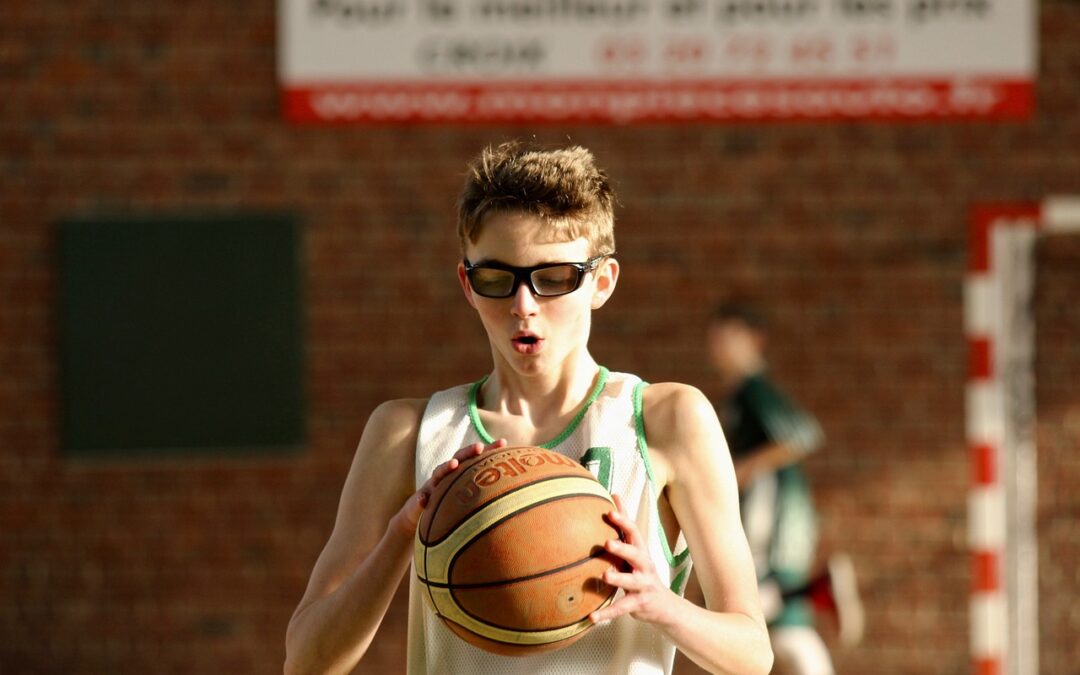
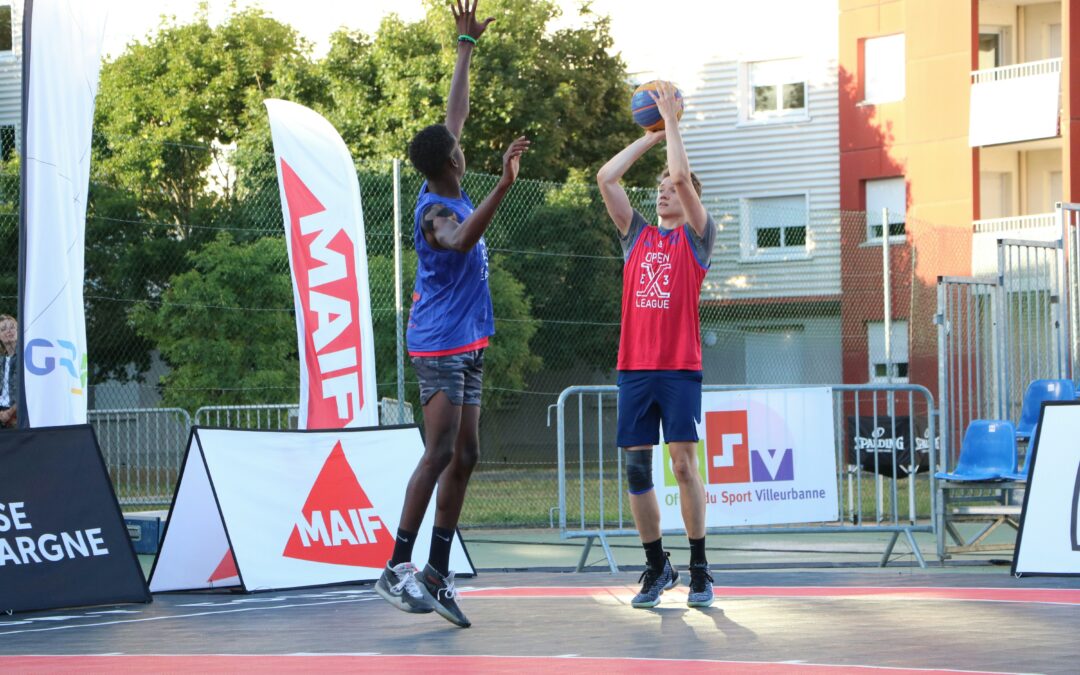
 The Best Senior Night Gifts!