When you’re working with young players, one of the first skills you need to build is solid passing. Good ball movement not only creates scoring opportunities but also teaches teamwork and decision-making. As a veteran coach, I’ve learned that the best way to build confident passers is by starting with simple, structured drills and then adding layers of difficulty. Below, I’ll walk you through some of the best youth basketball passing drills that you can use with any age group. These drills are simple, game-like, and can be adjusted based on your players’ skill level.
Why These Are the Best Youth Basketball Passing Drills
The common theme in all of these drills is progression. Start simple, then add movement, pressure, or game-like obstacles. Young players need to feel success before you challenge them with more complexity.
By incorporating these drills into every practice, your team will develop better passing habits, cut down on turnovers, and build confidence with the ball.
1. Cone Passing Drill (Progression Style)
This drill builds ball control, accuracy, and the ability to pass under pressure.
How it works:
Place cones in a straight line on the court.
Have your player slide left or right, making a pass with the corresponding hand.
The coach (or partner) passes the ball back each time.
Progressions:
Start with one ball, simple passes through the cones.
Add a second ball for quicker touches.
Finish with “knockdowns,” where players bounce-pass to knock over cones.
Coaching tip: Move cones closer together or create curves to increase difficulty and mimic real defensive traffic.
2. Two-Person Passing on the Move
Passing while standing still is easy. Passing on the move is game-like.
How it works:
Pair players in lanes going up and down the court.
Start with stationary passing using just the left hand, then progress to both hands.
Once they’ve mastered control, have them walk or jog while passing.
Add a “touch pass” version, where players keep the ball moving quickly without holding it.
This develops rhythm, touch, and the ability to make quick decisions in transition.
Join the TeachHoops Community
TeachHoops.com offers a unique platform for coaches to share experiences and gain new insights. Learn from others who have navigated similar challenges. It’s an invaluable resource for those looking to:
Every youth coach should have this in their toolbox. It’s fun, competitive, and teaches spacing and anticipation.
How it works:
Two passers stand apart, one defender in the middle.
Passers must “close one window, then open another” (example: fake high, pass low).
If the defender deflects or touches the ball, the passer goes to the middle.
This drill emphasizes timing, fakes, and the importance of ball protection against pressure defense.
4. Wall Passing Drill
Perfect for gyms with limited space or when you want high-rep passing.
How it works:
Players face a wall and pass to a marked spot.
Emphasize using the hips and core for power (“twist pass” technique).
Work chest passes, bounce passes, and “kick-out passes” (simulate driving and passing out to a shooter).
Keep these short, 25 to 30 seconds per set, but intense.
Final Thoughts for New Coaches
If you’re new to coaching, don’t overwhelm yourself or your players by trying to cover everything at once. Start with one or two of these best youth basketball passing drills, master them, and then move on to progressions.
Passing is a skill that grows with repetition, and these drills give your players the foundation they need to become strong teammates and smart decision-makers on the court.
When it comes to player development, nothing beats reps. But if you’ve ever run a youth basketball practice, you know that getting kids to take shooting seriously can be a challenge. That’s why adding a competitive basketball shooting drillat the end of practice is such a powerful tool.
It not only builds skill, it also creates the intensity and focus players need when the game is on the line.
Why Shooting Drills Still Matter
Many players today rely heavily on shooting machines or organized workouts. Gone are the days when kids would spend hours at the park just getting shots up. As a coach, that means you have to carve out time during practice to make up for the lack of reps.
Dedicating even 10–15 minutes per session to structured shooting can make a huge difference over the course of a season.
The “Up Two” Drill
One of the simplest ways to get players locked in is with the Up Two competitive basketball shooting drill. Here’s how it works:
Split players into two lines, often grouped by position.
Start at the elbow and have both shooters fire at the same time.
Teams compete to be the first to get up two points.
Winners stay locked in, while the drill resets and the competition continues.
It’s fast, it’s fun, and it taps into the natural competitiveness of your team. Later in the year, you can increase the challenge by playing “Up Three.”
Ways to Add Variety
The beauty of this drill is its flexibility. You can adjust it to keep practices fresh:
Move from the elbows to the wings or corners.
Turn it into a three-point competition.
Add rules to discourage interference (like resetting the drill if players touch an opponent’s ball).
Small adjustments keep players engaged and stop the drill from becoming routine.
Join the TeachHoops Community
TeachHoops.com offers a unique platform for coaches to share experiences and gain new insights. Learn from others who have navigated similar challenges. It’s an invaluable resource for those looking to:
The Up Two competitive basketball shooting drill turns what could be a stale end-of-practice session into something players look forward to. It encourages:
Repetition: Players get plenty of shots up in a short time.
Competition: The drill gets surprisingly intense once teams get invested.
Focus under pressure: Shooting with a score on the line simulates real-game scenarios.
Final Thoughts
If your players aren’t getting enough shots outside of practice, you need a solution that maximizes efficiency. The competitive basketball shooting drill known as “Up Two” does exactly that.
It’s easy to set up, quick to run, and highly effective in building both skill and competitiveness. Try adding it to the end of your next practice and see how much sharper your team becomes.
One of the most common frustrations for new coaches is watching players miss easy layups. It doesn’t matter how well you run your offense if your team can’t finish at the rim, you’re leaving points on the floor. That’s why every coach needs a reliable layup finishing drill that builds toughness, teaches players to attack with confidence, and eliminates the bad habits of “soft” finishes.
Why Skip the Traditional Layup Line
Layup lines are a staple at many practices, but they don’t prepare players for real game conditions. There’s no pressure, no defender, and no consequence for missing. In my gym, we haven’t done a layup line in over a decade (outside of pregame warm-ups). Instead, we use competitive finishing drills every day.
The goal is simple: train players to go up strong, even if they know a shot might get blocked.
The DeMatha Finishing Drill
This drill, often called the “DeMatha Finishing Drill,” has been around for years and is still one of the best. Here’s how to run it:
Setup: Two offensive players line up at designated spots—blocks, wings, elbows, or even near half court. A coach stands out front with the ball.
Start: Coach passes to either player. The moment the pass is caught, the player attacks the rim without hesitation.
Defense: A defender is allowed to contest or block the shot, but no fouls are allowed.
Rule for Offense: Players must go straight up strong. No fancy jelly finishes, no hesitation, no fading away to avoid contact. A blocked shot is acceptable. A soft or hesitant finish is not.
This creates a game-like situation where players must focus on finishing through contact, not avoiding it.
Join the TeachHoops Community
TeachHoops.com offers a unique platform for coaches to share experiences and gain new insights. Learn from others who have navigated similar challenges. It’s an invaluable resource for those looking to:
Immediate action: The ball is caught, and the player attacks. No wasted motion.
Strong mentality: Emphasize “points per possession” over style. Winning teams don’t need circus layups; they need high-percentage finishes.
Manage lines: If you only have one basket, split groups or rotate to avoid long lines. Use multiple coaches if available to keep reps quick.
Mix it up: Throw imperfect passes sometimes so players learn to adjust on the fly.
Why It Works
Every season, coaches complain about missed layups in early games. That’s because most players haven’t been forced to finish through contact in practice. This layup finishing drill solves that problem from day one.
Run it consistently, and your players will attack the rim with confidence all season long.
KeyTakeaway: Replace layup lines with competitive finishing drills. If you commit to teaching your players to finish strong, you’ll win close games simply by converting the shots everyone else misses.
Short on players doesn’t mean short on progress. This guide gives you basketball drills for small groups that turn low-number practices into high-impact skill sessions. Whether only two, three, or four athletes show, you’ll have simple, repeatable plans for ball handling, shooting, finishing, and small-sided games that teach real reads and keep every rep purposeful.
Why this happens and how to handle it
Low turnout is normal in youth hoops. Schedules collide, rides fall through, and injuries pop up. The fix is simple: arrive with multiple versions of your plan so you can pivot fast.
Bring a “full team” plan, a “small group” plan, and a “skills only” plan.
Over-plan the clock. For a 2-hour slot, prep 2.5 to 3 hours of activities so you never hit dead time.
Treat low numbers as a chance for high-impact reps and individual coaching.
Your small-group practice menu
Focus on ball handling, shooting form, footwork, finishing, and simple reads. You can also micro-teach team concepts in tight spaces.
3 player basketball drills
2-on-1 to 1-on-2 Attack two vs. one, then the defender outlets to trigger a quick 1-on-2 return. Cues: Wide spacing, one hard paint touch, finish through contact.
Triangle passing with screen action Corner, wing, top. Pass, follow to set a down screen, catch, and shoot or drive. Cues: Set feet before catch, screen angle at the defender’s hip.
3-man pick-and-roll series Ball handler, screener, spacer. Rep roll, short roll, and slip. Cues: Set up defender, change pace, hit the pocket pass early.
Closeout and help 2v1 shell One on the ball, one in gap, one as passer. Rotate after each rep. Cues: Choppy feet on closeout, high hand, see ball and man.
Shooting circuit Form shooting, one-dribble pull-ups, spot-up threes, finishing package. Cues: Hold follow-through, land on balance, finish outside hand off one foot and two.
2 player basketball drills
1-on-1 constraints Start from wing, slot, or post. Limit dribbles or require a paint touch before the shot. Cues: First step wins, protect the ball, finish on the far side.
Partner passing and shooting 30-second blocks: snap passes, relocation, catch-and-shoot, dribble-handoff into pull-up. Cues: Hit target hand, show hands early, shoot on the hop.
Screen and slip mini-series Set, show, and slip when defender jumps the screen. Cues: Sprint into screen, wide base, slip on contact.
Finishing ladder Power layups, inside-hand, reverse, floater, euro, pro-hop. Cues: Eyes on backboard markers, protect with body.
1 player workouts (when it’s just you and an athlete)
Form shooting tree Knee/waist/shoulder range, 25 makes each, swish or redo.
Ball-handling lane Stationary pound series, cross/inside-out, then cone slalom to a finish.
Mikan variations Standard, reverse, power finishes, no-backboard touch for soft hands.
Chair reads Use chairs as defenders for straight-line drives and stop-on-two jumpers.
Join the TeachHoops Community
TeachHoops.com offers a unique platform for coaches to share experiences and gain new insights. Learn from others who have navigated similar challenges. It’s an invaluable resource for those looking to:
You can still build “team basketball” with three players.
Half-court pick-and-roll reads Ball handler, screener, and spacer. Rep: roll, pop, short roll to dotted line, baseline drift kick. Progression: Call out a read before each rep to lock in decisions.
Quarter-court offense breakdown Run only the first action of your motion or continuity. Emphasize spacing and timing.
Small-sided games that scale
1v1 to advantage: Winner stays, losers do quick skill reps.
2v2 “first to 5 stops”: Defense scores by getting stops. Teaches pride and positioning.
3v3 half-court: Call a rule each game (must post touch, paint touch before three, only weak-hand finishes).
Two plug-and-play practice plans
Plan A: 60 minutes, 3 players
00:00–05: Dynamic warm-up and ball-handling lane
05:00–15: Form shooting tree and close-range finishes
15:00–30: Triangle passing with screen action
30:00–45: 2-on-1 to 1-on-2 transition game
45:00–55: PnR reads (roll, pop, short roll)
55:00–60: Free throws under fatigue (make 10 as a group)
Plan B: 75 minutes, 4 players
00:00–10: Partner passing into catch-and-shoot
10:00–25: 2v2 advantage games (no ball screens, touch paint before three)
25:00–40: Screen and slip mini-series, two pairs alternating
40:00–60: 3v1 closeout and help rotations, then 3v2 build-up
60:00–75: Finishing ladder and pressure free throws
Quick cues that raise the ceiling
“First step wins” on every drive.
Show target hands and talk early on D.
Land on two after catches and in the lane for balance.
Keep a running rep or make count to create urgency.
Roster and staffing tips
Target 10 players for youth teams. Eight is great for reps, but 10 gives you a buffer. Twelve gets tricky for minutes.
Ask an assistant, parent, or responsible sibling to be your “extra body” when needed.
Build attendance buy-in with clear roles, fun competitive segments, and fast transitions.
Mini-templates:
If 3 or fewer show: ball handling, form shooting, finishing, PnR reads.
If 4–6 show: small-sided games, screening actions, defensive rotations.
If 7–10 show: add team sets, special situations, and full-court segments.
Young teams often catch and bounce without a plan, which stalls possessions and wastes time. The no dribble basketball drill gives you a simple, game-like constraint that flips that habit fast. Players learn to cut with purpose, pivot under pressure, and move the ball to space. After a few short rounds, you’ll see cleaner spacing, quicker decisions, and better teamwork without adding a single new play.
Why run a no dribble basketball drill?
If your players catch and bounce by habit, this constraint flips their default. Taking away the dribble forces them to create advantages with cuts, spacing, fakes, and quick ball movement.
You get cleaner decision making, more purposeful passes, and better pivots. For youth teams, 3v3 is a sweet spot because it raises touches and keeps reads simple.
Drill snapshot
Item
Details
Goal
Reduce over-dribbling, improve passing, cutting, pivoting, and spacing
Players
3v3, 4v4, or 5v5, start 3v3 for clarity
Space
Half court to start, expand as players improve
Equipment
1 ball, pennies
Duration
6 to 12 minutes total in short rounds
Rule
No dribbles, any bounce is a turnover
Setup and rules
Start in 3v3 half court. First team to 3 baskets wins the round.
No dribbles allowed. A dribble equals a turnover.
Legal pivots only. Call travels tight to promote balance.
Defense plays live and can pressure the ball.
Make checks quick. Score it, check it, play again to keep tempo high.
Scoring add-ons to shape behavior
+1 for a paint touch before the shot
+1 for a pass to a cutter on a denial, often called a second cut
+1 for a one-more pass that leads to a made shot
Join the TeachHoops Community
TeachHoops.com offers a unique platform for coaches to share experiences and gain new insights. Learn from others who have navigated similar challenges. It’s an invaluable resource for those looking to:
See the floor before you pass, then pass away from pressure.
Jump stop to square on each catch.
Meet every pass and use fakes.
Keep spacing, wait for clean angles instead of forcing through traffic.
These cues show up in every good no dribble basketball drill and build cutting, pivot strength, and vision.
Progressions and variations for the No Dribble Basketball Drill
Start simple, then add constraints that target specific reads.
Advantage or disadvantage: 4v3 or 5v4 to encourage quick extra passes.
Time or touch limits: 12-second shot clock or minimum 3 passes before a shot.
Touch incentives: 1 point for a paint touch, 2 for a skip pass to the weak side.
One-dribble rescue: Allow a single escape dribble if trapped, then remove it again.
Full-court advance: First team to complete 7 passes and a layup without bouncing wins.
Defense starts with the ball: On the whistle, defense outlets to trigger movement and switching.
What to say while they play
Keep the ball rolling. Use short cues between reps rather than long stoppages.
Eyes up, pass fakes, meet it
Hold spacing, cut through if denied
Catch on balance, pivot to protect, see the next pass
If you need a quick reset, freeze the action, highlight a single read, then replay that possession right away.
Common problems and quick fixes
Players bunch up: Use cones to mark two corner zones. No two players can share a zone.
Telegraphed passes: Require a fake before any entry to the wing or post.
No cutting vs. denial: Add a bonus point for a successful second cut to the rim.
Panic under pressure: Use a one-count catch and scan rule to slow the mind without killing tempo.
Wrap-up
The no dribble basketball drill trims bad habits and builds the right ones fast. Keep rounds short, keep the ball moving, and use simple scoring to reward the behavior you want.
Stay patient early. As the reps stack up, you will see better passing, sharper cuts, and cleaner spacing on game night.
Youth basketball coaches are always looking for drills that combine skill development with mental discipline. One of the best examples is the 42 Point Basketball Shooting Drill. This timed workout challenges players to score efficiently from multiple spots on the floor while reinforcing fundamentals, concentration, and composure under pressure.
What Is the 42 Point Drill?
Unlike simple one-action shooting drills, the 42 Point Drill is a multi-layered routine designed to test all aspects of a player’s offensive game.
Borrowed in name from the precision of military and drill team performances, where flawless execution demands hours of focus and practice, this basketball version pushes players beyond basic repetitions into a more competitive, disciplined environment.
How the Drill Works
Five Spots: Players work through five shooting locations on the court.
Sequence at Each Spot:
One three-pointer (worth 3 points)
One layup (worth 1 point)
Two mid-range jumpers (worth 2 points each)
Scoring: Each round adds up to 8 possible points per spot. Across five spots, that’s 40 points total before free throws.
Free Throw Twist
The drill finishes with two free throws:
Swish (no rim) = +1 point
Make but hits rim = 0 points
Miss = –10 points
A perfect score is 42 points, which is extremely difficult to achieve.
Join the TeachHoops Community
TeachHoops.com offers a unique platform for coaches to share experiences and gain new insights. Learn from others who have navigated similar challenges. It’s an invaluable resource for those looking to:
Executing the 42 Point Drill flawlessly requires the same traits seen in elite performers:
Discipline: Players must stay locked in through each shot type and location.
Focus: The free throw penalty creates mental pressure, simulating game conditions.
Skill Mastery: Shooting from multiple ranges ensures players work on their complete offensive game.
Just as drill teams practice intricate routines to build precision and confidence, basketball players can use this challenge to sharpen fundamentals, develop resilience, and improve consistency under stress.
How Coaches Can Use It
Run it in individual workouts to push advanced players.
Add it to team practice as a competitive game, tracking scores.
Use it as a conditioning drill, since players must move quickly spot to spot within two minutes.
Final Thoughts
The 42 Point Basketball Shooting Drill is more than just another workout. It blends skill development with the discipline and concentration found in precision drills across other fields. For youth coaches, it’s a proven way to challenge players, make shooting practice engaging, and foster the mindset needed to perform under pressure.
Bonus: A Game-Changing Coaching Tool Is Coming Soon
A powerful new AI-driven coaching platform is set to launch later this summer, built specifically for youth basketball teams and families looking for smarter, faster feedback without spending hours breaking down film.
Here’s how it works: Upload a short video clip or a simple stat sheet, and the tool instantly provides coaching insights, suggests next steps, and helps you make real-time adjustments. Whether you’re coaching a third-grade rec team or a middle school travel squad, it’s designed to meet you at your level.
The goal is simple: save time, reduce guesswork, and make the coaching process more efficient and effective. It’s being developed by people who understand youth basketball, practical tools for real coaches, not overcomplicated systems that slow you down.
When it comes to player development, few skills are more valuable than learning how to attack in isolation. Basketball one-on-one offensive drills help athletes develop confidence, create space, and finish plays against tough defenders. Teaching players how to read and react in these situations gives them tools they’ll use in games at every level.
Be Ready to Shoot: “Hands Down, Man Down”
The first rule of one-on-one offense is simple: always be ready to catch and shoot. If a defender closes out with their hands down, that’s an automatic scoring opportunity. Encourage players to:
Keep hands ready and feet set before the catch.
Recognize poor closeouts as defensive mistakes.
Develop a quick, confident release.
This mental shift builds aggressiveness and keeps defenders honest.
Read the Defender’s Stance
Not all “hands up” looks are created equal. In many cases, a low hand means the defender is focused on stopping the drive, not the shot. Players should learn to:
Identify true contests versus low, non-threatening hands.
Attack the space defenders give up.
Force the defense into tough decisions.
Create Space With Strong Footwork
One-on-one offense often comes down to footwork. Young players should focus on:
Staying low with bent knees to stay balanced and explosive.
Using the lead foot to test the defender and find open angles.
Driving opposite of where the defense is shading.
Proper footwork allows players to stay under control while keeping multiple scoring options alive.
Join the TeachHoops Community
TeachHoops.com offers a unique platform for coaches to share experiences and gain new insights. Learn from others who have navigated similar challenges. It’s an invaluable resource for those looking to:
A common mistake players make is drifting away from the basket after beating their man. Instead, coaches should stress:
Driving back toward the rim once a step is gained.
Using the defender’s hip as leverage to maintain position.
Finishing strong on the line of attack.
This small adjustment leads to more high-percentage finishes.
Playing Low and Through Contact
At higher levels, defenders will try to bump players off their spots. To prepare for this, players should:
Stay low on drives with shoulders down.
Use reverse pivots aggressively to create space.
Embrace contact rather than fading away.
When athletes learn to play low, they can outlast stronger or more physical opponents.
Why Basketball One-on-One Offensive Drills Matter
Developing isolation skills builds confidence, improves decision-making, and sharpens finishing ability. Whether it’s recognizing when to shoot, attacking the defender’s weakness, or powering through contact, these drills prepare players for real game situations.
Final Thoughts
Basketball one-on-one offensive drills aren’t just about scoring—they’re about teaching players to think, react, and dictate the game. By building habits like “hands down, man down,” strong footwork, and low, aggressive attacks, coaches can help athletes become unstoppable threats when it matters most.
Bonus: A Game-Changing Coaching Tool Is Coming Soon
A powerful new AI-driven coaching platform is set to launch later this summer, built specifically for youth basketball teams and families looking for smarter, faster feedback without spending hours breaking down film.
Here’s how it works: Upload a short video clip or a simple stat sheet, and the tool instantly provides coaching insights, suggests next steps, and helps you make real-time adjustments. Whether you’re coaching a third-grade rec team or a middle school travel squad, it’s designed to meet you at your level.
The goal is simple: save time, reduce guesswork, and make the coaching process more efficient and effective. It’s being developed by people who understand youth basketball, practical tools for real coaches, not overcomplicated systems that slow you down.
If your players only practice clean looks, they struggle the moment a defender crowds their vision. The distracted shooting drill builds comfort shooting through visual clutter. It is simple to run, affordable to set up, and maps closely to what players see in games.
Why the distracted shooting drill works
When a shooter briefly loses sight of the rim, even for a fraction of a second, accuracy drops. Research on visual occlusion shows that if vision is blocked during the final ~350 milliseconds before release, performance suffers, while having vision restored in those final ~350 milliseconds preserves accuracy.
You can see this principle in the pros. The “Kornet Contest” is a good example, where a 7-footer jumps to momentarily block the shooter’s view. On those shots, opponents made 33.3%, compared with the league-wide “wide-open” average of about 38%. Obscuring vision, even from several feet away, can matter.
Biomechanics studies add detail. When players shoot over higher obstacles, they jump higher and alter entry angles, and their make rate declines compared with smaller obstacles. Training that experience in practice prepares players for real contests.
Finally, teaching athletes where and how to look helps them manage distraction. Quiet-eye training, which stabilizes gaze on a single target location, improves shooting accuracy and transfers under defensive pressure.
Equipment
1–2 pool noodles or a light broom handle
1 ball per shooter
1 partner or coach as the “distractor”
Pool noodles are safe, light, and easy for younger players to handle as they simulate a defender’s hand without contact.
Core distracted shooting drill
Goal: Normalize shooting with a hand in your line of sight.
Setup: Shooter at a wing or elbow. Partner stands an arm’s length away, holding a noodle or hand up to the shooter’s eye line.
How to run it
Catch and shoot with a contest
Partner lifts the noodle to the shooter’s eyeline as the ball arrives.
Shooter locks eyes on the rim through or around the “hand,” then shoots.
Make two and move
Five spots: corner, wing, top, opposite wing, opposite corner.
Shooter makes two at each spot, then rotates.
Switch roles after every spot or two.
Coaching cues
Get your eyes back to the rim early.
Freeze the gaze on one part of the rim before the rise.
Smooth rise, high finish, same follow-through each time.
The contest is visual, not physical. Keep space.
Why it maps to games: Players must reacquire the rim while a “defender” floats in their field of view, which mirrors the momentary occlusion that hurts accuracy if it occurs right before release.
Join the TeachHoops Community
TeachHoops.com offers a unique platform for coaches to share experiences and gain new insights. Learn from others who have navigated similar challenges. It’s an invaluable resource for those looking to:
Partner steps in with the noodle to the eyeline on the gather.
Shooter plants, rises, and hits one pull-up going right, one going left, then rotate spots.
What it trains: Footwork under pressure and quick visual reacquisition at game speed. Taller or longer defenders force higher jumps and different entry angles, which this variation replicates.
2) “Bobby Knight J’s” partner drill
Partner starts at the top with a ball.
Shooter relocates to a spot.
Partner passes, raises a hand or noodle to contest.
Shooter fires, rebounds, and outlets back.
Work five spots, make 2–3 at each.
What it trains: Rhythm into relocation, contested catches, and immediate shot prep.
Teaching the eyes: quick quiet-eye routine
Add this 10-second habit to every distracted shooting drill:
Find the rim as the ball arrives.
Fix your gaze on a single target on the rim.
Keep that fixated spot through the rise and release.
Quiet-eye training produces better accuracy than technique-only instruction and holds up better when a defender adds pressure.
Common fixes
Shots are flat when distracted
Cue “eyes early, soft arc.” If players jump higher to clear a contest, remind them to keep the same release rhythm.
Players rush when the hand appears
Rehearse one calm breath and a steady gaze before the rise. Quiet-eye research supports stable focus under pressure.
Young players shy away from the contest
Keep distance and remind the partner this is visual only. No reach-ins, no contact.
Age-level and space adjustments
Elementary and middle school: Use shorter distances and slower tempos. Hold the noodle higher and farther to reduce crowding.
High school: Add drifts, lifts, and trail threes with a late contest.
Limited space: Run two spots and alternate reps to manage traffic.
Wrap up
The distracted shooting drill teaches your players to see the rim through traffic and keep their form under pressure. Build it into daily shooting. Cycle through spots, add the pull-up series, and finish with “Bobby Knight J’s.” Anchor every rep with a steady gaze, then let the defense blur into the background.
If you’re looking to make your practices more efficient, engaging, and effective, small-sided basketball games for youth coaches are one of the best tools you can add to your playbook. Whether you’re working with beginners or experienced players, this approach keeps kids moving, learning, and competing, all while developing the skills they’ll need at higher levels.
Why Small-Sided Games Work So Well
In real basketball, the game often breaks down into smaller situations. Think 3-on-3 on one side of the floor or a 2-on-2 action out of a pick-and-roll. By focusing on these formats in practice, you:
Give players more touches on the ball.
Improve spacing and decision-making.
Create realistic, game-like situations without overcrowding the court.
The beauty of small-sided games is that you don’t have to constantly teach new drills. Instead, you can use the same game format and change the constraints to target specific skills.
Adding Constraints for Skill Development
Once you have your base game, say, 3-on-3 half court, you can modify it with a variety of rules to work on different fundamentals:
Limit dribbles: no dribble, one dribble, or two dribbles max.
Shot location: only in the paint, only three-pointers, or must have a post-up before a shot.
Passing rules: must screen away after a pass or set an on-ball screen.
Defensive objectives: double-team in specific areas or force baseline drives.
These constraints not only keep the drill fresh but also push players to think, adapt, and execute under different conditions.
Join the TeachHoops Community
TeachHoops.com offers a unique platform for coaches to share experiences and gain new insights. Learn from others who have navigated similar challenges. It’s an invaluable resource for those looking to:
While 5-on-5 scrimmages are valuable, most game action happens in smaller combinations. That’s why many experienced coaches lean heavily on 2-on-2 and 3-on-3 work. These setups:
Encourage players to read and react without getting lost in the crowd.
Allow more opportunities for each player to touch the ball.
Simplify spacing, making it easier for young players to learn movement principles.
If you want players to succeed in full 5-on-5, they need to first master these smaller formats.
Keeping It Competitive
Competition is the fuel that keeps players engaged. When running small-sided games:
Keep score to create urgency.
Add time limits for quick decision-making.
Reward execution, not just scoring. For example, give points for good screens or defensive stops.
When kids feel like they’re “scrimmaging” while actually working on targeted skills, practice becomes both productive and fun.
Final Thoughts
Small-sided basketball games for youth coaches aren’t just a trend, they’re a proven way to build fundamentals, maximize limited practice time, and keep players motivated. By starting with a simple format like 3-on-3 and layering in creative constraints, you can address multiple skills in a single session.
For ready-made practice plans that use these methods and build skills progressively throughout the season, visit CoachingYouthHoops.com. You’ll save time, keep practices focused, and help your players grow one small-sided game at a time.
A player who can only go one direction or finish with one hand is predictable, and predictability gets you beat. Whether you’re coaching fifth graders or high schoolers, helping players develop their weak hand is one of the most important long-term investments you can make. That’s where off-hand dribbling drills come in.
These drills aren’t just about being flashy with both hands. They’re about creating balance, confidence, and options under pressure. Mastering the off-hand takes deliberate, often frustrating repetition. But once a player begins to trust their non-dominant side, their entire game starts to open up. They become less predictable, more versatile, and far tougher to defend, exactly the kind of player every coach wants on the floor.
In this post, we’ll break down a progression of full-court off-hand dribbling drills perfect for youth practices. These quick daily routines, inspired by TeachHoops.com, will help your players strengthen their weak hand and build habits that last. Whether your team is just starting out or looking to tighten up fundamentals, these drills will raise your practice standards.
Why Off-Hand Work Matters
Great players can attack both sides of the floor, finish with either hand, and make decisions under pressure. Getting there means rewiring the brain and body through thousands of reps. Off-hand development sharpens:
Ball control under pressure
Passing angles in traffic
Finishing moves around the rim
One of the best ways to begin this process is by carving out 2–3 minutes at the start of practice for full-court off-hand dribbling drills.
Daily Off-Hand Dribbling Drill Progression
This simple but effective sequence from TeachHoops.com is built for youth players and can be adapted as they grow. Emphasize head up, control over speed, and consistent left-hand use throughout.
V Dribbles
Use the off-hand only (usually left).
Dribble in a wide “V” pattern while walking or jogging down the court.
Focus: coordination and hand control.
In-Out Dribbles
Fake a crossover using only the off-hand.
Work in rhythm while keeping the eyes up.
Focus: misdirection and ball feel.
Hesitation Dribbles
“Slow and go” move with the off-hand.
Great for learning change-of-pace techniques.
Focus: timing and decision-making.
Half-Court Combo
Baseline to Half Court: Dribble between the legs, off-hand only.
Half Court to Baseline: Dribble behind the back, off-hand only.
For younger players, split the moves across halves. For older ones, run the full court.
Join the TeachHoops Community
TeachHoops.com offers a unique platform for coaches to share experiences and gain new insights. Learn from others who have navigated similar challenges. It’s an invaluable resource for those looking to:
Keep reps short and focused. Quality over quantity.
Progress from walking pace to full-speed over time.
Incorporate passing and finishing drills to round out development (like off-hand bounce passes or left-handed Mikan drills).
Be patient. The off-hand will feel unnatural at first, but that discomfort is part of the growth.
Unlock the Floor with Off-Hand Confidence
Players who commit to off-hand work become harder to guard and more confident in tight situations. Whether it’s blowing by a defender to their weak side or finishing a tough layup through contact, these skills translate to real-game results.
Want more structured drills, personalized support, and a full development roadmap?
Check out TeachHoops.com for one-on-one coaching, office hours, and proven resources, less than a dollar a day, with a 14-day free trial.
Bonus: A Game-Changing Coaching Tool Is Coming Soon
A powerful new AI-driven coaching platform is set to launch later this summer, built specifically for youth basketball teams and families looking for smarter, faster feedback without spending hours breaking down film.
Here’s how it works: Upload a short video clip or a simple stat sheet, and the tool instantly provides coaching insights, suggests next steps, and helps you make real-time adjustments. Whether you’re coaching a third-grade rec team or a middle school travel squad, it’s designed to meet you at your level.
The goal is simple: save time, reduce guesswork, and make the coaching process more efficient and effective. It’s being developed by people who understand youth basketball, practical tools for real coaches, not overcomplicated systems that slow you down.
If you’re looking for a way to take your ball handling to the next level, a basketball tennis ball workout might be exactly what your training routine is missing.
This unconventional method forces players to push past traditional skill development by training their body and mind simultaneously. The result? Better handles, sharper instincts, and a stronger feel for the ball, even under pressure.
Why Use Tennis Balls in Basketball Workouts?
Tennis balls introduce a layer of complexity that accelerates a player’s development. By engaging one hand with a small, unpredictable object like a tennis ball, whether you’re tossing it, catching it, or dribbling it, you overload your coordination and decision-making systems. That pressure forces your dribbling hand to operate on instinct, helping you build tighter control and quicker reflexes without overthinking.
As Coach Collins explains in one of his core training videos, incorporating tennis balls into ball handling drills teaches your hands to do different things at once. This challenges your hand-eye coordination, balance, and control all at the same time.
Key Tennis Ball Drills for Ball Handling
Start simple with a 3-2-1 crossover drill, where the basketball is the active dribbling hand and the tennis ball acts as the “dummy ball.” Hold the tennis ball steady with your non-dribbling hand and execute three controlled dribbles before crossing over. Once that becomes comfortable, switch roles and use the tennis ball for the dribble, a much harder task due to its size and bounce.
Coach Collins recommends building up to advanced drills, like:
Between-the-legs with a tennis ball as the active dribble
Two-ball dribbling drills while catching a tossed tennis ball mid-drill
Full-court movement drills with tennis ball coordination
These progressions force players to keep their head up, make micro-adjustments, and stay in rhythm, all essential for in-game performance.
Join the TeachHoops Community
TeachHoops.com offers a unique platform for coaches to share experiences and gain new insights. Learn from others who have navigated similar challenges. It’s an invaluable resource for those looking to:
Added Benefits of a Basketball Tennis Ball Workout
Improved fingertip control: The smaller surface area of a tennis ball sharpens your touch.
Enhanced reaction time: Juggling a tennis ball requires quick reads and fast hands.
Game-ready poise: Handling distractions makes you more composed under pressure.
Head-up dribbling: You learn to process your environment while staying in control.
Players and coaches alike have even taken these drills to unconventional surfaces like grass to add even more resistance and unpredictability.
Want a fun, effective way to challenge your players’ coordination and control? Add a basketball tennis ball workout to your next practice. You’ll be surprised how quickly their handle sharpens, and how much more confident they play under pressure.
Final Thoughts
The goal of the basketball tennis ball workout is simple: make handling a basketball feel easy. By switching back to a regulation ball after practicing with a tennis ball, players often feel quicker, more in control, and more confident.
Whether you’re a coach running practice or a player looking to stand out, this workout is a low-cost, high-impact way to raise your skill level.
For more detailed breakdowns and coaching resources, visit TeachHoops.com. Coach Collins offers everything from 1-on-1 calls to full training roadmaps for youth basketball coaches ready to win more games and build stronger teams.
Looking for a Smarter Coaching Tool?
If you’re tired of overpriced software and endless film sessions, check out SportsVisio Coach Mode. This youth basketball coaching tool delivers AI-powered stats, quick highlights, and game insights, all for a price that works for real coaches.
Solid post play begins with footwork, and no move highlights that better than the drop step. One of the most effective ways to teach this skill is by using a well-designed basketball drop step drill.
Whether you’re coaching youth players or high school forwards, this drill helps athletes understand how to create space, seal defenders, and finish strong.
Why Use a Basketball Drop Step Drill?
The drop step is a foundational move for post players. It relies on balance, body control, and correct foot placement. A basketball drop step drill reinforces all three by isolating the footwork and helping players repeat it under light pressure before progressing to game speed.
At the core of the drop step is understanding the bottom foot, the foot closest to the baseline when the player is in the post. In many drop step situations, this is the foot that swings around to establish position and create an angle to the basket.
Key Components of the Drop Step
To run an effective basketball drop step drill, start by breaking down the movement:
Catch and establish pivot: The player catches the ball with their back to the basket and locks in their pivot foot.
Identify the bottom foot: This is the foot closest to the baseline.
Execute the drop step: The player swings their bottom foot around the defender, stepping hard toward the hoop while using their body to shield the ball.
Finish with power: Emphasize finishing high and through contact, ideally with one strong dribble and a layup or short hook.
Join the TeachHoops Community
TeachHoops.com offers a unique platform for coaches to share experiences and gain new insights. Learn from others who have navigated similar challenges. It’s an invaluable resource for those looking to:
Here’s a basic basketball drop step drill to introduce the move:
Setup:
Place a cone or chair on the left block.
Have players start on the perimeter, catch a pass on the move, and land on two feet.
Designate the right foot as the pivot when catching on the left block.
Action:
Player pivots on the right foot.
Executes a strong drop step toward the baseline using the left foot (the bottom foot).
Finishes at the rim.
Reset and repeat on both sides of the basket.
Coaching Points:
Emphasize balance and body control when pivoting.
Cue players to swing their bottom foot wide around the defender (or cone) to seal properly.
Use one power dribble and keep the ball tight to the body.
Finish with either hand based on positioning.
Progressing the Drill
Once players show confidence with the movement, you can advance the basketball drop step drill by:
Adding a live defender to contest the finish.
Incorporating a help-side defender for decision-making.
Using timed reps to simulate game pace.
Why This Drill Matters
Footwork in the post isn’t flashy, but it wins possessions. Teaching a consistent drop step through focused reps gives players a dependable scoring option in tight spaces. The drop step also teaches physicality, balance, and how to use leverage, skills that translate throughout a player’s game.
Basketball drop step drills are simple to implement but powerful in impact. By focusing on the bottom foot and teaching players how to seal and finish, you’re building habits that lead to success at every level.
For players looking to take their scoring to the next level, learning how to become a better basketball shooter starts with building a strong technical foundation. Shooting is more than just repetition, it’s the result of proper mechanics, consistent targeting, smart practice, and attention to detail.
In this post, we’ll break down the key principles behind becoming a more efficient shooter, with insights from veteran college coach Doug Schakel and time-tested teaching points from coaches across all levels.
1. Master the Mechanics First
Before you can hit shots consistently, you need a reliable and repeatable shooting motion. That starts with:
Balanced base: Feet should be shoulder-width apart, with your shooting-side foot slightly ahead for natural power transfer.
Grip and hand placement: The ball should rest on your finger pads with a visible pocket of space between the ball and your palm. The off-hand guides but does not interfere.
Elbow alignment: Your shooting elbow should be tucked in, forming a straight line from your toe to the rim.
Release and follow-through: Finish high with a relaxed wrist snap, fingers pointing at the rim, and hold your follow-through.
This alignment helps eliminate variables, reduces off-target misses, and increases your margin for error. Without this structure, even the most intense practice won’t result in consistent results.
2. Build Muscle Memory Through Smart Practice
Effective shooters don’t just shoot more, they practice smarter. Start with close-range form shooting to reinforce muscle memory and rhythm. Focus on swishes, not just makes. Then, gradually increase your distance.
Include:
Shooting off the dribble
Coming off screens
Free throws under pressure
Fatigue shooting drills
These game-like reps build your ability to score in realistic conditions. Track makes and misses, analyze patterns, and make micro-adjustments. The best shooters treat practice like performance and their numbers reflect it.
3. Targeting: Where You Look Matters
According to Coach Schakel, targeting plays a key role in distance control and accuracy. While many shooters default to aiming at the front or back of the rim, his preferred method is the bullseye technique, focusing on a tiny imaginary dot in the center of the hoop.
Front rim targeting allows for soft shots to crawl in but may lead to short misses.
Back rim aiming can produce hard bounces due to the lack of give.
Bullseye targeting emphasizes pinpoint accuracy and mentally narrows your aim, much like a marksman hitting the center of a target.
This approach has helped many shooters who struggle with inconsistent depth or streaky performance.
Join the TeachHoops Community
TeachHoops.com offers a unique platform for coaches to share experiences and gain new insights. Learn from others who have navigated similar challenges. It’s an invaluable resource for those looking to:
Another crucial element in shooting success is the launch angle or arc of the shot. A higher arc increases the ball’s entry space into the rim:
A 60° launch angle offers the most room for the ball to drop cleanly through the basket (ideal inside 15 feet).
A 52.5° launch angle is better suited for longer shots where energy conservation and speed matter.
A flat shot (below 45°) drastically reduces makeability, especially from deep.
Schakel even uses a simple PVC arc trainer to help players visualize and train their arc. A higher, softer shot also increases your chances of “deflected makes” and “rim dancers,” reducing hard misses and rim outs.
5. Straight Is Better Than Perfect
Of the three elements, distance, arc, and direction, shooting straight is the most critical. You can be slightly short or long and still make shots, but if the ball veers left or right, it’s almost always a miss.
Coach Schakel emphasizes:
Slight body turn, not a squared-up stance, to promote better elbow and hand alignment.
Lead and trail shoulders help guide the shooting motion naturally.
Use of a vertical “shooting tunnel” formed by toe, knee, elbow, and eye.
He compares it to throwing darts: when the body is properly aligned, the shot travels straight without forcing it.
Track Your Progress With Purpose
One of Schakel’s most effective tools is the free throw accuracy game. Each make is scored based on quality:
3 points: Swish
2 points: One rim touch
1 point: Multiple rim touches
0 points: Miss
By rewarding clean makes, this system teaches players to value precision, not just results. Use it during practice or create a team-wide competition like a “free throw ladder” to track standings and name captains based on performance.
Final Thoughts: Become a Shooter, Not Just a Player
Learning how to become a better basketball shooter requires commitment, structure, and repetition, but more importantly, it demands intention. By pairing proper mechanics with intelligent, focused practice, any player can see significant gains.
Whether you’re a youth player trying to improve your form, a high school guard looking to increase your scoring average, or a coach searching for effective shooting drills, these principles hold true.
Teaching your bigs to run the floor with purpose is critical in today’s fast-paced game. One of the best ways to build those habits is by implementing a transition post drill that focuses on movement, timing, and scoring on the move. If your post players are standing still and waiting for the ball, you’re missing a big opportunity.
This drill not only improves their ability to catch while moving but also reinforces essential passing angles, court awareness, and post positioning. For new and inexperienced youth basketball coaches, this is a great starting point for building confident, mobile post players.
Why the Transition Post Drill Matters
Youth basketball often emphasizes guard play, but the development of bigs can’t be overlooked. The transition post drill gives post players opportunities to move in space, catch the ball in stride, and create scoring chances in game-like situations. In addition, it teaches guards to look ahead and feed the post effectively.
Too often, young players only practice stationary post moves. However, this drill mimics real transition opportunities where timing and movement matter. Even better, it keeps your bigs active and engaged, no more standing around in the paint waiting for a guard to decide what to do.
How to Set Up the Transition Post Drill
Follow these steps to create a productive drill environment:
Two lines: One at half court and one on the opposite wing.
Glass pass: A big starts under the basket and tosses the ball off the backboard.
Sprint and zigzag: A second big (or guard) zigzags through cones toward the wing.
Deliver the pass: That player feeds the big in stride on the block.
Add pressure: Use a coach or teammate with a pad to simulate contact.
This drill works best when players understand spacing. Make sure your post players are aiming to catch the ball above the hash mark, not buried under the basket where they have no angle to finish or pivot.
Key Coaching Points for Success
Catch on the move: Your post player should be catching while running, not standing. This builds comfort finishing in transition.
Pass from an angle: Guards should get wide enough on the wing to deliver a clean, direct pass into the post.
Sprint with purpose: Movement must be game speed to reinforce real transition habits.
Post above the hash: Use the hash mark as a teaching cue. This improves footwork, passing angles, and scoring options.
Vision up court: Guards must develop the habit of lifting their eyes and delivering early passes.
By reinforcing these details each rep, your players will start to internalize the rhythm of transition offense. As a result, they’ll play faster and with more confidence.
Join the TeachHoops Community
TeachHoops.com offers a unique platform for coaches to share experiences and gain new insights. Learn from others who have navigated similar challenges. It’s an invaluable resource for those looking to:
As your team progresses, it’s smart to increase the complexity of the transition post drill. Here are a few ideas:
Add more cones: This forces guards to control the ball through traffic before making the entry pass.
Include a coach with a pad: This simulates real post contact and helps build finishing toughness.
Make moves position-specific: Require different post finishes based on footwork or game scenarios.
Go both directions: Run the drill in both directions to develop left and right-hand comfort.
Additionally, make sure your team is practicing proper spacing during the entire sequence. While the drill emphasizes the post, it also improves guard skills and transition spacing.
Final Thoughts on the Transition Post Drill
This transition post drill is about more than just getting your bigs layup reps. It builds timing, decision-making, and physicality in a way that reflects real games. When done right, your team will run more fluid offense, make smarter passes, and get higher percentage shots.
For youth basketball coaches just starting out, drills like this help form the foundation of a well-rounded team. It encourages teamwork, pace, and awareness, and those are the building blocks of winning basketball.
Keep your bigs moving. Teach your guards to read. And most importantly, create an environment where learning through game-like drills leads to confident, effective players.
When it comes to building strong youth basketball fundamentals, most coaches start with ball handling, passing, and shooting. But there’s one essential skill that often gets overlooked: footwork. Teaching footwork in youth basketball lays the foundation for almost everything players do on the court.
From shooting mechanics to defensive positioning, footwork drives player development, and it’s time more youth coaches give it the attention it deserves.
Why Teaching Footwork in Youth Basketball Matters
You shoot with your feet. Defend with your feet. Move with your feet. Without a solid base, nothing else works. One of the biggest mistakes new coaches make is assuming footwork will come naturally. It doesn’t. It has to be taught, reinforced, and drilled with intention.
When you focus on teaching footwork in youth basketball, you’ll start to notice immediate improvements in how kids move, react, and play. Footwork connects directly to:
Shooting: Proper foot placement before the catch improves balance and shot consistency
Defense: Staying on the balls of their feet keeps players agile and reactive
Cutting and screening: Clean steps on back cuts or screens create space and scoring chances
Ball handling: A player’s first step, pivot, or jab starts with their footwork
Keep It Simple: Starting with the Basics
One of the best things you can do as a new coach is simplify your approach. Footwork does not need to be overly complicated, especially at the youth level. During the first week of practice, spend time teaching:
Pivoting off the left and right foot
Proper stance when catching the ball
Basic footwork for passing and receiving
Light, quick movement in defensive slides
The key is consistency. Every drill should include a footwork focus. It might not be the main point of the drill, but it should always be part of your coaching language.
Join the TeachHoops Community
TeachHoops.com offers a unique platform for coaches to share experiences and gain new insights. Learn from others who have navigated similar challenges. It’s an invaluable resource for those looking to:
Making Footwork Part of Your Everyday Practice Plan
Teaching footwork in youth basketball is not a one-and-done concept. It needs to be layered into your regular practice structure. Here are a few simple ways to integrate it:
Use terminology kids understand. “Happy feet” is a fun phrase for staying active on defense
Break down the footwork involved in common drills, like setting a screen or using a jab step
Give real-life examples. Players love hearing how someone like Steph Curry has already completed his footwork before the ball touches his hands
Use short, focused corrections when players are off-balance or flat-footed
These small reminders help players become more aware of their movement and body control.
The Long-Term Payoff of Teaching Footwork
If you’re serious about player growth, teaching footwork in youth basketball should be near the top of your list. It is one of the fastest ways to improve a player’s game without needing fancy equipment or advanced drills. So once kids learn how to move properly, everything else improves: shooting, spacing, defense, and even confidence.
Look at how your players are using their feet. Make adjustments, and keep it simple. The gains will come.
Final Thoughts
Footwork is one of the most under-taught but impactful skills in youth basketball. By focusing on teaching footwork in youth basketball, you set your players up for long-term success. The changes won’t always be flashy, but they will be noticeable and they’ll stick.
Want more help building your coaching toolkit? Head over toCoachingYouthHoops.comand grab a full-season practice plan. It is now 25 percent off with the code PODCAST250. You’ll find templates, tips, and tools to help you coach with confidence.
Every youth basketball coach hits a wall at some point. Whether it’s gym time, funding, or just plain burnout, the job comes with obstacles. That’s why finding real-world solutions for coaching youth basketball is so important.
If you’re a new or inexperienced coach, especially one working with limited resources, this post will walk you through practical ways to stay on track and build something meaningful without breaking the bank.
Use Local Gym Memberships to Offset Costs
One of the best solutions for coaching youth basketball with a tight budget starts with gym space. Renting gym time is one of the biggest expenses for any youth program. One creative coach kept his total per-player cost under $350 by encouraging families to join the local YMCA. That gym membership allowed players to use the court anytime, while the coach was able to use the space twice a week for team practices at no additional cost.
The gym gains more members. The players get extra access to courts and equipment. And the coach avoids a major expense. This setup takes some coordination, but it’s a smart and repeatable model.
Maximize Limited Practice Time with Simple Systems
When you only get the gym two nights a week, you cannot cover everything. High school coaches may have five or six days to implement complex systems, but youth coaches need to keep it simple. That’s where efficient practice planning becomes critical.
A smart solution for coaching youth basketball in limited time is to break the game into teachable chunks. One coach used a “Hot Potato” concept to teach zone offense. Players lined up and passed quickly in a pattern, learning to shift the ball and move defenses without overthinking. It might not be flashy, but it gets the job done.
Youth players benefit from clarity and repetition more than complexity.
Join the TeachHoops Community
TeachHoops.com offers a unique platform for coaches to share experiences and gain new insights. Learn from others who have navigated similar challenges. It’s an invaluable resource for those looking to:
If you’re walking into practice without a plan, you’re already behind. One piece of advice that comes up again and again from veteran coaches: always bring a written practice plan. That plan helps you stay on task, layer skills over time, and avoid wasting minutes.
Go in knowing exactly what you want to accomplish. Break drills down, stick to time limits, and make sure your teaching points stay clear. It’s one of the most underrated solutions for coaching youth basketball effectively and efficiently. There are effective ways to schedule your basketball practice to keep athletes focused.
Cut Costs with Fundraising and Smarter Uniform Choices
Uniforms, tournament fees, and insurance can add up quickly. But you can get what you need without asking families to spend hundreds. Tap into your local community for help. Credit unions, small businesses, and even employers with donation matching can make a difference.
You can also run clinics to raise money while building interest in your team. Traditional fundraisers like shoot-a-thons or even light bulb sales still work. And when ordering uniforms, try going straight to wholesale suppliers. Skipping the middleman saves money and gives you better control over quality.
Build a Supportive Community Around Your Program
One of the best long-term solutions for coaching youth basketball is creating a support network. Parents, neighbors, and local business owners often have resources or connections you wouldn’t know about unless you ask.
Whether it’s backyard hoop access, tournament sponsorships, or discounted gear, the support is out there. You just need to involve them.
Final Thought on Solutions for Coaching Youth Basketball: Be Resourceful and Stay Focused on the Mission
Every youth basketball coach runs into obstacles. What separates the best from the rest is how they respond. When you hit those inevitable challenges, practice space, budget, player gear, etc., pause and look for the most practical workaround. You don’t need perfect conditions to make an impact.
As a veteran youth basketball coach, one of the most crucial aspects of building a successful team is ensuring that your players can score efficiently. One of the best ways to improve your team’s ability to score is through focused shooting drills that replicate in-game scenarios. In this post, we’ll discuss a fantastic shooting drill for scoring that can help your players develop confidence, improve their accuracy, and enhance their competitiveness.
Why a Shooting Drill for Scoring is Essential
In youth basketball, players often lack consistent shooting reps, especially with the rise of shooting machines and less outdoor play. One effective way to combat this is by incorporating a shooting drill for scoring that encourages repetition and healthy competition.
This drill helps players learn how to shoot under pressure, replicate real-game situations, and develop an intuitive understanding of how to score.
The “Up Two” drill is a fun and competitive game that simulates the high-stakes environment of a basketball game. The drill involves players competing head-to-head to score points and outshoot each other.
By introducing this competitive element, you’re not only working on shooting skills but also building mental toughness and focus in your players. This drill can be modified throughout the season to add more challenges as players improve.
Setting Up the Shooting Drill for Scoring
The setup for this shooting drill for scoring is simple, yet highly effective. Begin by dividing the players into two even teams. Have each team line up at the elbow or another shooting spot, depending on the variation of the drill.
The goal is to score points faster than the opposing team. The rules are easy to understand:
The first team to score two points (or three points, if you prefer a more advanced challenge) wins the round.
Both teams shoot at the same time, competing to make their shots and earn points.
If one player makes their shot and the other misses, the shooting team scores one point.
This game-based approach keeps players engaged and encourages them to shoot under pressure. Players enjoy the competitiveness, and it pushes them to perform at their best, which can translate into more efficient scoring in games.
Join the TeachHoops Community
TeachHoops.com offers a unique platform for coaches to share experiences and gain new insights. Learn from others who have navigated similar challenges. It’s an invaluable resource for those looking to:
Modifications to Keep the Shooting Drill for Scoring Fresh
As your players develop their shooting skills, you can increase the difficulty of this drill. Consider moving to the “Up Three” version later in the season for a more challenging experience. The concept remains the same, but the players must now make three successful shots before they can win the round.
Additionally, you can modify the drill to incorporate various types of shots. Players can practice mid-range shots, three-pointers, or even corner shots. This allows you to target different aspects of their shooting game, ensuring they become well-rounded scorers.
One useful modification is to have players focus on specific shooting techniques. For example, you might emphasize the importance of proper form or teach them how to shoot off the dribble. By introducing these small changes, you can tailor the drill to address your team’s unique needs.
Why This Shooting Drill for Scoring Works
The reason why this shooting drill for scoring is so effective lies in its simplicity and competitiveness. First, it’s easy to understand and implement, making it a perfect drill for youth players. Second, the competitive aspect keeps players engaged and motivated to improve their shooting accuracy. Lastly, the drill teaches players how to handle pressure, making them more effective when it matters most in game situations.
As a coach, you can use this drill to break up monotonous practices and bring an element of fun to your training sessions. Players will look forward to it, and you’ll see improvements in their shooting efficiency over time.
Conclusion
If you’re looking for a shooting drill for scoring that encourages both skill development and competitiveness, the “Up Two” drill is an excellent choice. It’s versatile, fun, and can be adapted to suit the needs of your players as they grow and improve. Incorporate this drill into your practice routine, and you’ll see a noticeable difference in your team’s shooting abilities and overall scoring performance.
Let’s face it, shooting is one of the most important skills in basketball, and the more opportunities your players have to practice, the better they’ll become at scoring. Give the shooting drill for scoring a try today and watch your players become more confident, accurate, and competitive on the court.
June and July aren’t just for rest. They’re the most important months for basketball summer skill development. This is the time when players and coaches should focus on improving, not just maintaining.
If you’re still running isolated drills or relying on routines from five years ago, it’s time to update your plan. Summer is where habits are built, shots are refined, and smart decisions get hardwired into players’ games.
Add Decision-Making to Every Summer Drill
Summer workouts shouldn’t look like a layup line or cone gauntlet. Instead, design sessions around decision-making and in-game reads.
Here are a few ideas to build smarter players:
Toss the ball and ask: “Attack baseline or middle?”
Teach players how to read a hedge, switch, or trap on a ball screen.
Use small-sided games that mimic pressure, spacing, and timing issues.
These kinds of drills teach players to react, something isolated reps can’t do.
Basketball Summer Skill Development Must Include Rebounding
Rebounding often gets ignored in offseason workouts, but it needs attention. You don’t need a true center to rebound well, you need urgency, positioning, and consistent reminders.
Build rebounding into your summer development plan by:
Creating drills with consequences (missed box-out = team sprint).
Teaching angles and timing through controlled chaos.
Repeating the phrase: Find, Hit, Get.
Make it part of your culture, not just an afterthought. You don’t need a true center to dominate the glass, just a team that’s committed to it.
Join the TeachHoops Community
TeachHoops.com offers a unique platform for coaches to share experiences and gain new insights. Learn from others who have navigated similar challenges. It’s an invaluable resource for those looking to:
Summer is the best time to refine mechanics, reps, and confidence. But there’s a big difference between being a shooter and being a scorer.
A few summer goals for shooters:
Hit 60% of open threes in an empty gym consistently.
Practice movement shooting, not just spot-ups.
Learn to shoot after contact or closeouts.
Shooting improvement happens in workouts. Scoring shows up when the lights are on. Both start in the summer.
Don’t Forget On-Ball Defense in Your Summer Workouts
Too many coaches overlook ball pressure in their summer sessions. But staying in front of the ball is a skill that can be built—if you prioritize it.
Make sure your basketball summer skill development plan includes:
Lateral quickness drills with resistance or reaction components.
Daily work on closeouts and proper stance.
Reps where defenders must force a player to their weak hand.
Defense wins in the winter, but it’s built in the summer.
Build Game-Like Habits, Not Just Reps
You want players who think fast and adjust in real time. That doesn’t come from doing 100 perfect reps. It comes from 100 imperfect reps under game-like stress.
Here’s what to include in your summer sessions:
Game-speed, game-like reps with variable outcomes.
Partner or group work to simulate pressure.
Drills that include consequences and choices, not just movements.
Basketball summer skill development should feel like practice with a purpose, not a training video.
Final Word: Put in the Time, Build the Habit in Basketball Summer Skill Development
Skill development only works when it’s consistent. Set expectations, track progress, and encourage players to train with intent.
Whether you coach varsity, AAU, or a rising 6th-grade team, use the summer to build habits that translate to wins. And remember: the offseason is where players are made.t practice.
If you’re looking to boost your team’s hustle, court awareness, and communication all in one go, the two ball conditioning drill might be just what you need. It’s a high-energy drill that combines sprinting, tipping, passing, and teamwork. Best of all, it teaches young players how to talk on the floor, something that often gets overlooked.
As a youth coach, you’ll love how this simple setup pushes your players to compete at game speed, without needing to draw up anything complicated.
Why the Two Ball Conditioning Drill Works
The two ball conditioning drill gives you multiple benefits in a short amount of time. First, it forces players to run the floor while staying alert. Then, it adds the tipping and passing element to simulate fast-paced game actions.
Most importantly, it teaches communication. Because players must call out and make decisions on the fly, it creates an environment that encourages talking and teamwork.
Here’s why this drill should be part of your end-of-practice routine:
It’s fast-paced and competitive.
It promotes full-court movement.
It teaches players to communicate under pressure.
It builds cardio without needing suicides or laps.
Drill Setup and Execution
To get started, you’ll need two basketballs and at least 10 players. More is even better.
Setup instructions:
Place one line of players on the right block with a ball.
Place the other line on the opposite right block across the court.
The first player tips the ball off the backboard and sprints to the opposite line.
The next player immediately tips the ball, continuing the cycle.
Once everyone understands the flow, add the second ball into the mix.
Eventually, one player will tip the first ball, then receive a pass from a coach or teammate using the second ball. That second ball then gets passed to the next player in line. While it sounds tricky at first, players usually pick it up after a few reps.
Join the TeachHoops Community
TeachHoops.com offers a unique platform for coaches to share experiences and gain new insights. Learn from others who have navigated similar challenges. It’s an invaluable resource for those looking to:
Coaching Points for the Two Ball Conditioning Drill
To get the most out of this two ball conditioning drill, make sure you’re emphasizing the following points:
Communication is key. Players must call out and let each other know when and where to tip or pass.
No walking. This is a sprint drill. Push effort and pace.
Hold players accountable. If the ball hits the floor or communication breaks down, reset and start over.
Make it a timed challenge. Set a 2-minute clock and tell players the goal is zero dropped balls.
Reinforce technique. Players should tip with control and pass on target.
When to Use the Drill
This drill is ideal to use near the end of practice. It works well as a finisher that builds conditioning and hustle without boring your players.
You can also use it as a team bonding exercise, since success depends on group effort. If your players are slacking on communication or jogging through drills, this will wake them up fast.
Final Thoughts
The two ball conditioning drill is more than just a way to run players. It’s a tool that improves timing, trust, and teamwork. Because it forces everyone to stay involved, no one hides. And that’s what you want in a solid youth basketball drill: constant motion, communication, and purpose.
Add this to your next practice and watch your team grow more vocal, quicker, and more competitive.
A smart basketball warm up routine can set the tone for everything that follows in your session. Whether you coach in a high school gym or a church rec league, the principles are the same. Players need structure, movement, and energy from the jump. As a coach, you don’t want kids walking into the first drill cold. You also don’t want to waste time.
This post gives you a fast, effective warm up you can run anywhere, on a court, in a hallway, or even a classroom. You’ll also get key tips on preventing injuries, boosting focus, and improving early-session energy.
Why Your Basketball Warm Up Routine Matters
Too many teams treat warm ups like filler time. That’s a mistake. The warm up sets the tone for effort, focus, and tempo. And at the youth level, it helps prevent avoidable injuries. When done right, your basketball warm up routine becomes a tool for skill reinforcement, not just stretching.
Benefits of a good warm up:
Activates muscles safely
Reduces risk of ankle, knee, and hamstring injuries
Establishes the day’s energy and pace
Builds good habits over time
Creates focus in chaotic environments
Make it part of your culture, not just a routine.
Start with Controlled Movement
Always begin with body control and muscle activation. Avoid jumping right into sprints or high-intensity drills.
Try this simple progression:
Walking Lunges (with a ball):
Go halfway down the court or hallway. Keep it slow and controlled.
Two Steps Forward, One Back (ball overhead):
Promotes rhythm and awareness. Keeps kids active without rushing.
Side Slides (to half court):
Emphasize staying low. Teach players to push off their back foot.
Use these to build a foundation without draining energy early in practice.
Incorporate the Ball in Your Basketball Warm Up Routine
The ball should be in your players’ hands as often as possible, even during warm ups. This isn’t just for guards. Big men benefit from ball handling, too. Let them get touches early.
The ball isn’t just a skill tool, it helps keep kids focused. Distractions go away when their hands are full.
Join the TeachHoops Community
TeachHoops.com offers a unique platform for coaches to share experiences and gain new insights. Learn from others who have navigated similar challenges. It’s an invaluable resource for those looking to:
This part of the basketball warm up routine is often skipped, but it’s one of the most important for injury prevention. I started requiring ankle braces after watching too many kids go down with rolled ankles.
To build ankle strength:
Balance on one foot and touch the ground with the opposite hand
Pick up and replace a ball without letting the off-foot touch down
Try the same with eyes closed or while holding a weight
Add light hops or line jumps to train stability and reaction
Don’t wait for an injury to start focusing on ankle work. Add this in now and build it into your warm up structure.
Make It Fast and Functional
We live in a fast-paced world. Practices should reflect that. Your basketball warm up routine needs to keep moving. If it drags, attention fades.
Here’s how to keep the pace up:
Set time limits for each movement (30–45 seconds max)
Rotate drills quickly and keep a tight order
Skip things that aren’t working and revisit later
Mix in music or rhythm to keep energy high
Players should never feel like the warm up is a punishment. If they’re bored, the pace is off.
Add Jump Work to Prep for Game Action
Jumping drills help simulate the movement players will use in the first few minutes of a game. It also conditions soft landings and proper takeoff form.
Use this jump sequence:
Standard Jumps in Place (5–8 reps)
Rebound Jumps (emphasize timing and high-point technique)
Vertical Leap Focus (try to hit max height with proper form)
360 Spins (challenge balance and core control)
These take less than two minutes total. But they prep your team for rebounding, closeouts, and put-backs before the ball tips.
Keep Your Basketball Warm Up Routine Versatile and Consistent
Your basketball warm up routine should be portable. You won’t always have a court, and warm up windows change constantly at youth events.
Places you can warm up:
School hallways
Cafeterias
Parking lots
Classrooms (cleared space)
Locker rooms
Adapt your routine so your players are never standing around before game time. Once it becomes a habit, they’ll know what to do even when you’re not watching.
Final Thoughts
A consistent basketball warm up routine is one of the simplest ways to improve player health, readiness, and practice energy. You don’t need fancy gear. You just need structure, intention, and a little creativity.
Start by getting players moving. Add ball work. Mix in ankle stability. Finish with jumping. Keep it under five minutes, and your team will be better for it.
When it comes to building strong habits in your players, few tools are more effective than a well-designed youth basketball defensive drill. One of the simplest and most effective drills you can add to your practice routine is called One-on-One in Space.
It teaches on-ball pressure, defensive footwork, and player accountability, while keeping things competitive and game-like. If you’re coaching at the youth level and want your team to become more confident defenders, this drill should be part of your regular routine.
Why This Youth Basketball Defensive Drill Works
This drill isolates your defender and gives them one clear task: do not get beat in three dribbles. That clarity is important, especially when you’re working with younger or less experienced players.
It forces athletes to focus on footwork, body control, and defensive positioning without relying on help defense. Just as important, it gets them used to guarding in space, which is critical in the modern game of basketball.
Because the offense is attacking at full speed, the drill simulates real game pressure. Defenders are learning how to contain the ball under stress, without fouling or overcommitting. It is also an excellent way to condition your players mentally and physically, as it demands full effort on every repetition.
How to Set Up the 1-on-1 in Space Drill
To get the most out of this youth basketball defensive drill, follow this step-by-step setup:
Pair your players with one on offense and one on defense.
Have the offensive player spin the ball out near the top of the key or just inside the three-point line.
They retrieve the ball, pivot, and pass it to their partner who is already moving.
The offensive player catches the pass on the run and attacks the basket, staying on the same side of the hoop.
The defender must contain the drive and try to prevent a layup, foul, or blow-by within three dribbles.
Offensive players should be encouraged to play fast but under control. Defenders must use angles, quick feet, and balance to stay between the ball and the basket. You can run this drill on both wings and in the middle to vary the spacing and angles of attack.
Join the TeachHoops Community
TeachHoops.com offers a unique platform for coaches to share experiences and gain new insights. Learn from others who have navigated similar challenges. It’s an invaluable resource for those looking to:
This youth basketball defensive drill reinforces the mindset that every player is responsible for guarding their own space. We call this “guarding your yard.” It sends the message that players cannot always rely on a teammate to help or clean up their mistakes.
In many game situations, defenders will be isolated, and this drill gives them the reps to build confidence in those moments.
Instead of steering players toward help, this drill teaches them to square up, move their feet, and wall up without reaching. It also builds better communication as teammates on the sideline start to recognize good defensive technique and effort.
Variations to Increase the Challenge
Once players get the hang of this youth basketball defensive drill, you can raise the difficulty to keep it fresh and challenging. Here are a few ways to do that:
If the offensive player gets into the paint, the defender automatically loses that round.
Introduce a charge element, where defenders try to absorb contact legally and stay vertical.
Keep score in short sets, like best of five or first to three stops, to add a competitive edge.
Restrict offensive players to one side of the court, reinforcing the concept of working within tight space.
You can also reward great defensive efforts with praise or small team privileges. Players respond well to recognition, especially when it is tied to effort.
Final Thoughts on Using This Youth Basketball Defensive Drill
Defense is about more than just stopping your man. It is about positioning, toughness, anticipation, and effort. This drill teaches all of that in a fast-paced, game-like format. It also gives your players the chance to learn from failure, adjust, and improve over time.
Incorporating this youth basketball defensive drill into your practices will lead to better individual defenders and a stronger team defense overall. Stick with it, coach it daily, and watch your players grow on the defensive end.
When it comes to youth basketball practice planning, one of the biggest challenges new coaches face is deciding how to divide practice time. Should you run through plays? Focus on skill development? Teach game strategy? The truth is, you can’t do it all, especially when you’re working with young players and only have an hour or two each week.
I’ve coached at nearly every level, from second grade to high school seniors, and one lesson stands out: at the youth level, fundamentals come first. If you’re just starting out as a coach, here’s how you can think about practice planning in a way that builds long-term player success.
Why Fundamentals Should Dominate Youth Basketball Practice Planning
If you only take one thing from this post, let it be this: young players need reps, not playbooks. Ball handling, footwork, passing, spacing, and shooting are the foundation of everything they do in a game. Without those basic skills, no amount of plays or schemes will matter. The players simply won’t be able to execute them.
At the youth level, consider using simple, repetitive drills that allow for lots of touches and decision-making. For example, have players work on stationary and on-the-move dribbling, form shooting near the basket, and one-handed passing off the dribble. These are the kinds of habits that lead to confidence on the court.
A good rule of thumb for youth teams is to spend at least 80 to 90 percent of your practice time on fundamentals. The younger the players, the closer to 90 percent you should aim for. Save the play diagrams and full-court sets for later down the road when the kids can actually move and think at the same time.
Don’t Skip Strategy, Just Keep It Simple
While fundamentals are key, your team will need some structure during games. Kids should know where to stand on an inbound, how to start an offensive set, and what to do when they do not have the ball. That said, the teaching should be light, and the execution should be flexible.
Stick to simple concepts like spacing, ball movement, and defensive positioning. For example, teach a basic motion where players pass and cut, or show them how to set and use a screen without needing to memorize a playbook. Defensively, start with a basic man-to-man defense where players stay in front of their man and help when the ball gets inside.
When you do introduce plays or actions, walk through them slowly. Use cones or lines on the court to help players visualize spacing. Reinforce with repetition, but never let a play dominate the practice. Let it complement the fundamentals, not replace them.
Join the TeachHoops Community
TeachHoops.com offers a unique platform for coaches to share experiences and gain new insights. Learn from others who have navigated similar challenges. It’s an invaluable resource for those looking to:
How much time you spend on skill work versus team concepts should change as your players grow and improve. Here’s a basic breakdown that works well across age groups:
Grades 2–4: Spend about 90 percent of the time on fundamentals and just 10 percent on team concepts.
Focus on dribbling, passing, basic shooting, and understanding spacing.
Grades 5–7: Shift to around 80 percent fundamentals and 20 percent team play.
Introduce basic offense and defense structure. Start teaching how to move without the ball.
Grades 8–10: Spend about 70 percent on fundamentals and 30 percent on strategy.
By now, players should understand spacing, screening, help defense, and simple inbound plays.
High School Varsity: Spend 30 percent on fundamentals and 70 percent on strategy.
Most of your practice time will be on game prep, scouting, and advanced team systems. Players should already have a solid skill base.
This progression ensures that as kids grow physically and mentally. They also grow in their understanding of how to play the game in a team setting.
Create a Youth Basketball Practice Plan That Maximizes Time
New coaches often feel like they are running out of time the second practice starts. Having a structure in place can make a big difference. A balanced plan keeps players moving, cuts down on downtime, and builds habits that last all season.
0 to 10 minutes: Warm up with dynamic stretches and ball-handling drills.
Let every player touch the ball early.
10 to 30 minutes: Station work with skill development.
Include passing off the dribble, layups from both sides, footwork drills, and closeout defense.
30 to 50 minutes: Competitive small-sided games like 1-on-1 or 3-on-3.
These allow players to use their skills in a game-like setting without needing a full team.
50 to 70 minutes: Introduce or review basic team actions.
Teach where players should space, how to rotate defensively, or walk through an inbound play.
70 to 90 minutes: Finish with a controlled scrimmage that reinforces the theme of the day.
For example, you can limit dribbles or require a certain number of passes before shooting to encourage teamwork.
This kind of practice structure keeps things focused, purposeful, and fun while maximizing reps and learning.
Final Thoughts on Youth Basketball Practice Planning
It’s easy to feel pressure to run flashy plays or mimic high school and college systems, especially when you watch YouTube videos or see what other coaches are doing. But remember, you are coaching kids. Your job is to give them tools they can carry with them as they grow.
If your players finish the season with better footwork, more confidence handling the ball, and a clearer sense of spacing and movement, you have done your job. Focus on steady improvement, and let wins and losses take a backseat. The game rewards those who master the basics.
When people think of success on the basketball court, they often picture star players making flashy plays. But experienced coaches know the truth: games are often won or lost by the players beyond the starting five. Your bench matters. If you want consistent wins, you need a second unit that understands your system, executes under pressure, and contributes without disrupting chemistry. That starts with intentional, consistent basketball skill development.
In this post, we’ll break down proven ways to develop your bench into a dependable, game-ready unit. Every tip below is rooted in real coaching experiences and built for practical use with youth teams.
Shift the Focus of Basketball Skill Development
Many new or inexperienced coaches rely on static drills, things like stationary ball handling, one-handed passing, or cone zig-zags. These have value, but they don’t teach players how to think. Game performance is about reactions, not routines. So shift your focus toward decision-based drills. Give players scenarios where they must choose and act quickly.
Start with a “catch-and-react” drill. Have a player catch the ball at the short corner or wing. On the catch, give them 1–2 options: attack baseline or middle. Add a defender. Teach them to scan, decide, and go. From there, layer in additional reads: help defense rotation, post feed, or pull-up. Let the drill evolve based on game situations.
By repeating these reactive moments, players stop thinking and start playing instinctively. And that’s when development becomes game-real.
Use Small-Sided Games for Basketball Skill Development
Want your bench to get better? Let them play. But in controlled, competitive, small-sided settings. Small-sided games (2-on-2, 3-on-3, 4-on-4) speed up learning because they isolate key decision-making moments.
In a 5-on-5 setting, a bench player might go minutes without touching the ball. In a 3-on-3 setting, they’re involved constantly.
Add simple rules to shift the focus. Try 3-on-3 where players must pass within 2 seconds. Or 2-on-2 with no dribbles allowed. These rules force quicker thinking and better spacing. You can even run a 4-on-4 “advantage” game: defense starts with only three players, offense reads and attacks the gap.
Keep scores and rotate teams quickly to maintain pace and energy. Bench players thrive in these formats because they learn how to read defenders, use space, and make fast decisions.
Make Rebounding Part of Basketball Skill Development
Rebounding is often treated as a hustle stat. While effort is critical, it’s also a teachable skill. Especially for youth players, learning how to box out and read angles can be the difference between a rebound and a put-back bucket.
Teach “find, hit, get.” That’s your rebounding sequence. First, locate your assignment. Next, initiate contact. Finally, go get the ball. Simple, clear, and actionable.
One effective drill: position two players, one on the wing, one under the hoop. Toss a shot from the top. When the shot goes up, both players sprint to the ball. The one underneath works on boxing out; the wing player works on attacking the glass. Add consequences if the ball hits the floor. This raises intensity without needing to run extra sprints.
Another option: play 5-on-5 where a missed box-out equals a point for the other team. Now your team connects rebounding with winning.
Join the TeachHoops Community
TeachHoops.com offers a unique platform for coaches to share experiences and gain new insights. Learn from others who have navigated similar challenges. It’s an invaluable resource for those looking to:
Bench players won’t always get touches, but they can earn minutes with defense. And nothing gets a coach’s trust faster than strong on-ball pressure. But players must be taught how to defend, not just told to “stay in front.”
Drill footwork and angles in short bursts. Start with a “mirror drill.” Two players face each other: one on offense, one on defense. The offensive player can shuffle left or right, no ball, no fakes. The defender mirrors their movement. Focus on low hips, active hands, and short steps.
Then layer in a live ball. Let the offensive player attack with one dribble max. Defender focuses on forcing weak-hand drives and keeping their hips square. Rotate pairs every 30 seconds to keep energy high.
Don’t forget to emphasize help defense and recoveries too. Bench players often come in cold. They need to be mentally sharp and positionally aware to contribute defensively.
Every Player Should Learn to Shoot
Not every player will become a scorer, but every player should be able to shoot. It’s the most universal skill in basketball, and it travels to every level. Great shooters space the floor, force closeouts, and give your offense breathing room.
Teach consistent form. Repetition matters here. Require every player to make 50 form shots before practice or after. Use a shooting ladder in workouts: start short, move out, track makes. Teach players that shooting under pressure starts with shooting under control.
Here’s a challenge to give your team: in an empty gym, your shooters should hit 60% from three. If they can’t do that without a defender, they’ll struggle when a defender contests or bumps them. Help players understand that gym shooting and game shooting are not the same, but one builds the other.
Build Skill Through Repetition and Accountability
Skill doesn’t develop through variety alone. It develops through repetition, accountability, and purpose. As the coach, set a tone that the bench must meet the same expectations as the starters.
Start with accountability. If no one boxes out in a drill, stop the action. Explain the mistake. Reset. If your second unit turns the ball over, don’t ignore it. Teach the right choice and run it back.
Use a rotation that gives your bench group specific goals during scrimmages. For example: hold the other team to one shot, move the ball through all five players, or force two turnovers before rotating out. This gives structure and lets players connect effort to results.
Even when you’re not drilling specific skills, your culture is always developing. So make sure your bench players know they’re a vital part of it.
Final Thoughts on Basketball Skill Development
The best way to prepare players for games is by mimicking games. That means creating pressure, enforcing decision-making, and building habits they can rely on when things speed up. Your bench needs reps just like your starters. Let them play, make mistakes, and learn in controlled chaos.
When you focus on basketball skill development that builds thinking players, not just skilled ones, you develop a team that’s deep, confident, and ready for any moment.
If you’re coaching youth basketball, you’ve probably seen it a hundred times, players catch the ball and immediately start dribbling. That habit kills ball movement and stalls the offense. A simple fix? Try the No Dribble Basketball Drill.
This constraint-based drill teaches players how to move, cut, and pass with purpose. As mentioned in the video below, over-dribbling is a problem at every level, especially early in the season. Players often bring habits from AAU or summer play, where dribbling on the catch is the norm. This drill starts to undo that.
Why Use the No Dribble Basketball Drill?
The No Dribble Basketball Drill forces players to engage mentally and physically. This is an example of what’s called a constraint-based drill, which is an exercise that uses specific limitations to force players towards discovering effective solutions and skills.
This drill teaches players to scan the floor, move with purpose, and communicate. Without the option to dribble, they are forced to pass and cut. This encourages better spacing, sharper footwork, and more intentional ball movement. It also helps develop awareness of defensive switches and off-ball positioning. These are all areas where players often struggle if they rely too heavily on the dribble.
Because you can assign offensive and defensive goals within the same drill, it turns into a multi-layered teaching tool.
When to Use the No Dribble Basketball Drill
This drill doesn’t need to dominate your practice plan. It works well as a short segment in practice. Ten to fifteen minutes is plenty. It fits into small-sided games like 3-on-3, 4-on-4, or 5-on-5. You can also include it as a constraint in advantage-disadvantage situations.
For example, when running a 5-on-3 drill, simply instruct the offense not to dribble. This makes them look for better cuts and smarter passes instead of falling into bad habits. The change forces quick decision-making. This can be an eye-opener for players and helps them learn how to find gaps with movement rather than a bounce.
What to Emphasize During the No Dribble Basketball Drill
The beauty of this drill is that it is very adaptable to the skill level of your team. Coaches should tailor their teaching points based on the skill level of their players to get the most out of this drill.
What to Emphasize for Lower-Level Teams
Pivoting under pressure: Teach players to stay under control and use their pivot foot to avoid travels and turnovers.
Basic passing techniques: Focus on chest passes and bounce passes with proper form and timing.
Simple cuts and movement: Encourage players to cut after passing and avoid standing still. Keep it basic and repeatable.
Spacing fundamentals: Help players understand the need to spread out and avoid bunching up near the ball.
Making the next pass: Reinforce the idea of moving the ball quickly to an open teammate rather than holding it.
Join the TeachHoops Community
TeachHoops.com offers a unique platform for coaches to share experiences and gain new insights. Learn from others who have navigated similar challenges. It’s an invaluable resource for those looking to:
Reading the defense: Push players to scan and react to how defenders are positioned and where the help is coming from.
Creating passing angles: Teach players to use fakes, step-throughs, and footwork to open up better lanes.
Second cuts and re-screening: Introduce more complex off-ball movements like backdoor cuts and re-screening actions.
Using voice and eye contact: Encourage clear communication and non-verbal cues to stay in sync with teammates.
Adjusting to switching defenses: Work on how to recognize and exploit mismatches after defensive switches without relying on dribbling.
These points can be layered as your players develop. Starting simple and gradually increasing the challenge ensures growth while maintaining confidence.
Coaching Tips for the No Dribble Basketball Drill
Keep the drill moving. Do not stop practice repeatedly. Give coaching points in between reps or while players rotate in and out. This keeps energy high and reps consistent.
Use short prompts and quick feedback. Ask questions like “What was the next pass?” or “What did you see there?” to keep players thinking. Make adjustments on the fly rather than turning the drill into a lecture.
Adapting the Drill to Any Offense
No matter what system you run, this drill has value. Even if your team plays a dribble-drive style, players need to know how to move the ball without pounding it. The No Dribble Basketball Drill teaches them to catch, scan, and move. These are universal skills.
The goal is to reduce empty dribbles and increase purposeful actions. Better movement creates better shots, no matter the offense. Players learn to make better decisions, move without the ball, and work as a unit. When introduced early in the season, it can help set the tone for smarter, team-first basketball. Even if things look rough at first, that is part of the growth. The more reps your team gets, the more comfortable they will become.
This drill belongs in every coach’s toolbox. It is quick to implement, easy to adjust, and effective at every level.

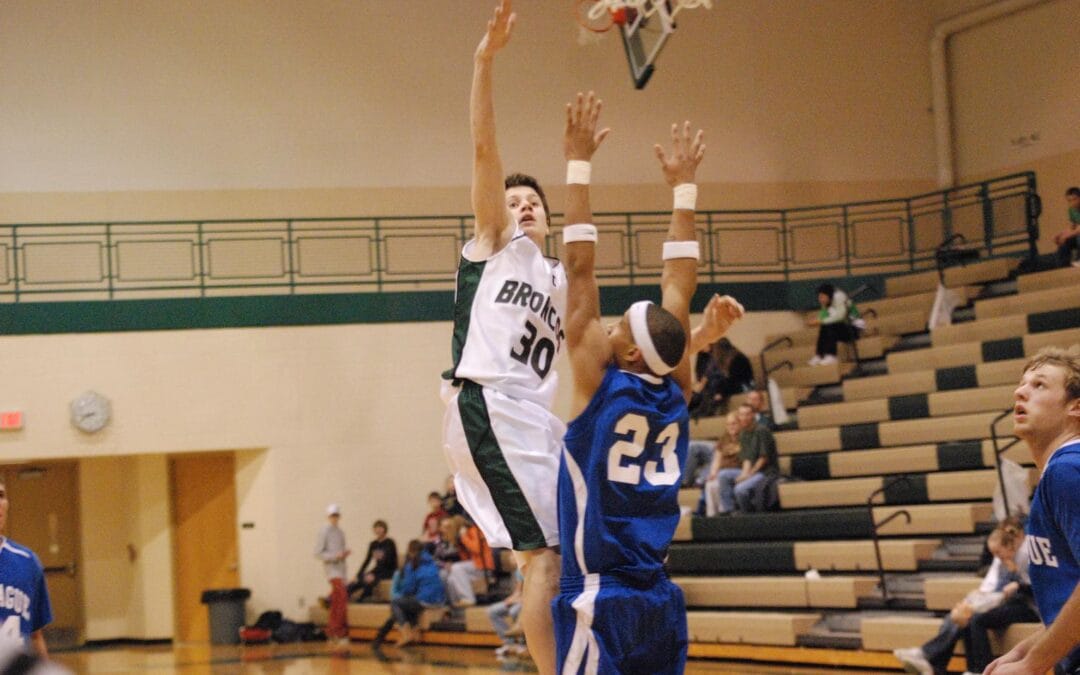
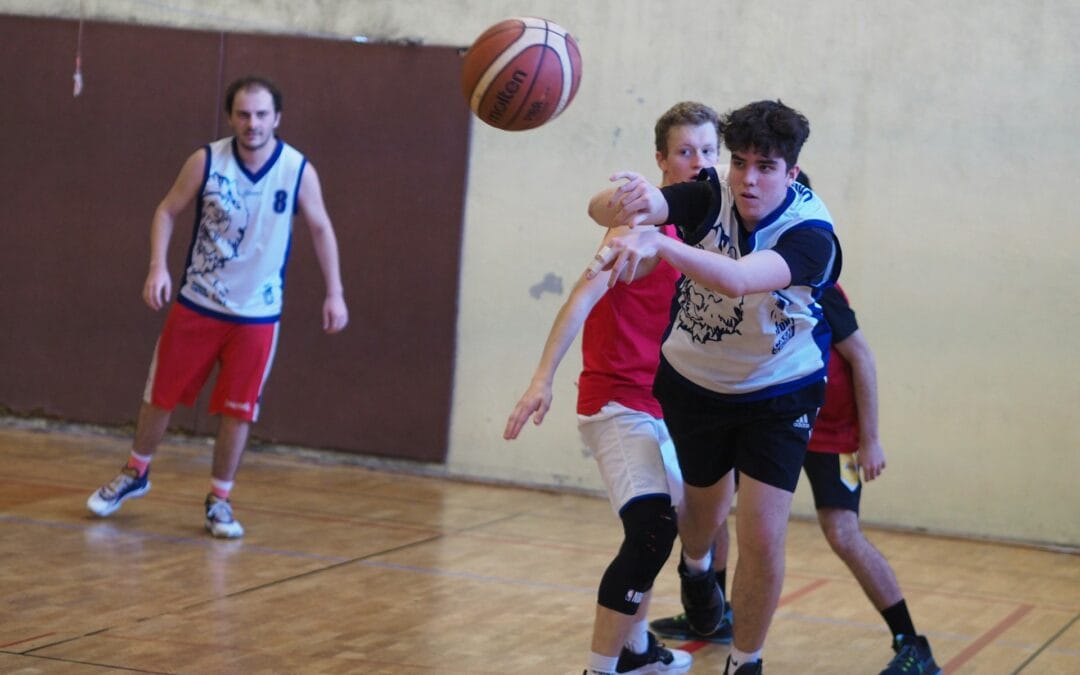
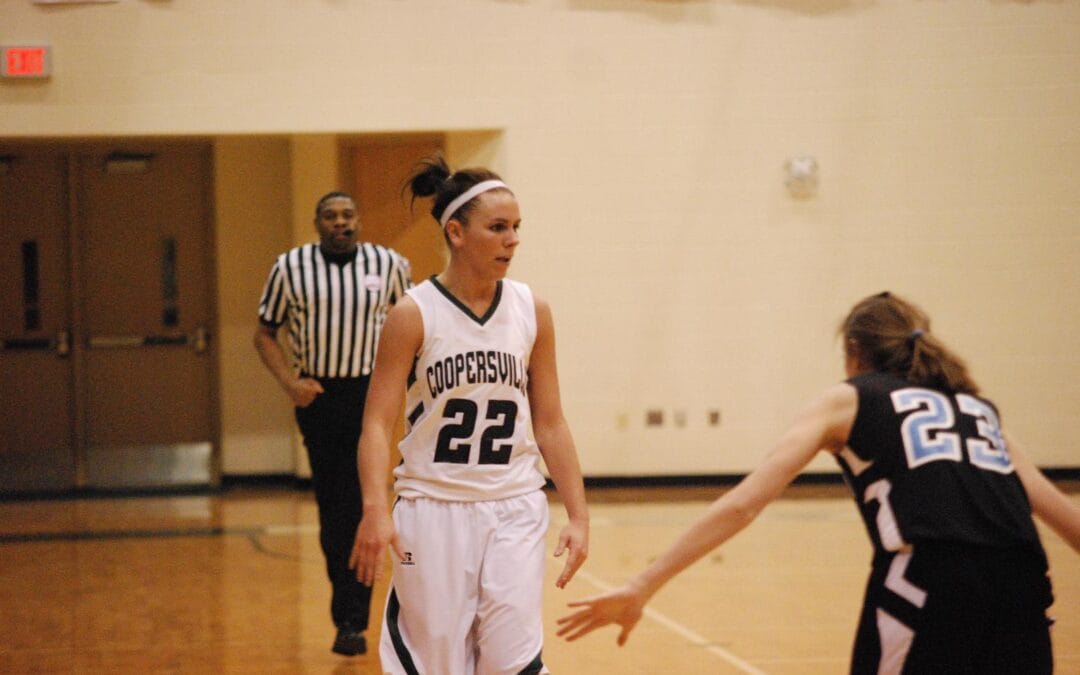
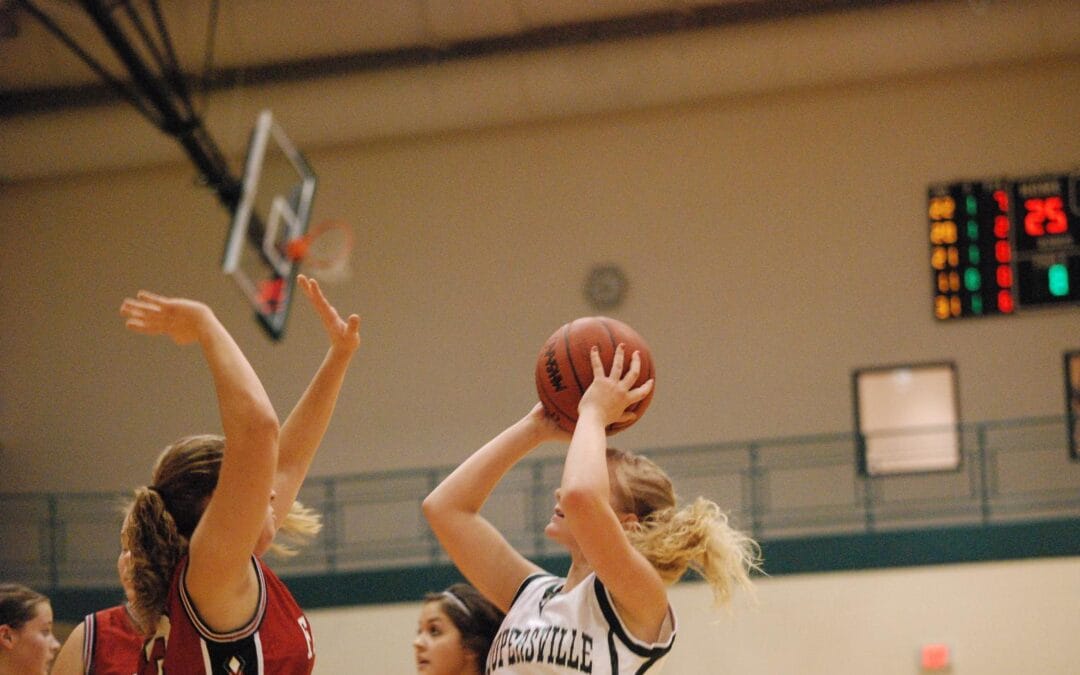
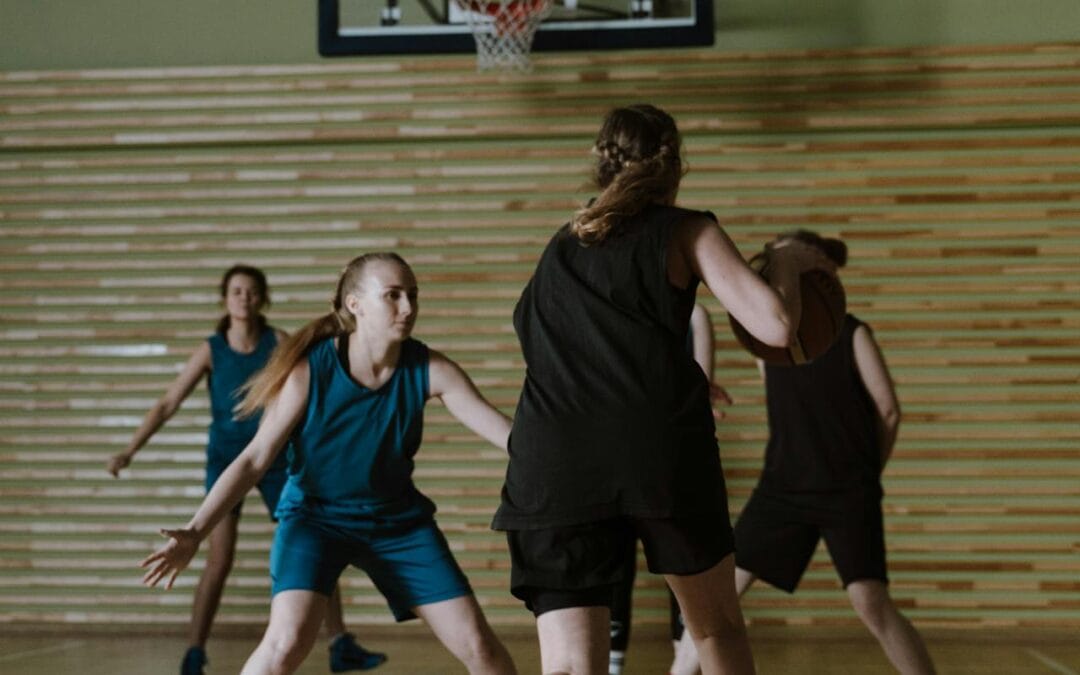


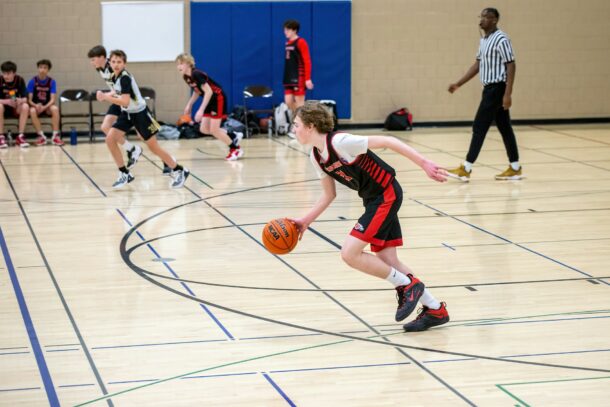